How to Configure BlueStacks Controls to Play Ensemble Stars Music on PC or Mac

The idol industry is full of melodious music, flashy lights, and stylish live performances and you can experience that on your device when you play Ensemble Stars Music. This rhythm game is in the same realm as Hatsune Miku: Colorful Stage! in that you tap, hold, or slide buttons as the beats of the song play, while showcasing beautiful 3D graphics. When playing on a touch screen, the game mechanics are straightforward; however, this doesn’t really translate well when you’re playing on a keyboard.
Fortunately, you can still enjoy Ensemble Stars Music with your keyboard by doing a couple of configurations with the BlueStacks controls editor. Once properly configured to your liking, playing Ensemble Stars Music or generally any other mobile rhythm game becomes an extremely unique and fun experience that is akin to playing an actual keyboard instrument or a launchpad.
Table of Contents
How to Create a 64-bit Instance
To start off, we need to install Ensemble Stars Music with a 64-bit Android instance. This is because the game runs better on a 64-bit instance but also because the game tends to not work properly on 32-bit instances. Fortunately, creating a new instance is easy.
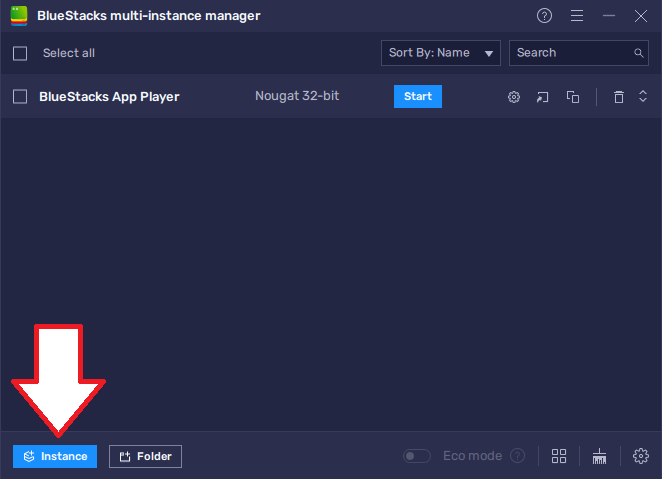
- Open the BlueStacks Multi-instance Manager. This program is already included when you download BlueStacks on your PC or Mac.
- Click on the blue Instance button.
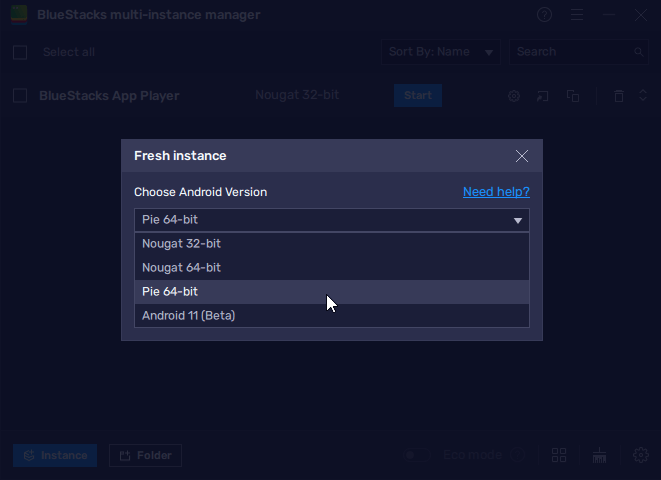
- Click on Fresh Instance.
- Under “Choose Android Version”, select Pie 64-bit. You may also select Nougat 64-bit or Android 11 (Beta) but note that the latter is still in beta stage so it might be unstable compared to the other 64-bit options.
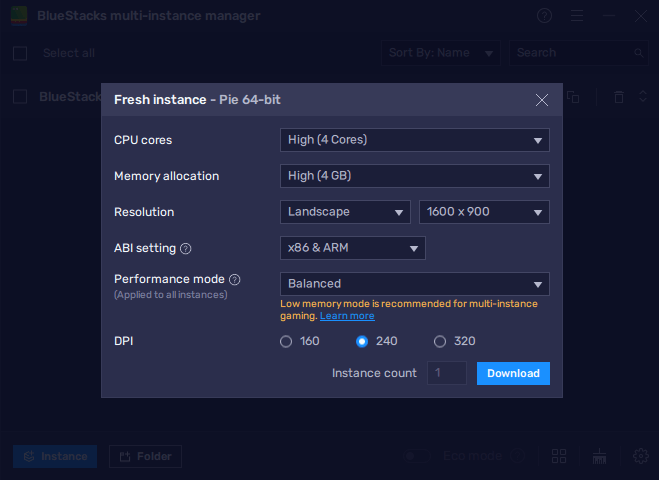
- When editing the hardware specifications, you may leave all options to the default values but do change the “Performance mode” to Balanced. If your PC or Mac has weaker or dated hardware, you may reduce the “CPU cores” and “Memory allocation” to a medium or low setting. You may also reduce the “Resolution”. If you have stronger hardware, you may opt to upgrade to a higher resolution.
- Click on the blue Create button to create the instance.
- You should see the new instance appear in the instance menu. Click on the blue Start button to open the instance.
- Once you arrive at the home menu, you can now install Ensemble Stars Music. You can follow this guide to learn how to install the game.
Creating and Editing Control Schemes
Once you’ve installed the game, created an account, and made it to the main menu. We can now start creating control schemes. Fortunately for us, BlueStacks already provides default controls however these are not actually enough and also they may not suit your preferences.
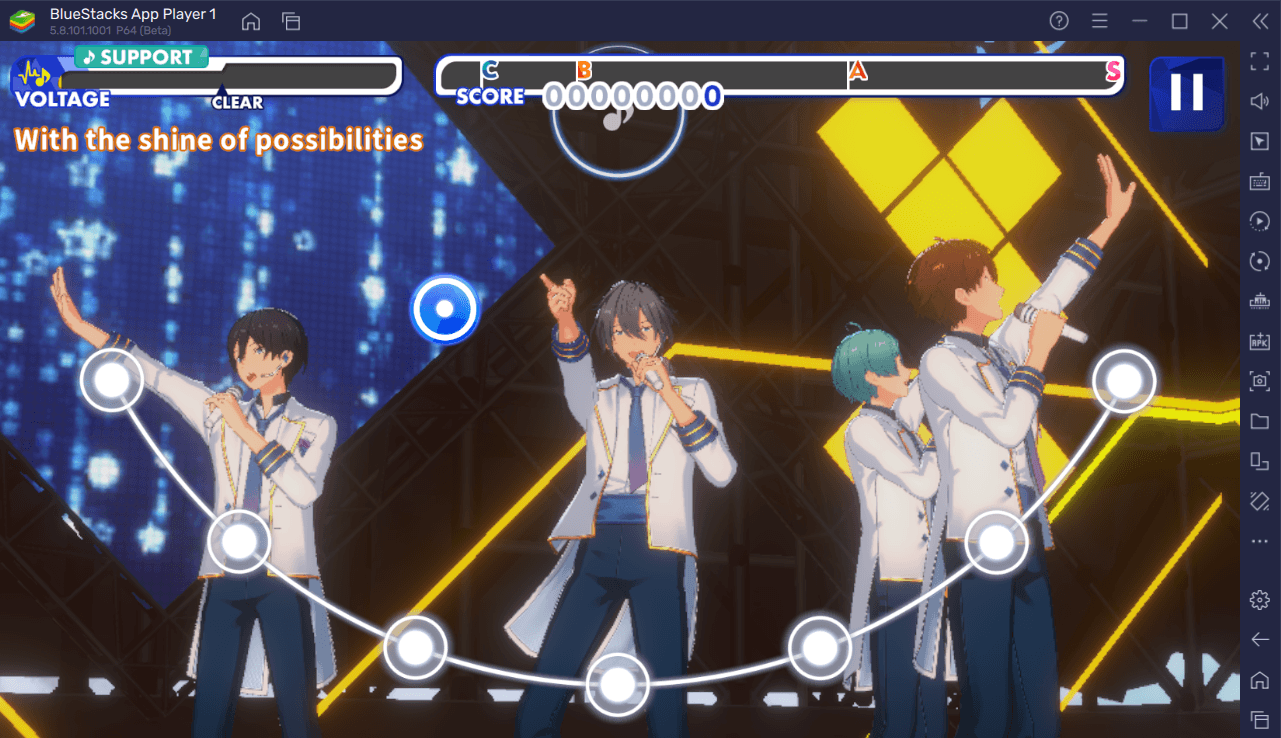
Before we continue, we have to understand first the basic controls of Ensemble Stars Music. The gameplay simply consists of a line of nodes and buttons falling onto these nodes as the idols sing and dance. You must activate these buttons the moment they land on the nodes, and you are scored depending on how perfect your timing is. With that, there are several ways by which you activate buttons,
- Tap – simply tap the button on the correct node when the beat plays.
- Double Tap – tap two buttons that land on separate nodes at the same time.
- Hold – when it reaches the node, hold the button until it reaches the end. You usually hold this on a straight line but sometimes you may veer to either left or right.
- Swipe – swipe the button either left or right depending on the indicated arrow once it reaches the node.
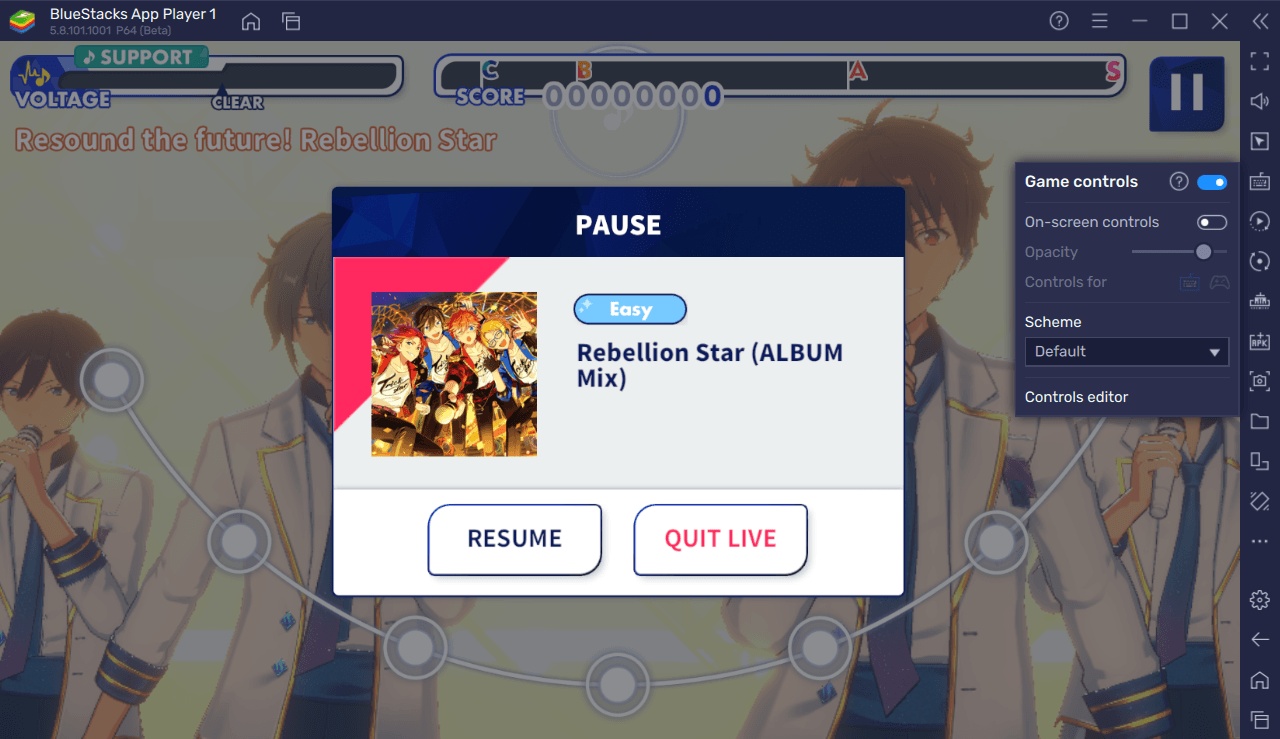
BlueStacks’ default controls only account for tapping, double-tapping, and holding. Additionally, it does not also account for higher difficulties which have more nodes than the assigned controls provided by default. To fix this, we can create new controls and create new control schemes for different difficulties.
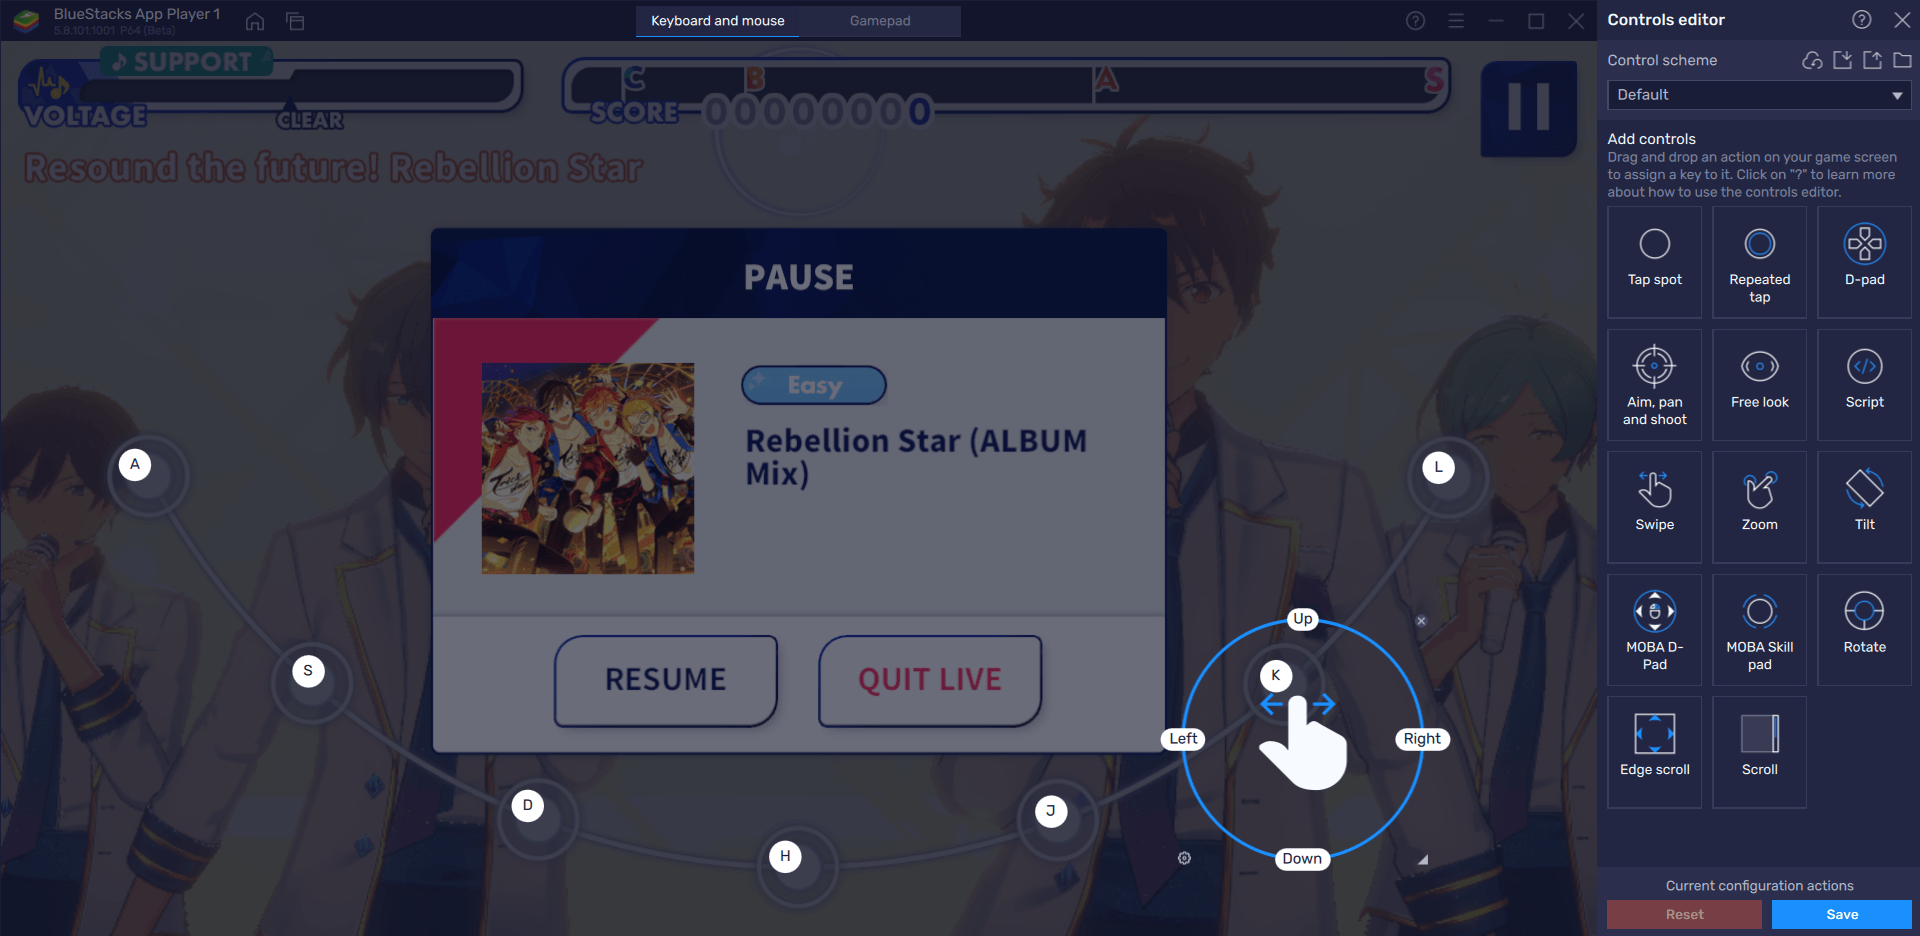
- Search and click ‘Game Controls’ on the menu bar.
- Click on ‘Controls Editor’.
- Let’s create new controls for swiping actions first. Drag and drop the ‘Swipe’ box onto the screen and place it on a node. Afterwards, click on Left and press on the key that you want to assign. Do the same when you click on Right.
- Repeat Step 3 for all other nodes.
- When done, click on Save.
- To create a new control profile, go to Control Scheme tab and click on the currently selected control profile, which is named ‘Default’
- Hover over to the right of the Default profile and click on the Copy icon (two rectangles) to duplicate the default profile.
- A duplicate called ‘Default(1)’ should now be created. This will now serve as a new control profile for higher difficulties.
- Start a live performance and set it on hard difficulty. Once you start seeing the nodes, click on Game Controls again and go to the Controls Editor.
- Now that you have the hard-difficulty nodes on the screen as reference, start adding new controls by dragging and dropping both “Tap Spot” and “Swipe” boxes on the appropriate nodes.
- Assign the keys you want as you drop them.
- When you are done, click on Save.
- Repeat this process for the harder difficulties (if you wish to play them).
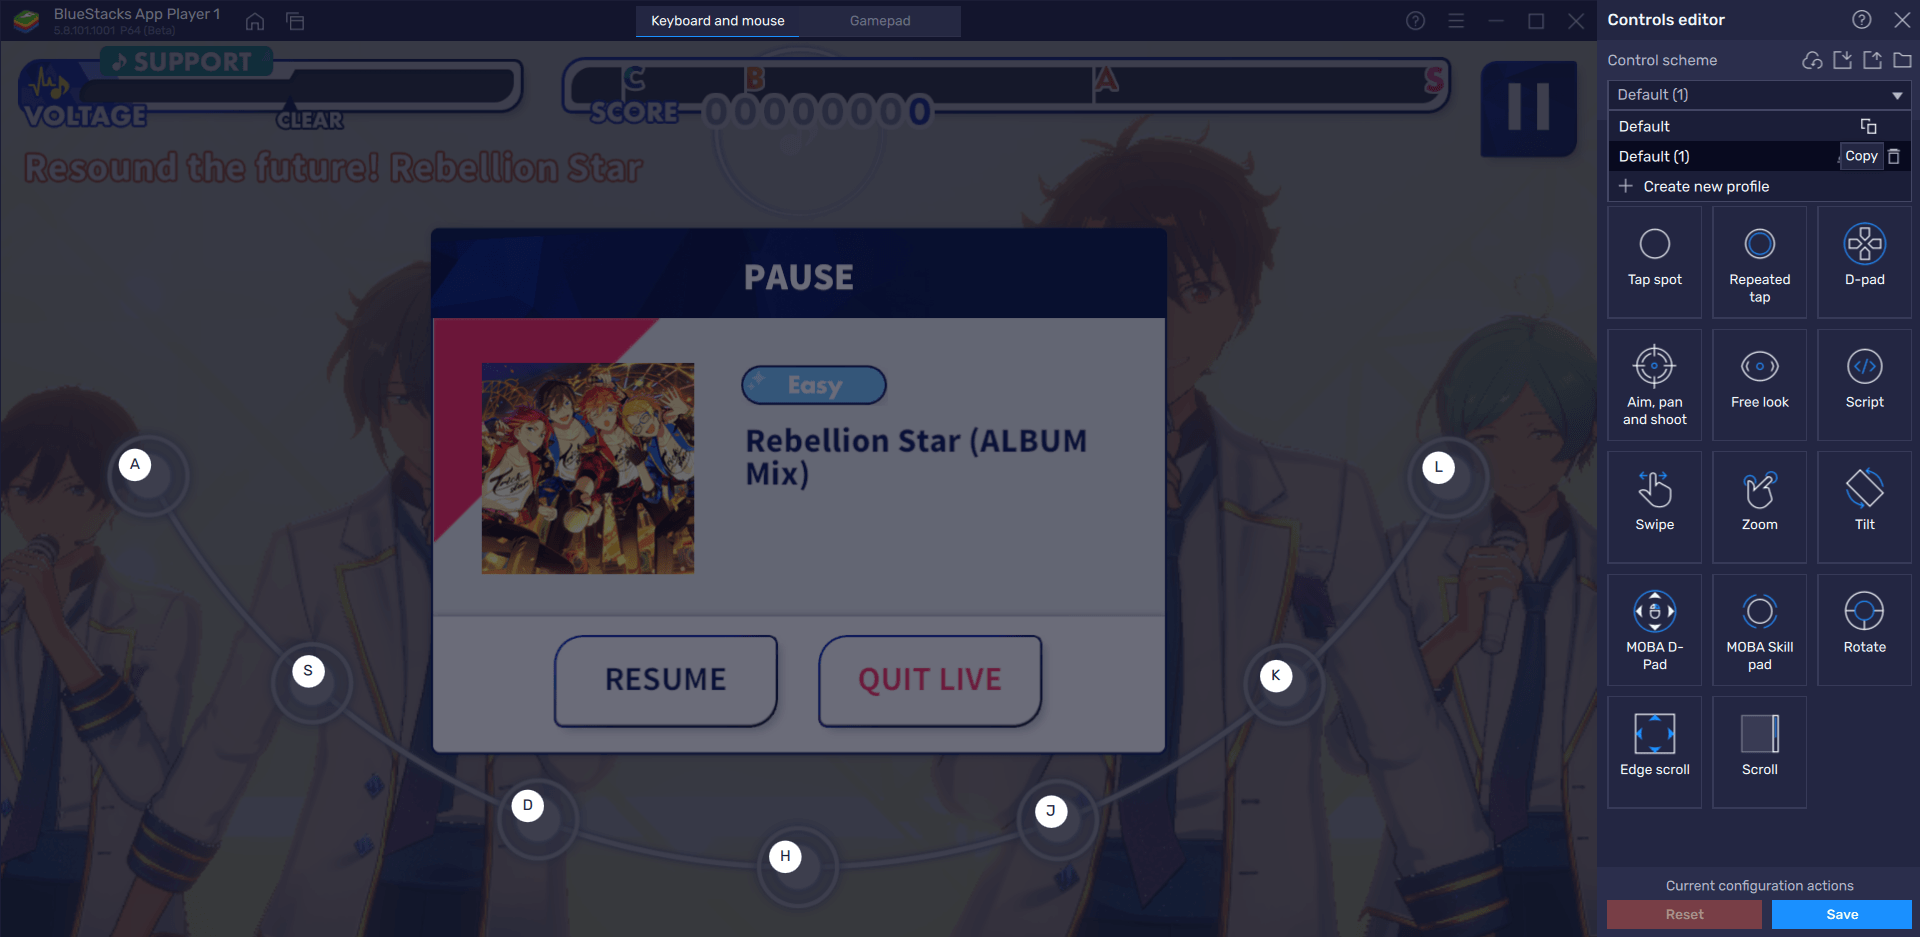
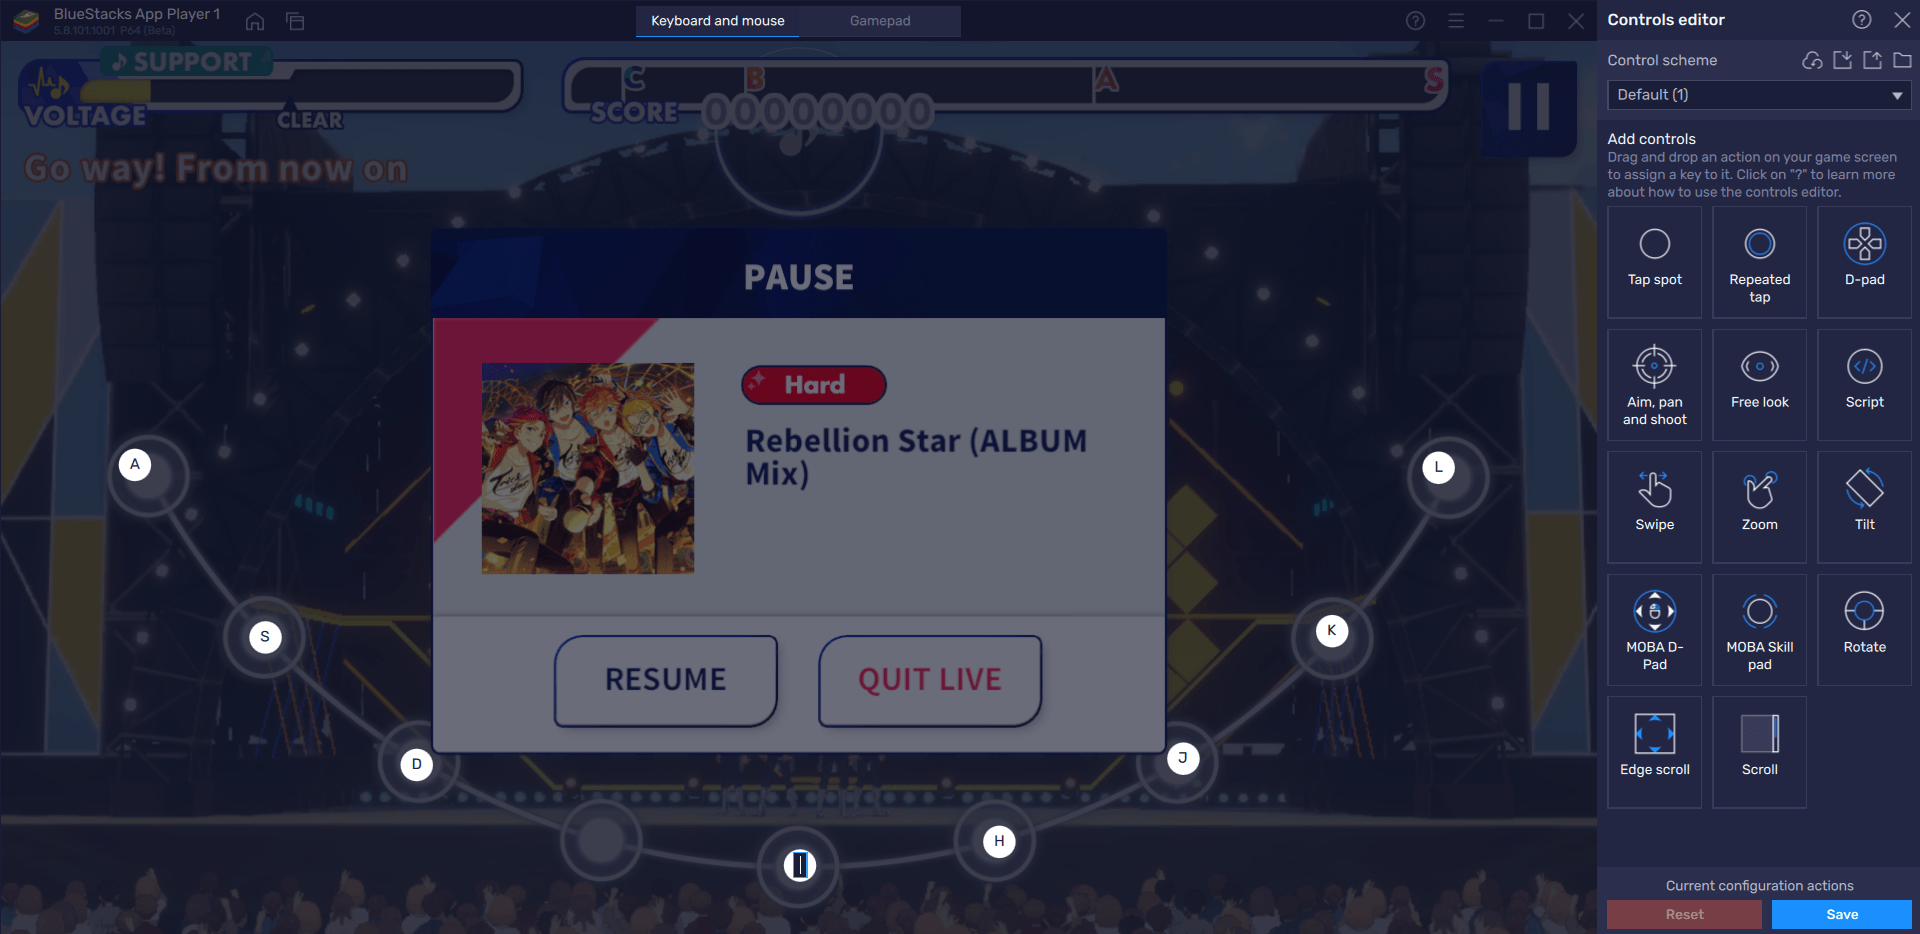
The controls editor of BlueStacks is a powerful feature and provides you plenty of ways to customize how you play Ensemble Stars Music. You can even edit the default controls if it does not suit you. At the end of the day, keep playing around with the controls editor and see what scheme works best for you. Once you find your ideal control scheme, playing Ensemble Stars Music can be a unique experience that you cannot replicate on a touch screen.


