How to Overcome Prey Day: Survive the Zombie Apocalypse with BlueStacks?

If you are stocking up for the zombie apocalypse that will happen one day and is already planning which shop to loot first, we have good news: That glorious day has already arrived and zombies have invaded the streets of the city. You have dodged the first attack because you planned ahead and took shelter in a hospital: You have to continue to survive now. You will collect supplies, eliminate zombies, fight mutated creatures, and work with other survivors to rebuild civilization. Prey Day: Survive the Zombie Apocalypse lets you do all of these and more. As always, BlueStacks will be your most important supporter and will allow you to survive the zombie apocalypse safely. Below we explain how you can do this.
How to Download & Install Prey Day: Survive the Zombie Apocalypse to Your PC
Every survivor knows that the best tool to survive the zombie apocalypse is your computer: The zombies have already eaten everyone who uses a mobile phone. Thanks to BlueStacks, you can do this easily, as we enable you to play thousands of Android games, including Prey Day: Survive the Zombie Apocalypse, on your computer without any problems. Moreover, you don’t have to be an “expert” to do this: In just a few simple steps, you can run Prey Day: Survive the Zombie Apocalypse on your PC.
- First, download the latest version of BlueStacks from our website (or update your version to take advantage of the latest features)
- Start BlueStacks, log in with your Google account, type the name of the game in the search box in the upper right corner of the Game Center screen, and press Enter.
- Select the game from the search results and click the install button.


At the time of this article, Prey Day: Survive the Zombie Apocalypse had a setup file of less than 500MB, so you won’t have to wait too long. BlueStacks will automatically download and install the game on your computer and display a notification when it’s ready to play. You can now start fighting against zombies by clicking the icon on the main screen of the game: Moreover, you do not need to bother with any settings.
Setting Up Controls for Prey Day: Survive the Zombie Apocalypse
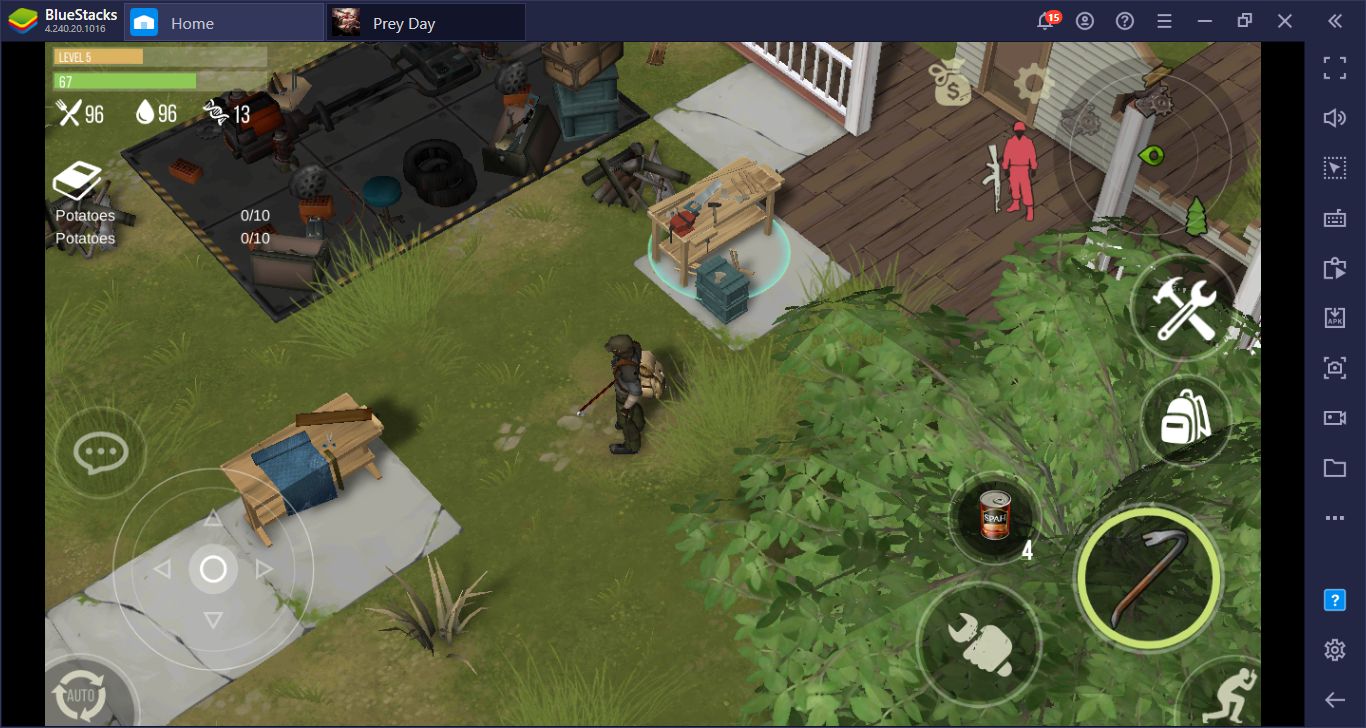
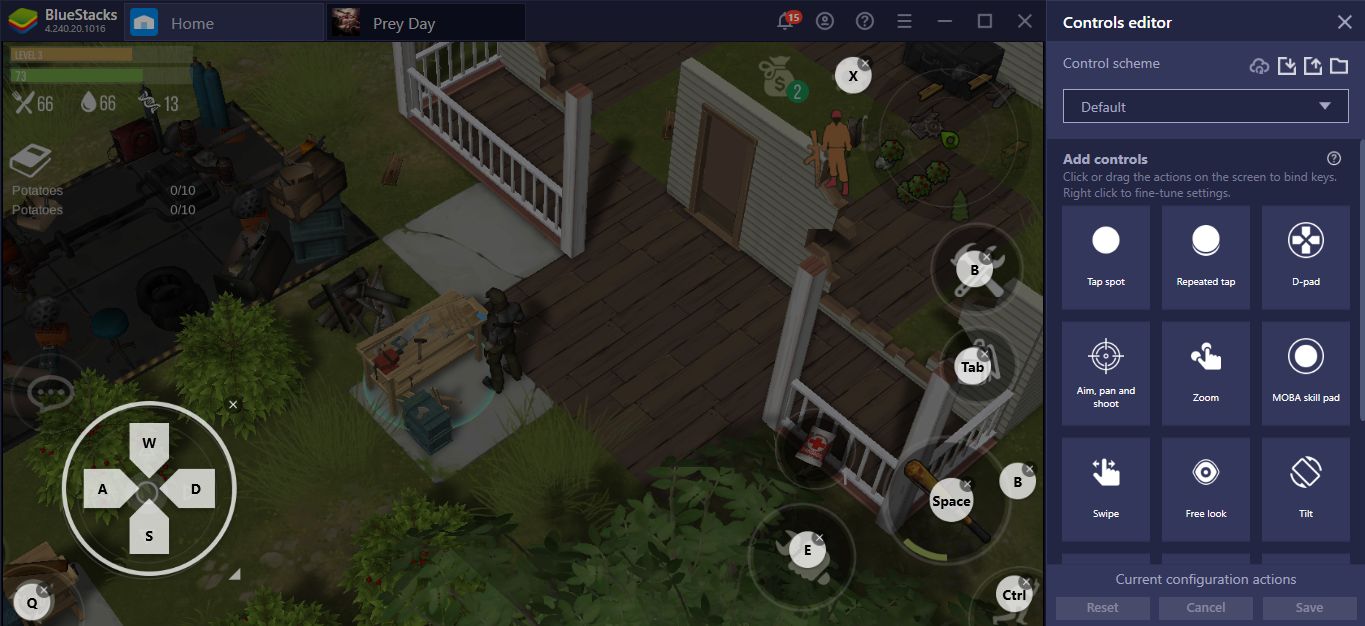
BlueStacks offers a default control scheme for this game and by using it, you can get an enjoyable experience. You use the WASD keys to move your character and your mouse to interact or attack things on the game field. You can open your inventory by pressing the Tab key and you can gather everything around you by pressing the E key.
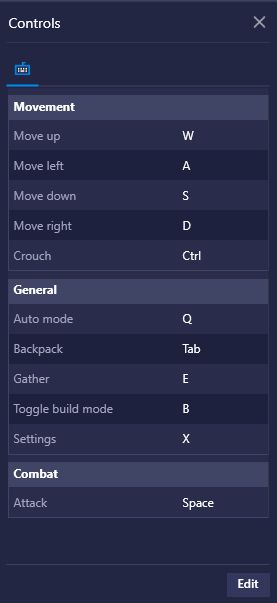
You can see the default controls for Prey Day: Survive the Zombie Apocalypse on this screen. By clicking the “edit” button, you can change the default keys too.
However, if for some reason you want to change the default keys, it is very easy to do it: Click the tiny keyboard icon in the right bar to open the “Controls” screen you see above and change any key you want by clicking the “edit” button. This is not the only option: You can also get a visual control scheme by opening the “Control Editor” from the same screen. On the right, you will see a list of available buttons: You can assign a shortcut for each by dragging any of them and dropping over the buttons on the game area. Whichever option you choose; you can change the default controls as you wish.
Using Macro Recorder to Save Your Life
We said above that BlueStacks will make it easier for you to survive the zombie apocalypse: The Macro Recorder is among our features that you can use for this purpose. With the Macro Recorder, it is possible to record all clicks in a specific action sequence and repeat them automatically. In other words, with a single keypress, you can repeat a chain of actions that would normally require you to press a large number of keys. So, how can this help you against the zombies?
The downside of fighting zombies is that they hit you too: You have to constantly replenish your health, which requires opening your inventory and/or making multiple clicks each time. The problem is that when you’re surrounded by zombies, this is not an easy task to do: If you don’t press the necessary keys in the right order and quickly, you become the zombie lunch.
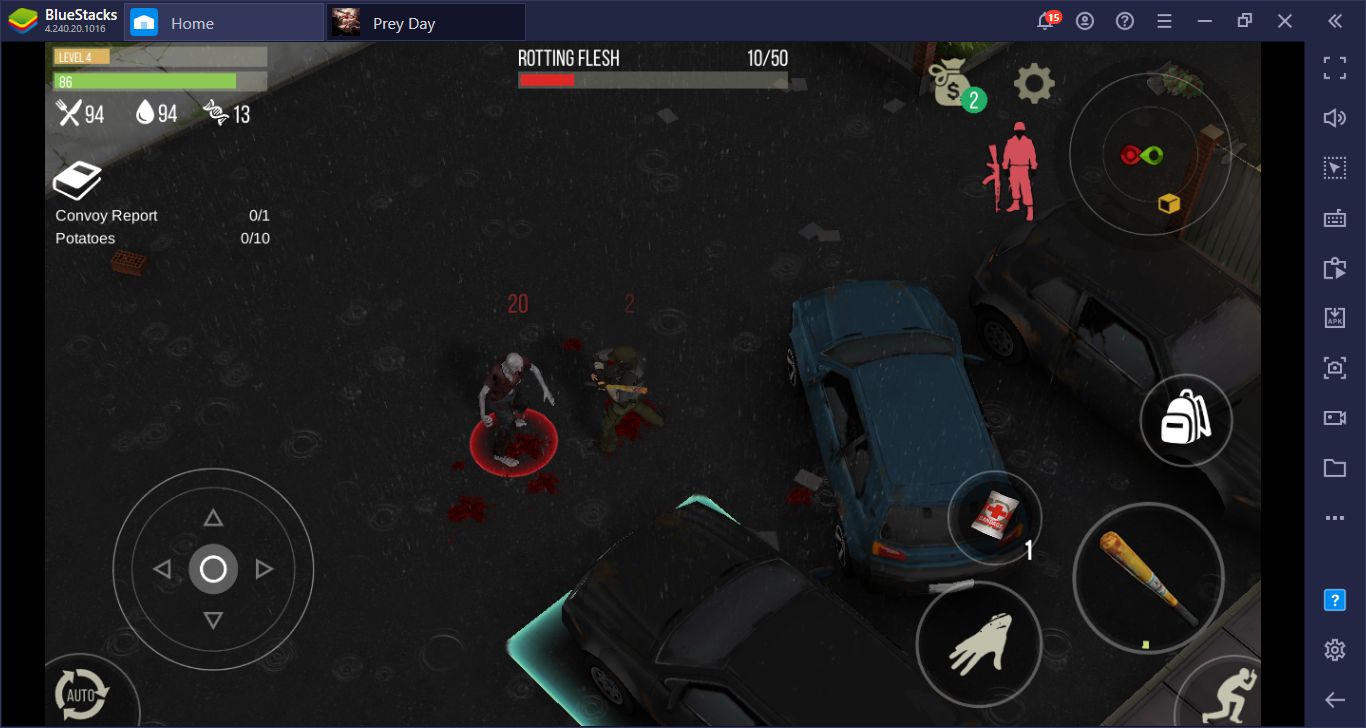
Dear zombie number 1, can you please stop for a second so I can use my medkit? Ok, thanks.
Using the Macro Recorder eliminates the need to press the necessary keys perfectly each time. Let’s explain it simply: Start a recording, start attacking zombies, use a medkit when your health is low, and keep hitting the zombies. End recording and assign a key. When you press that key in the future, you will automatically repeat every action involved in the recording. In other words, you won’t have to press different keys in a panic to use a medkit.
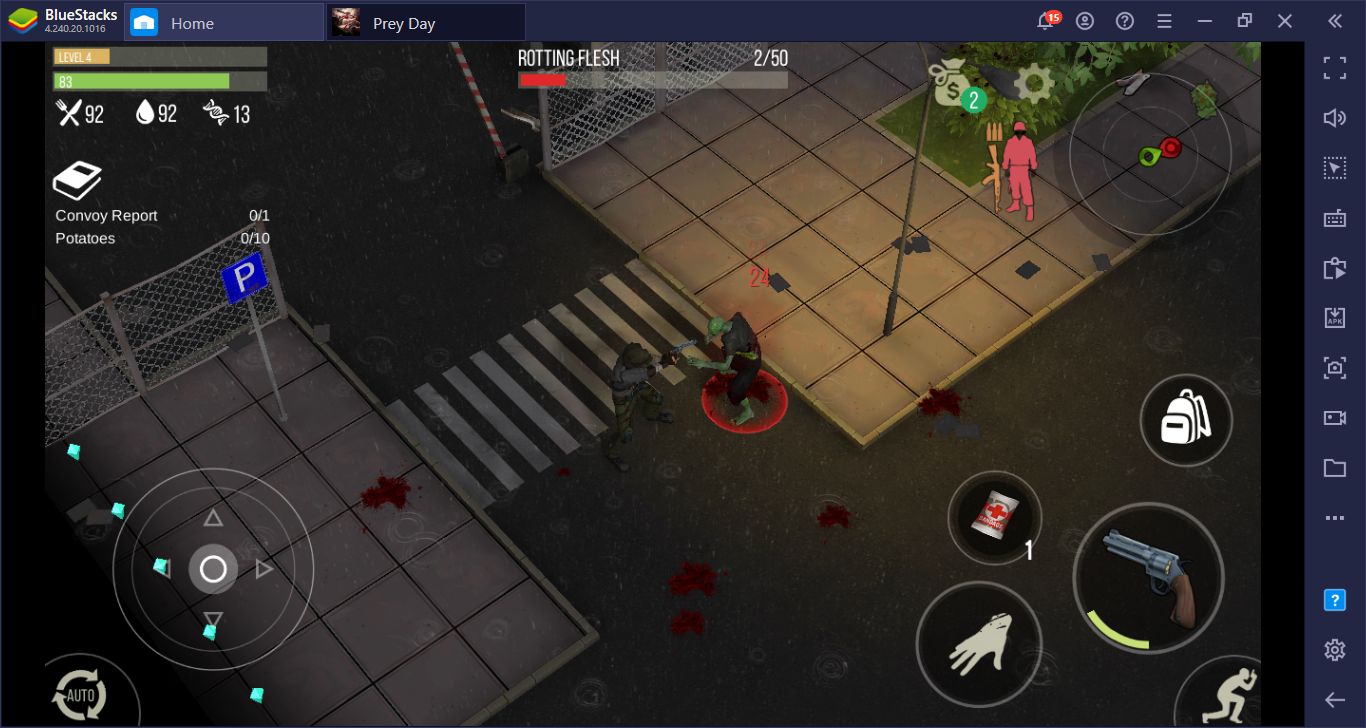
Hello zombie friend. This is the perfect moment to start our recording.
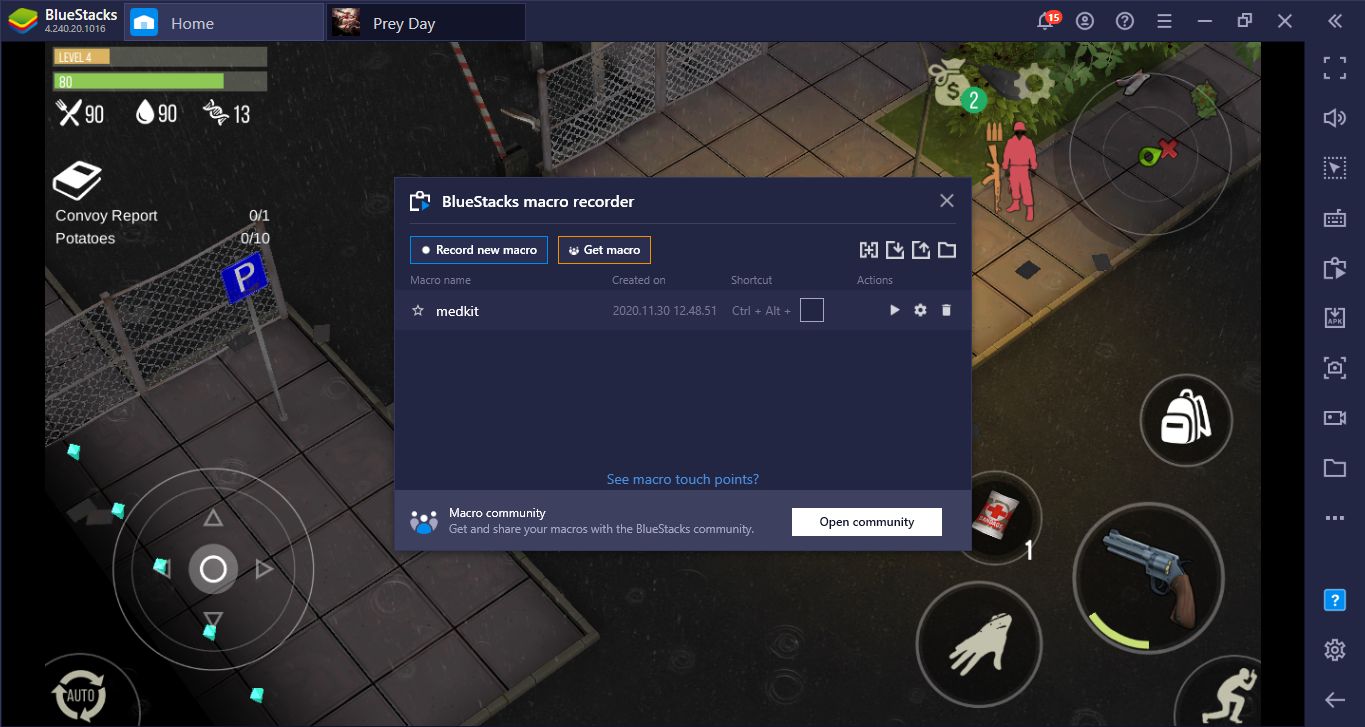
And here is the end result: When we click this button in the future, our zombie-fighting hero will use his medkit automatically.
With a little creativity, you can find many scenarios where the Macro Recorder will benefit you: Don’t forget to share your creative ideas with us. You are not alone in your fight against zombies: BlueStacks is ready to assist you with its original features and user community of tens of thousands of players. Don’t forget to check out other Prey Day: Survive the Zombie Apocalypse guides we’ve prepared to increase your chances of survival. Now, if you let us, we need to go and prepare our survival bag: The zombie apocalypse will eventually begin and we want to be ready when that day comes!