Enhance Your Project RUN Experience on PC with our BlueStacks Features

For fans of Project RUN, a game that uniquely blends strategy, survival, and high-octane runner mechanics, BlueStacks becomes not just a platform but a powerful ally. In the world of mobile gaming, where strategy and reflexes often determine the thin line between triumph and defeat, having the right tools at your disposal can significantly enhance your gameplay experience. This is where BlueStacks steps in, offering a plethora of features designed to give players an edge in their gaming endeavors. Playing Project RUN on PC with BlueStacks opens up access to features that can transform your approach to navigating the post-apocalyptic world in this game.
In this sense, why should you, as a player, care about leveraging BlueStacks for Project RUN? The answer lies in the undeniable advantages that BlueStacks brings to the table. With features such as customizable controls, multi-instance functionality, and improved graphics settings, BlueStacks enhances gameplay, making it smoother, more responsive, and visually more appealing. These enhancements not only make the game more enjoyable but also allow players to engage with the game’s unique aspects more deeply.
In this guide we will be looking at some of the most important tools and features that BlueStacks offers when it comes to enhancing your gameplay experience in Project RUN.
Enhance Base Building and Dungeon Running with Keyboard Shortcuts
Navigating the intricate world of Project RUN on BlueStacks becomes a more intuitive and efficient experience with the aid of the Keymapping Tool, a feature designed to revolutionize the way players interact with the game. This powerful tool allows for the customization of keyboard shortcuts, enabling a seamless transition between building your base and diving into the frenetic runner dungeons. By setting up keyboard shortcuts for base building, players can manage their refuge and resources with pinpoint accuracy, streamlining the gameplay to focus more on strategy rather than cumbersome clicks. In the runner dungeons, where quick reflexes are key to survival, improved controls through keymapping offer a significant advantage, allowing for more precise movements and actions.
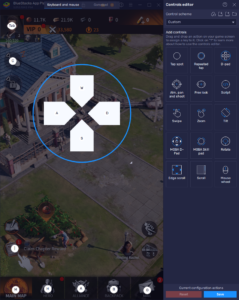
To harness the full potential of the Keymapping Tool in Project RUN, you can simply press Ctrl + Shift + A while in-game to open the Advanced Editor. This action unleashes a world of customization, presenting players with the current bindings and offering the flexibility to modify them to suit individual play styles. Whether it’s adjusting an existing binding by clicking on it and selecting a new key or adding entirely new functions by dragging them from the functions panel, the process is designed to be user-friendly. Even deleting unwanted bindings is made simple with a click on the designated X icon that appears when you hover over the bindings. After customizing the control scheme to your liking, clicking “Save” ensures your settings are updated, transforming how you play Project RUN on BlueStacks.
This level of control customization not only enhances gameplay but also aligns with BlueStacks’ commitment to providing a superior gaming experience on any system.
Enjoy the Best Visuals and Frame Rate on Any System
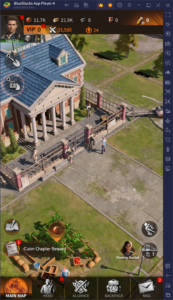
BlueStacks ensures that the game’s beautifully hand-drawn environments and fluid character animations shine through, delivering an immersive gaming experience. BlueStacks’ ability to fine-tune graphics settings allows players to enjoy the best possible visuals without compromising on performance—regardless of the hardware capabilities of their system. This is particularly beneficial during the high-speed vertical running sections, where the smooth rendering of oncoming obstacles and enemies is crucial for gameplay. Similarly, the detailed and vibrant visuals in the base building aspect of Project RUN are rendered beautifully on BlueStacks, making the strategic planning and resource management elements of the game a visually pleasing experience.
To optimize your graphics and performance, please follow these simple steps:
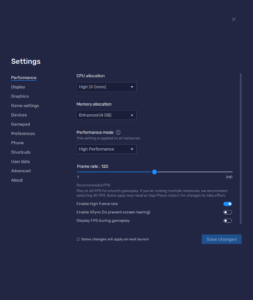
- In the BlueStacks settings, go to the “Performance” tab.
- Check that your emulator is using at least 4 GB of RAM, 4 CPU cores, and that the Performance mode is set to “High performance”.
- Set the FPS slider underneath to at least 60 FPS, and finish by clicking on “Save changes” on the bottom right.
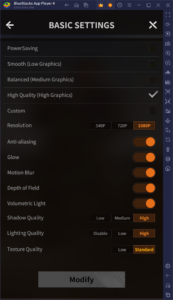
- Launch the game and head to the in-game settings.
- Set your graphical options to the highest settings.
By leveraging BlueStacks to play Project RUN, gamers are afforded the luxury of experiencing top-tier graphics and performance across all aspects of the game. This platform’s compatibility with a wide range of system specifications means that players can dive into the zombie apocalypse without the need for expensive hardware upgrades. Whether strategizing the next expansion of your base or navigating through the perilous ruins in runner mode, BlueStacks ensures that your focus remains on the gameplay, not on performance issues.
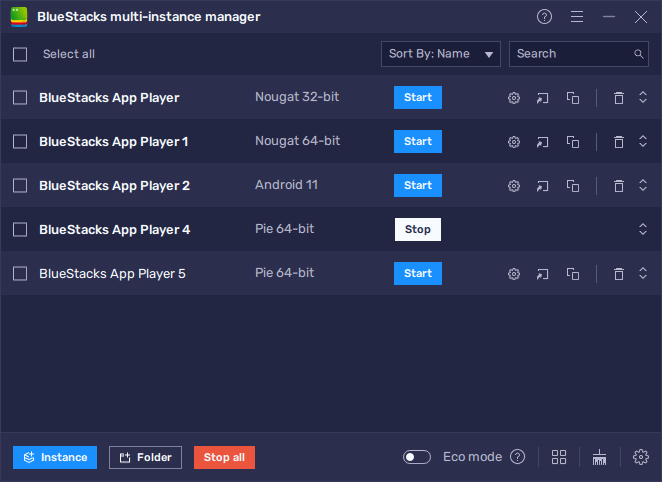
Create Powerful One-Person Alliances with the Instance Manager
The Instance Manager feature on BlueStacks elevates the gameplay of strategy conquest games like Project RUN, enabling players to manage multiple settlements simultaneously. This functionality broadens the strategic landscape, allowing for the creation and control of entire alliances within a single player’s grasp. By running several instances of Project RUN at once, players morph into a formidable force, overseeing various facets of the game’s world with ease. The capability to experiment with diverse strategies across multiple accounts amplifies the game’s depth, offering a more nuanced and expansive gameplay experience.
Activating the Instance Manager is straightforward: a simple press of Ctrl + Shift + 8 unveils a panel where players can manage their instances—launching, adjusting settings, or creating new ones to suit their strategic needs. Once you’ve created two or more instances, as your PC resources allow, following the game’s PC setup guide on each instance allows for seamless installation and gameplay across multiple accounts. This multitasking prowess provided by BlueStacks not only enriches the player’s engagement with Project RUN but also highlights the platform’s dedication to enhancing the mobile gaming experience through innovative features.
By leveraging BlueStacks’ innovative features such as the Keymapping Tool, optimized graphics and performance settings, and the Instance Manager, players can truly maximize their experience with Project RUN. These tools not only enhance the gameplay visually and functionally but also expand the strategic possibilities within the game. Whether you’re navigating through zombie-infested territories, managing your refuge, or coordinating an alliance of settlements, BlueStacks offers a suite of functionalities designed to elevate your gaming journey.