Lords Mobile: Using BlueStacks to Streamline Your Gaming Experience on PC


Lords Mobile is a free-to-play online strategy game that boasts a population of over 280 million players. The game takes place in a massive open-world that spans with everyone fighting to be the top dog on their server in classic MMO fashion. The game mechanics encourage you to team up with players from all over the world to form your own guilds and alliances. Resource management and Player Versus Player combat is also emphasized. Really though, when we say Player Versus Player, what we really mean is mounting defenses and launching attacks in guild wars that involve hundreds of players!
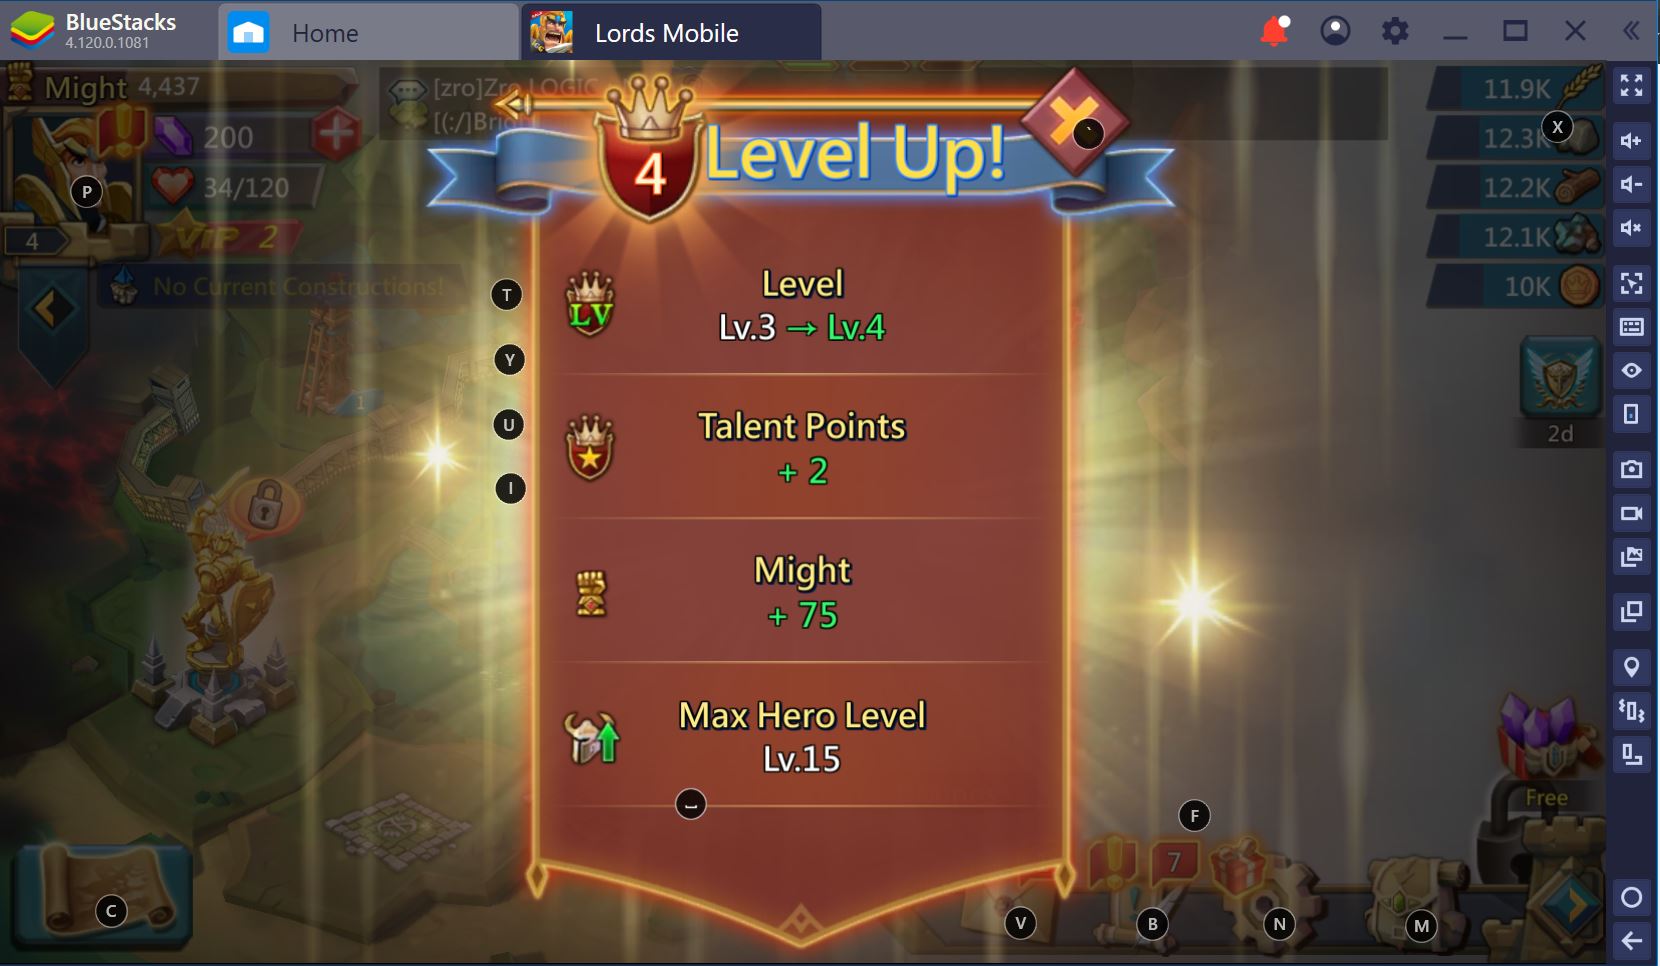
Understandably, you will want to advance through the game quickly to take part in the action. Due to the nature of the resource-gathering mechanics, research and development mechanics, and mobile games’ sometimes inconvenient UI design, game progression can take a long time. The good news is that BlueStacks is here to make your life easier and help you progress through the game much faster than you would on mobile.
In an earlier blog article, we covered some beginner tips and tricks to help you get started. This time, we’re going to go over some ways to streamline your gaming experience in Lords Mobile using the BlueStacks platform to help you rise to the top!
But first-things-first, we need to install Lords Mobile onto BlueStacks.
Installing Lords Mobile on BlueStacks
- Download and install BlueStacks on your PC.
- Complete Google Sign-in to access the Play Store, or do it later.

- Look for Lords Mobile in the search bar at the top right corner.
- Click to install Lords Mobile from the search results.
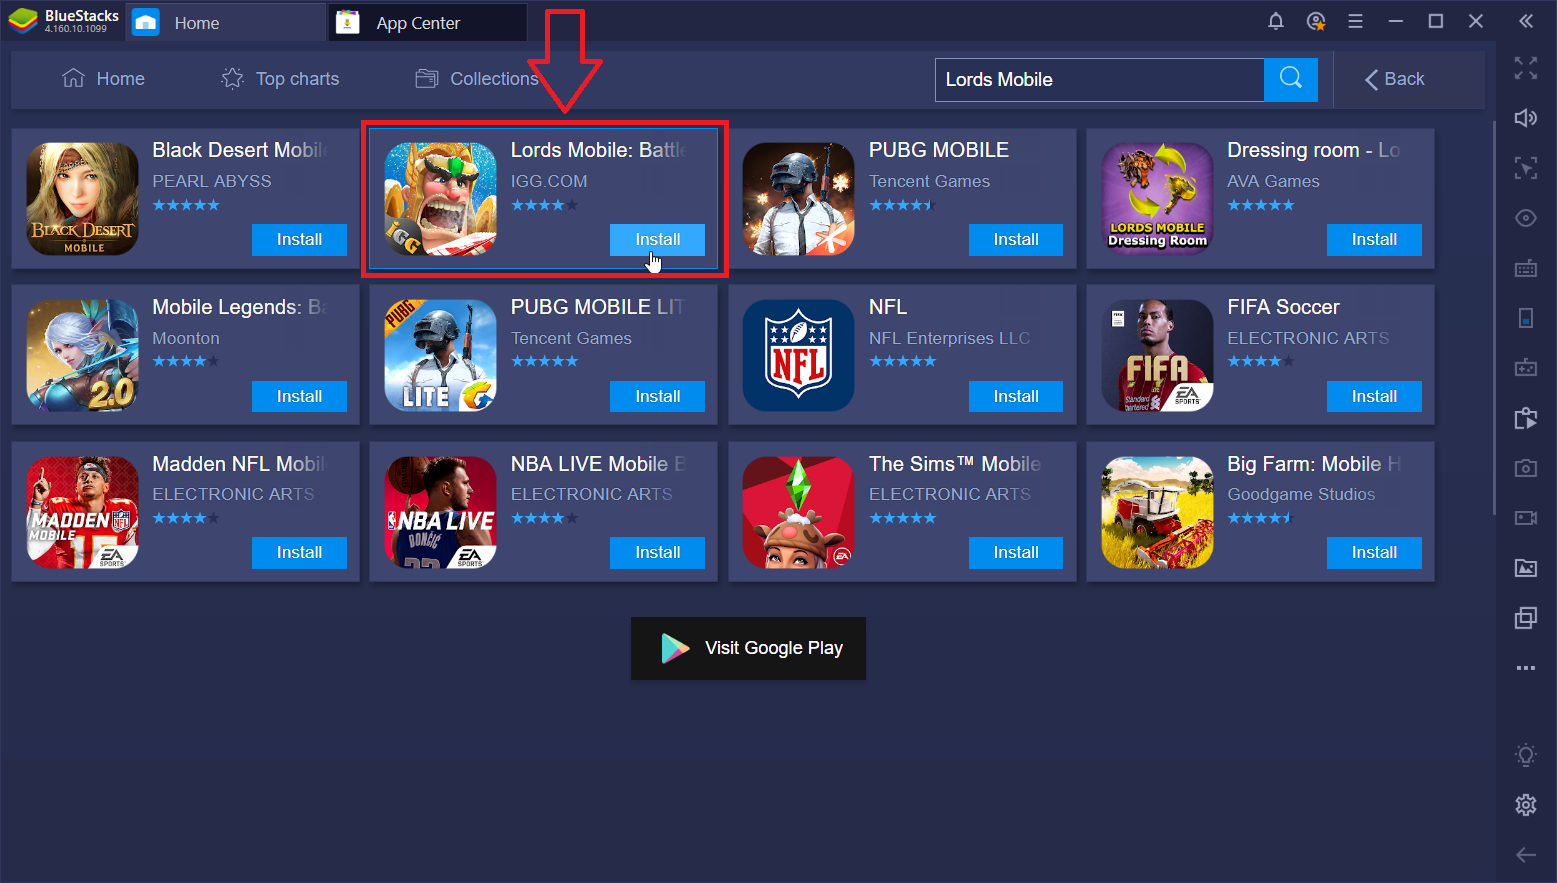
- Complete Google Sign-in(if you skipped step 2) to install Lords Mobile.
- Click the Lords Mobile icon on the home screen to start playing.
Now let’s get to the fun part!
Setting Up Keymapping
Mobile gaming allows an unprecedented amount of people from all over the world to get involved in an online gaming universe. While this allows some of your favorite genres to have a booming player population, the limitations touch screen controls and UI design can be unwieldy at times. This can prevent efficient menu navigation and game progression.
In the early game, the benefits of having a custom Key-Mapping Tool may not seem immediately obvious; You only have a couple of structures to manage and the enemy players have much bigger fish to fry. Though, as you progress into the end game – when you have guild members, countless resource production structures, and the threat of enemy guild to manage – efficient task management becomes of paramount importance. This can be the difference between being able to defend against an attack and getting wiped! With the help of the BlueStacks Key-Mapping Tool, the people who prefer a traditional mouse and keyboard playstyle are able to take advantage of opportunities to really optimize their menu navigation.
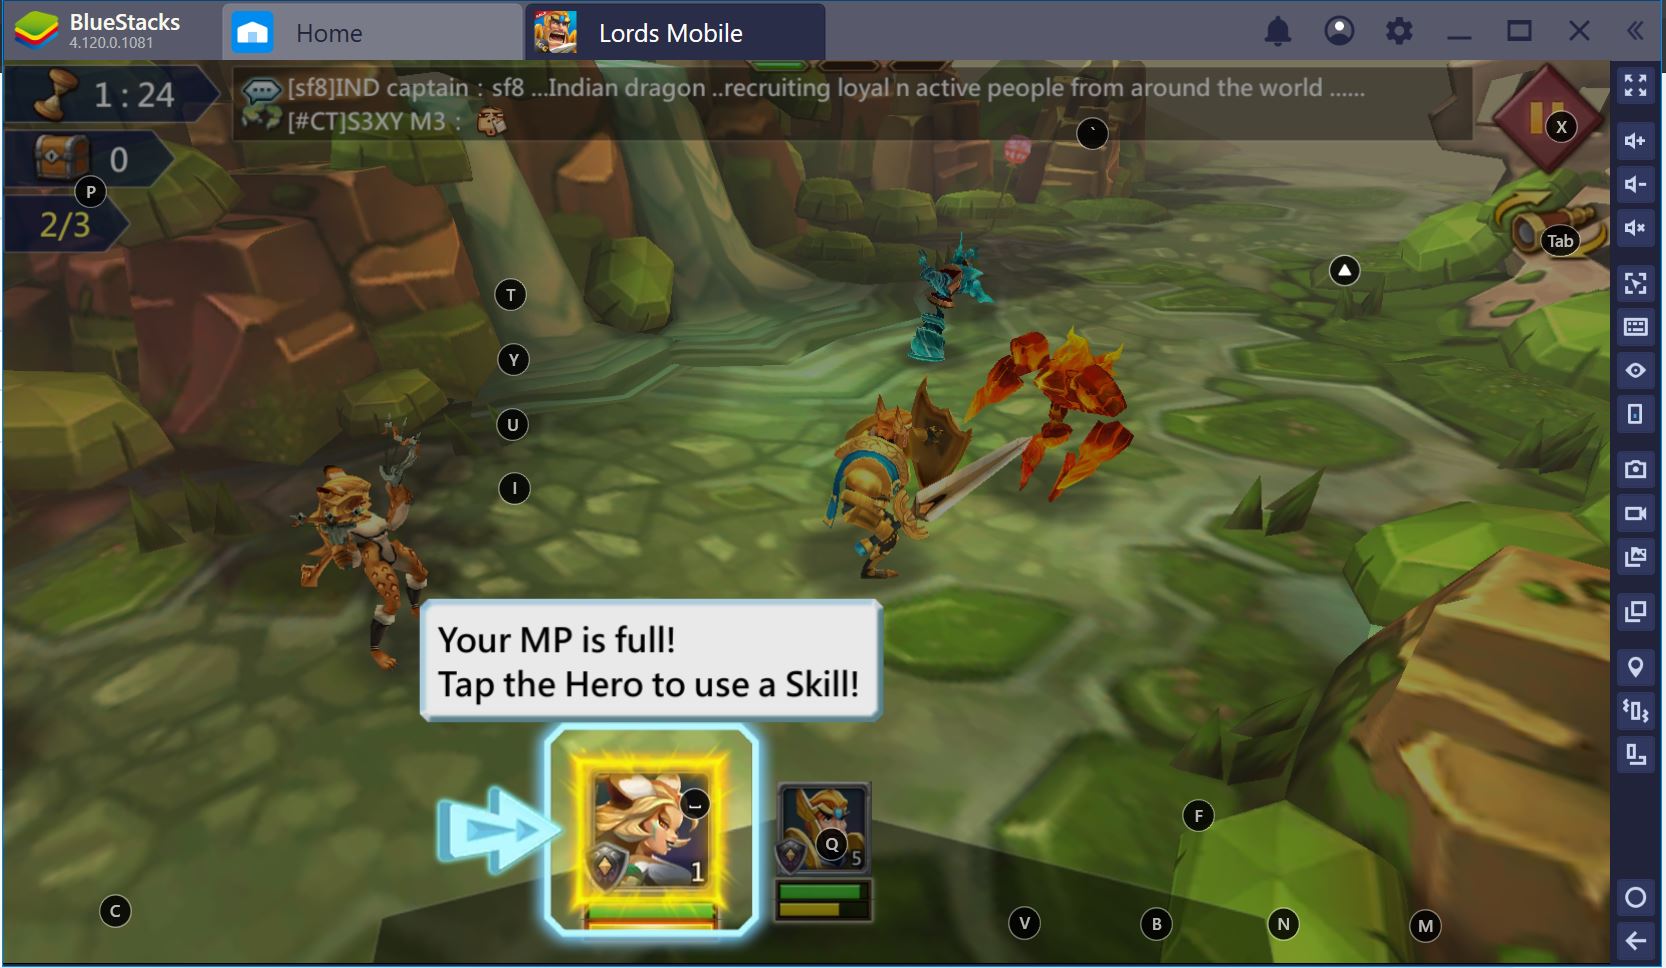
After some toying around, we believe we created the optimal and most versatile Key-Mapping layout for Lords Mobile! We spent a couple of hours playtesting and we found that the layout shown below allows for the most accessibility within the most commonly occurring menus.
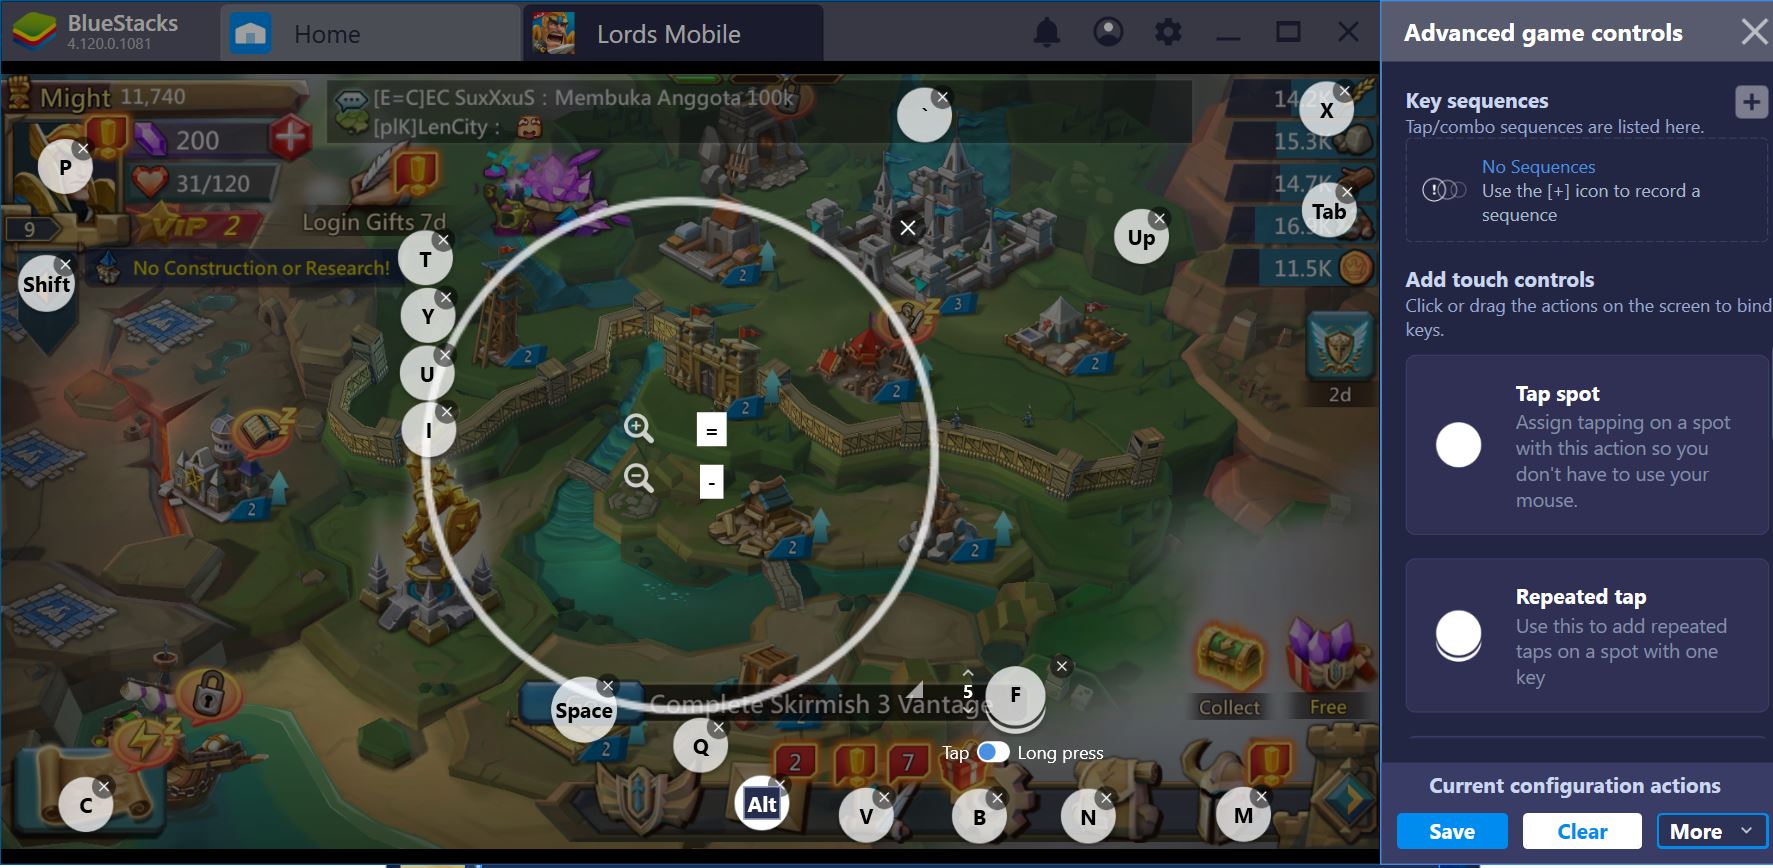
Of course, you can adjust the key bindings themselves to your meet your personal preferences. You can also add or remove a couple keys if you don’t like their placement.
Play Lords Mobile on BlueStacks
Additionally, the key layouts shown don’t have to be as intrusive on the game interface as they appear in the images. The opacity settings for the keymap overlay can be adjusted from the BlueStacks in-game menu located on the right sidebar. Just click the button that looks like an eyeball and adjust the visibility of the overlay to your heart’s content!
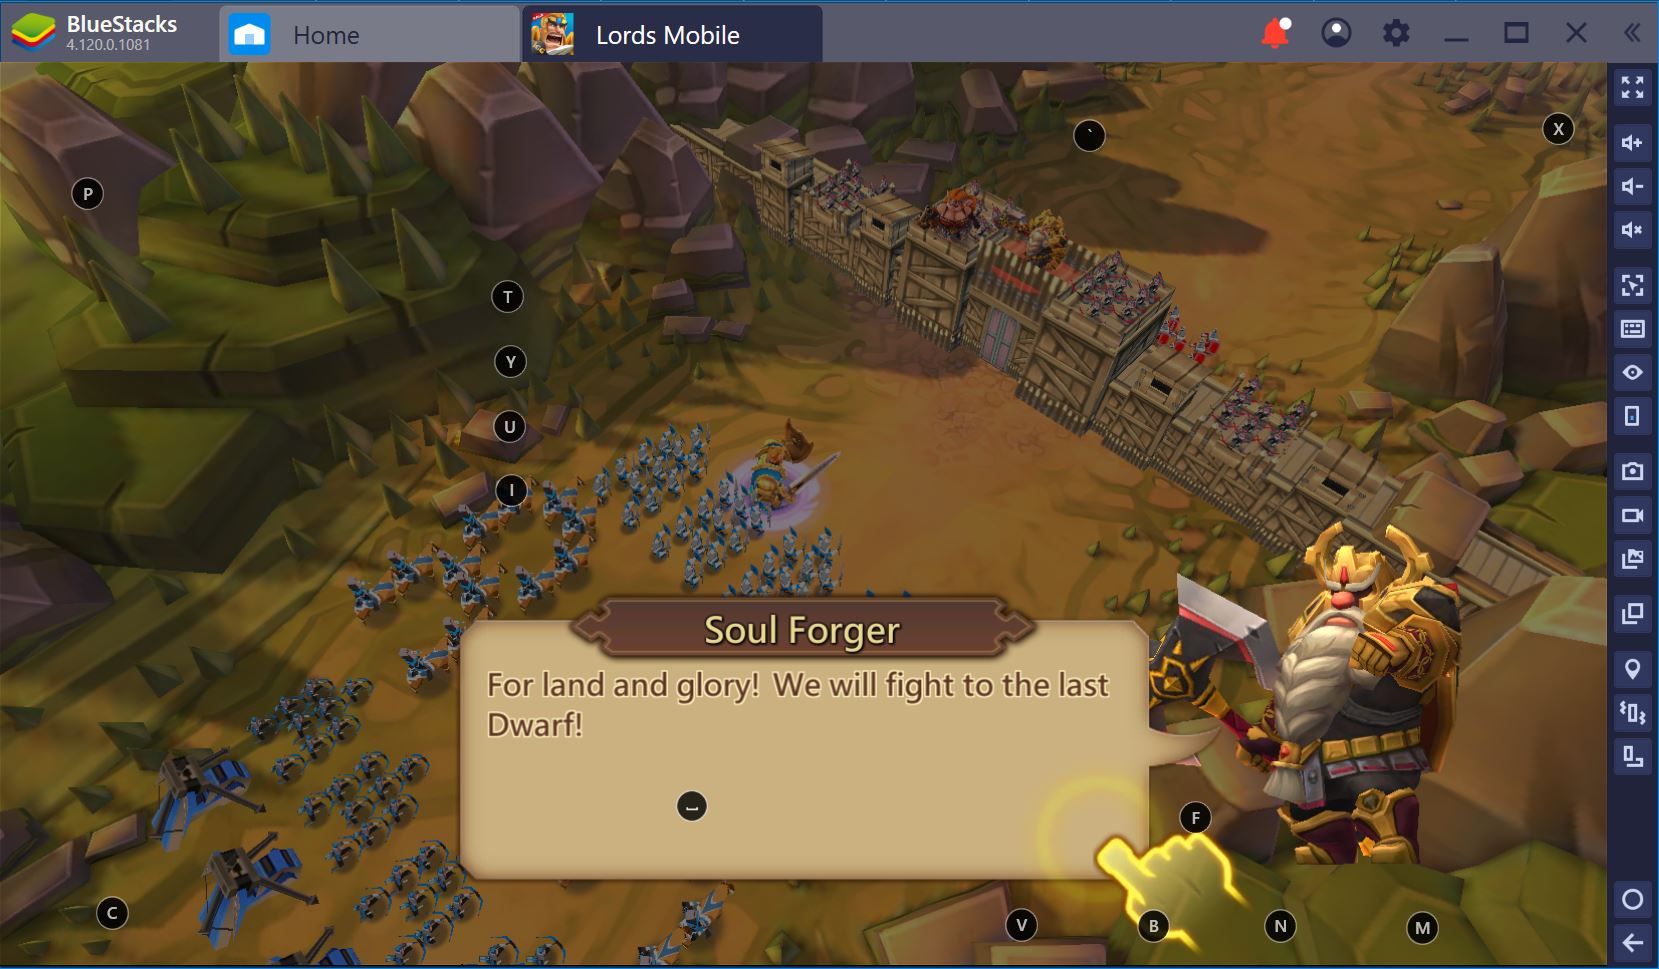
We used the Repeated Tap function for the “F” key to quickly click through most dialogue scenes.
As you can see, this setup gives certain keys a main purpose, but they can also work in less commonly occurring menu layouts. The world is your oyster with the Key-Mapping Tool!
Setting Up the Multi-Instance Manager
As mentioned before, this game encourages players to cooperate in order to defend against enemy players and tighten their grip on their foes. While you can technically play the game alone, you won’t get very far by yourself; In fact, with hordes of player armies roaming the kingdom in search of easy-to-raid vaults, you could very well find yourself getting repeatedly trampled. In addition, with the various resource and progression bonuses you get access to for joining a guild, it’s almost a no-brainer decision.
Even though there’s plenty of options, a good guild can be tough to find. Many guilds require you to apply and – often times – when you are first starting out, you don’t have much to offer them that would incline an invitation. There are some guilds that are open to the public, but the community and facilities they offer are much less consistent than the closed guilds. As a result, many players find themselves fending for themselves or creating their own guild with a couple of friends. While this isn’t necessarily a bad thing, this can really hamper your progression because you don’t have access to a hundred players’ worth of resources and protection that traditional guilds offer.
BlueStacks Multi-Instance Manager can be used to help solve this problem. Through the use of alternative accounts – also known as alt accounts – you can create hyper farms and pool resources to help bridge the gap between you and enemy guilds. Normally, creating and managing alt account can be difficult; in some cases, it can be impossible due to account linking and engine limitations. The Multi-Instance Manager, you will not have any of these problems; the manager will allow you to use your primary and any alternative accounts simultaneously. With BlueStacks, the road to resource riches is a piece of cake! This article covers some cool things you can do once you set up the Multi-Instance Manager; but first-things-first, we’ve got to get it up and running
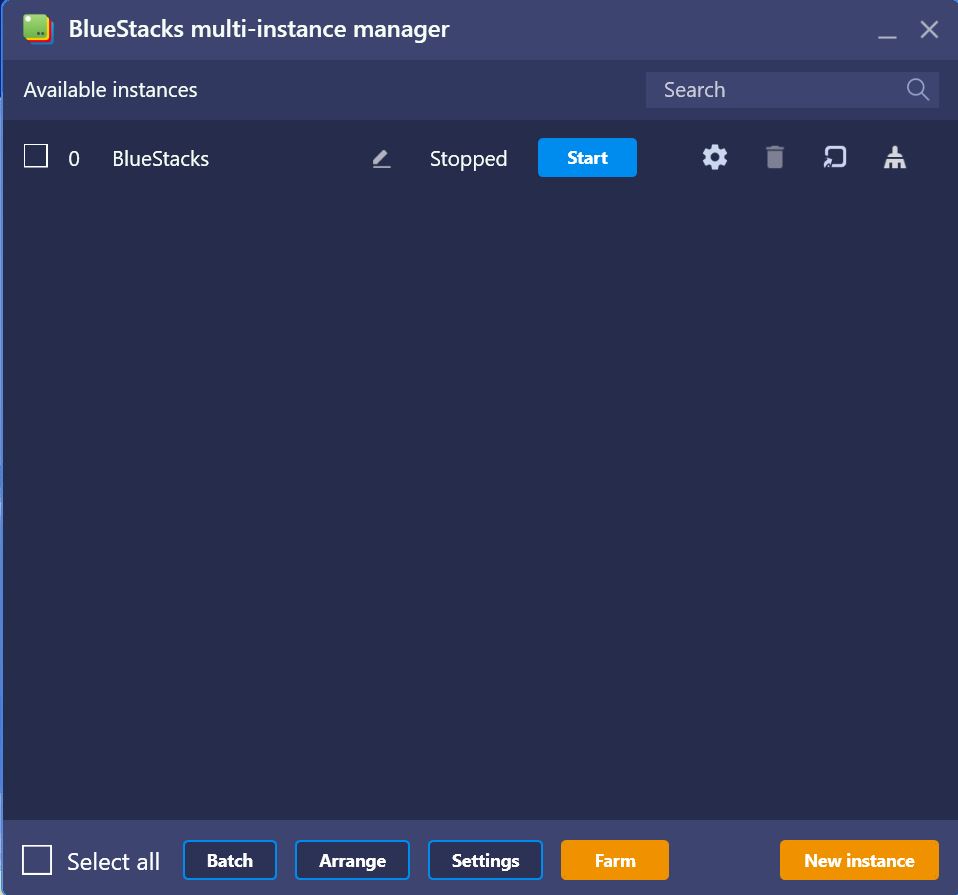
Setting up the Multi-Instance Manager is pretty simple and only takes a couple of minutes. The first thing you need to do is open up the Multi-Instance Manager. This can be accessed through the right sidebar on the BlueStacks program interface. If the window that opens looks like this, you’ve come to the right place.

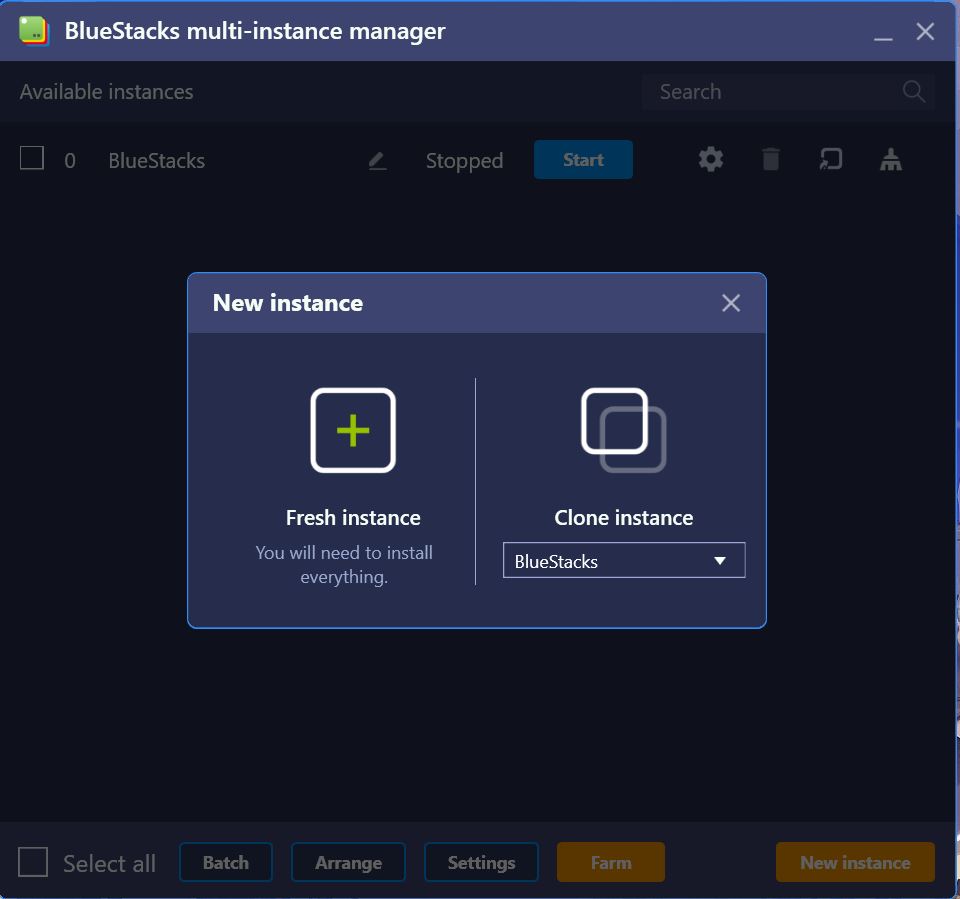
Now that the Multi-Instance Manager is open, click the “New Instance” button in the bottom right of the window. A prompt will pop up and then you will need to click “Fresh Instance”.
Once you have created the new instance, launch the two clients. Depending on your computer specs, you may want to load the instances on after another as opposed to launching them at the same time to avoid long load times. The fresh instance will prompt you to log into a Google Account to access the Google Play Store. The original instance will be logged into your primary Google Account. It will be necessary to use a new Google Account to run more than one instance. This is because your Lords Mobile account is linked to your Google Account and therefore only one instance can be open per Google Account. If you do not have a second Google Account, making a new one only takes a couple of minutes.
After logging into an alternative Google Account on the fresh instance, go to Google Play Store and download Lords Mobile.
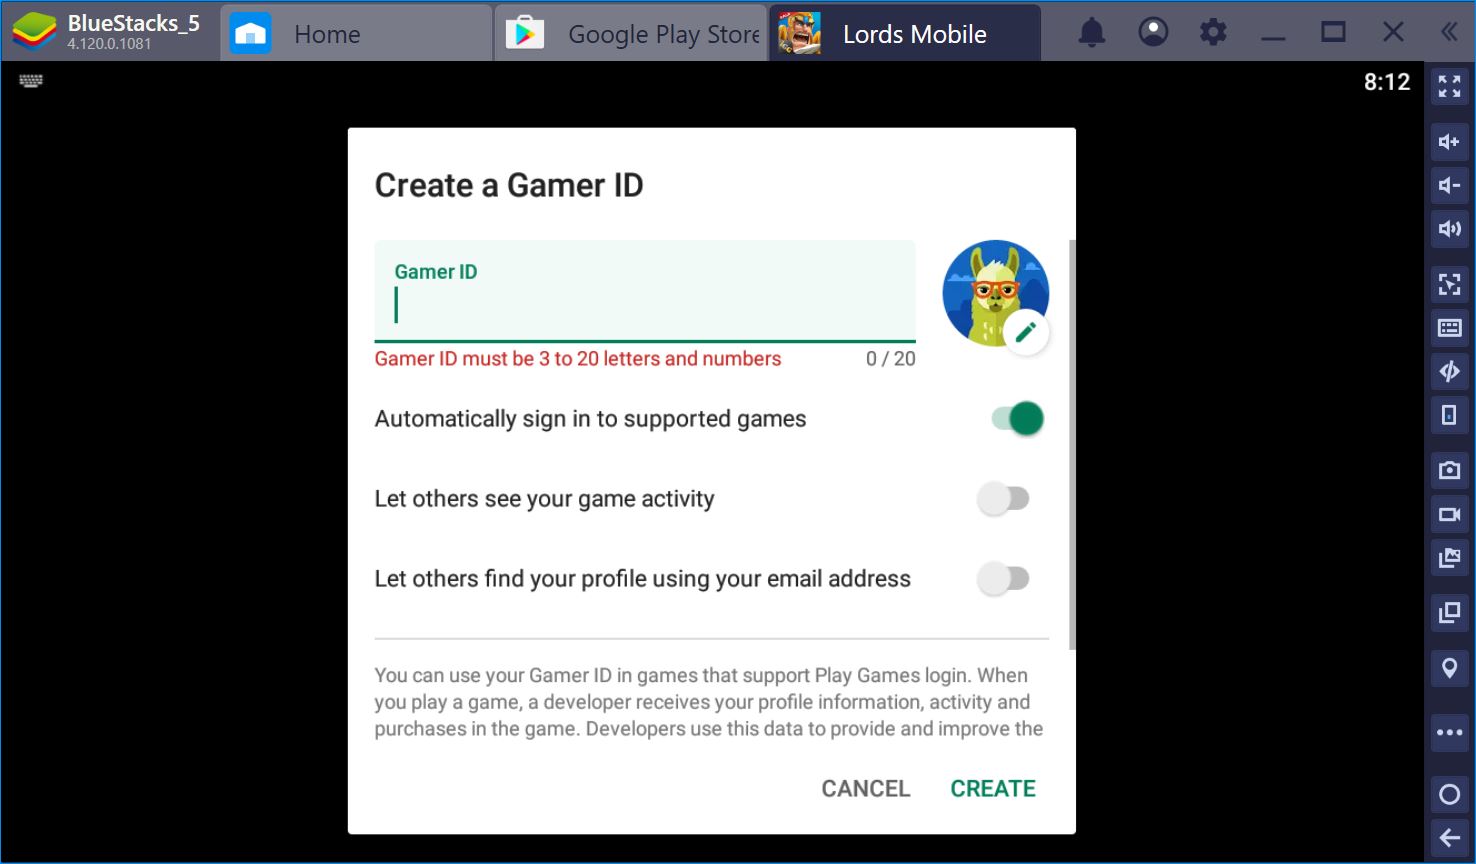
After installation, fire up both instance of Lords Mobile. If everything worked correctly, the original instance should bring you to your primary account and the fresh instance will bring you to the account creation screen. Now, you are ready to create an army of alt accounts – or at least however many instances your computer can handle!
Conclusion
You can read more information on BlueStacks Key-Mapping Tool here, and there is additional information on the Multi-Instance Manager here.
Armed with these tools, your army will have the efficiency of a Roman Legion and your resource structures will have the manufacturing output of China! If you take advantage of what BlueStacks has to offer, you can easily give even the most powerful guilds a run for their money as you demonstrate an incredible display of power. Now go on and conquer!
Download BlueStacks Now