Best BlueStacks Settings for Low End PCs | Performance Tips by BlueStacks
We’ve all been there; having a slow or laggy gaming experience on your PC is perhaps one of the worst experiences of all time. You have tried everything – restarting your computer, refreshing the tabs, closing and restarting the application itself, or tweaking with the settings to the best of your knowledge, but nothing seems to work and the lag seems to persist. Luckily, you’re not alone, and we understand the peril of gamers who might be affected with such issues, especially if you’re having an older generation CPU, or a low spec PC. Do not fret, we have the perfect remedy for such issues at BlueStacks, the world’s most trusted and renowned emulator for mobile games on PC.
Got questions about guilds, gaming, or our product? Join our Discord for discussions and support!
In this article, we will be going deep into the issues that cause these lags/crashes frequently in low-end PCs. We will also be providing thorough solutions to players, so that they can enjoy their favourite games effectively and efficiently without experiencing any such lags or delays on their PC with BlueStacks.
Adjusting the Performance Settings
BlueStacks makes use of various application Settings to adjust the performance according to a set parameter. By default, these Settings are set fixed but they can be changed anytime by the players. If you’re experiencing lags or delays due to operating BlueStacks on a low-spec PC, worry not, as you can solve this issue by going to the Settings, accessed from clicking the “Wheel” icon on the right-hand side of the BlueStacks application.
Here’s a step-by-step guide to lower your performance settings in order to eradicate any lag or delays you might experience while gaming:
- Open the BlueStacks Settings from the right-hand side toolbar.
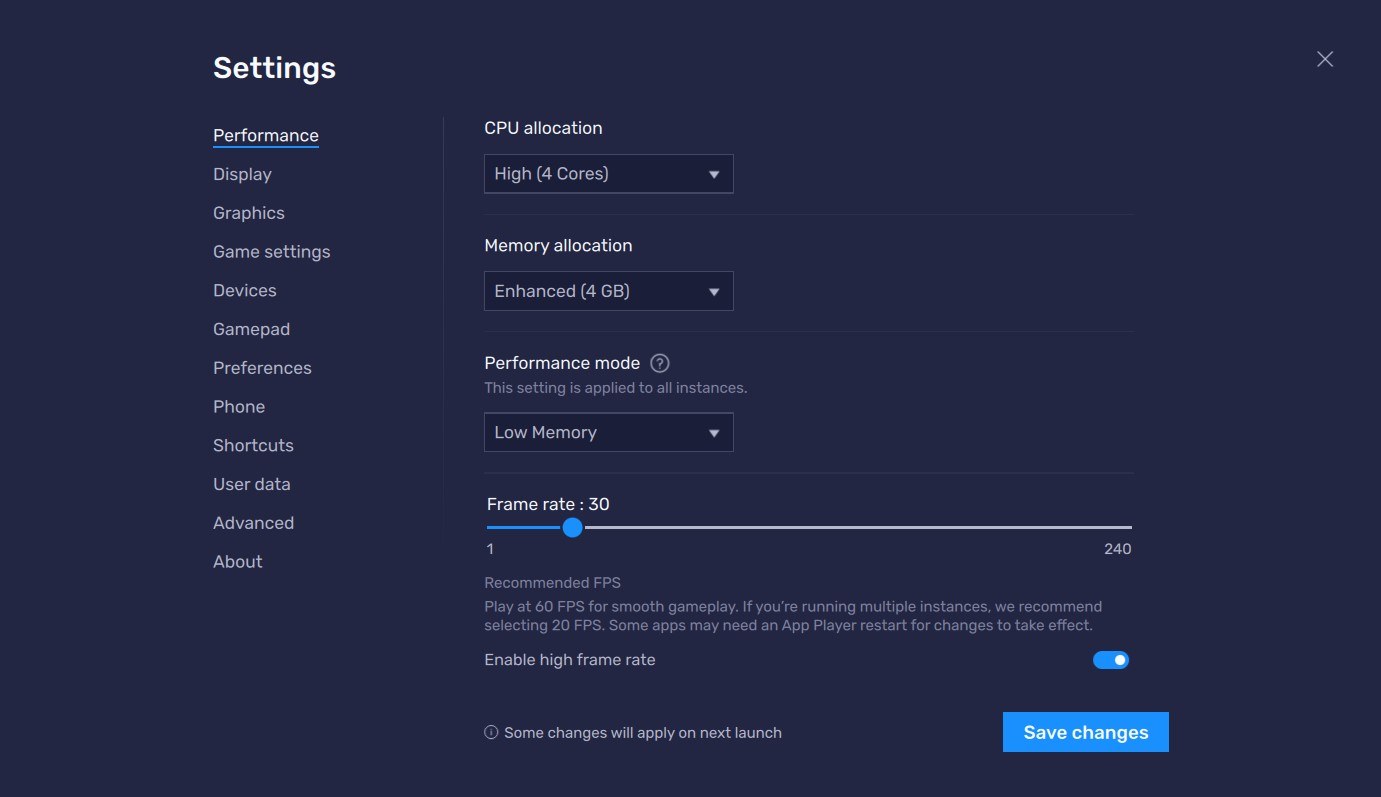
- Go to the Performance tab, and Adjust the Frame Rate to 30 Frames Per Second. Hit the “Save Changes” option located below and restart your BlueStacks application to apply the changes.
- If the lag/delay still persists, you can also lower the overall resolution to lessen the GPU load on your PC. Simply go to the Settings tab once again, and open the Display tab. Here, select the resolution “1280 x 720”. Hit the “Save Changes” option located below and restart your BlueStacks application to apply the changes.
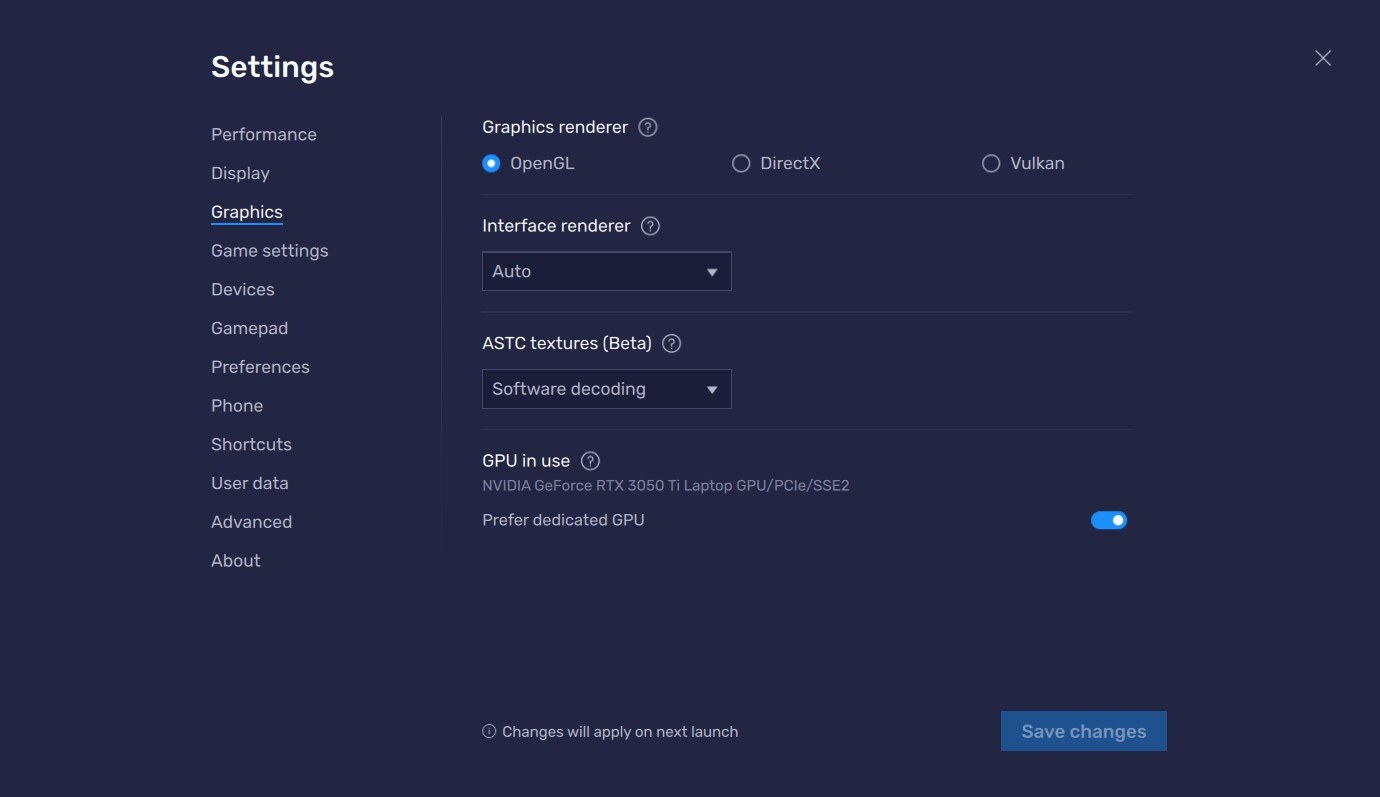
- If the lag/delay still persists, go to the Graphics tab and under the heading Graphics Renderer, choose “OpenGL”. OpenGL is generally considered faster and more compatible with low end PCs. Hit the “Save Changes” option located below and restart your BlueStacks application to apply the changes
Windows Optimizations
Apart from BlueStacks settings, there are also a ton of optimizations you can make on your Windows PC to optimize performance and reduce lag/delay. Here are a few of the notable ones that seem to work frequently:
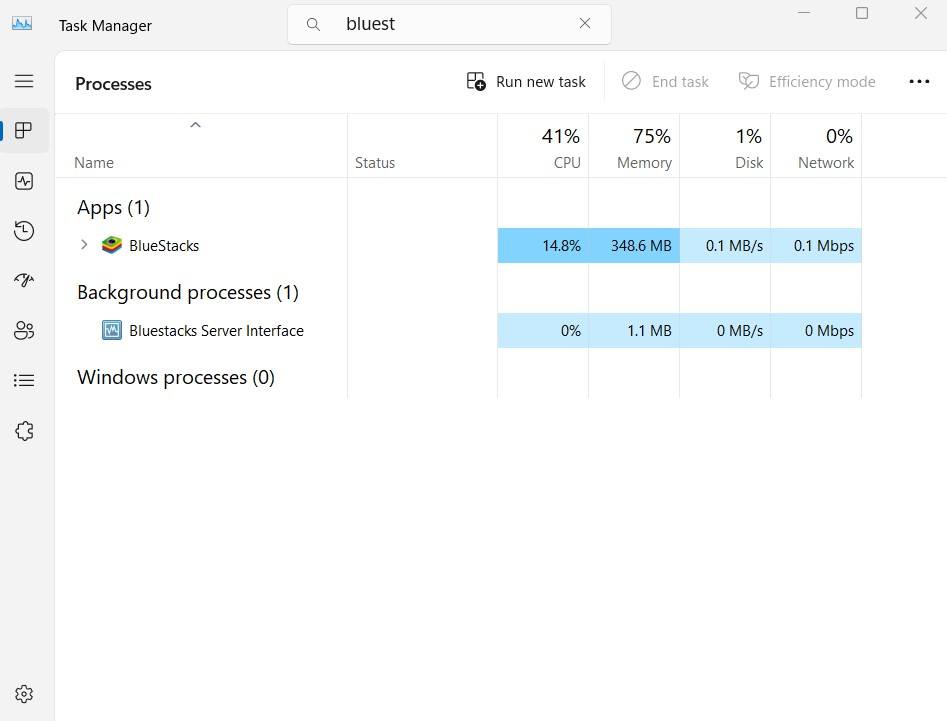
Task Manager Settings
STEP 1: Open the Task Manager by right-clicking the Task Bar.
STEP 2: Go to the Details tab on the Task Manager and find the BlueStacks processes by manual search by simply typing “Bluestacks” in the search bar.
STEP 3: Once found, right click on the process and set the Priority to “High” or “Real time” to allocate more of your CPU resources to BlueStacks. Additionally, consider closing unnecessary background applications and/or processes to free up more CPU resources.
Graphic Card Drivers Updation
If all else fails, it’s a good chance that your graphics card drivers might be dated and require an update. To do so, simply look up your graphics card name and search on Google to update the respected drivers.
Note: Make sure to update your graphics card drivers only from authentic and reputed sources, such as the company’s official website or database.