A Comprehensive Campaign and Map Guide to Heroes of the Dark
Heroes of the Dark features an engaging and content-filled campaign. More importantly, it also boasts a large and vast map that contains a myriad of conquerable enemy territories as well as the mansions of other players who are willing to compete for resources. Both the campaign and invasions in the map involve the use of the game’s combat system that emphasizes the use of strategic thinking.
In this guide, we’ll guide you through the game’s combat system and how you can effectively use it to constantly win battles. Moreover, we’ll also discuss how the campaign mode works as well as the contents of the game’s large map and how you can conquer it with ease.
Combat System
The combat system in Heroes of the Dark resembles those of idle RPGs insofar as it strategically placing the appropriate heroes on several spots in the battlefield. You do not directly control the actions of your heroes as every movement is automated and your victory is determined by the team’s overall strength.
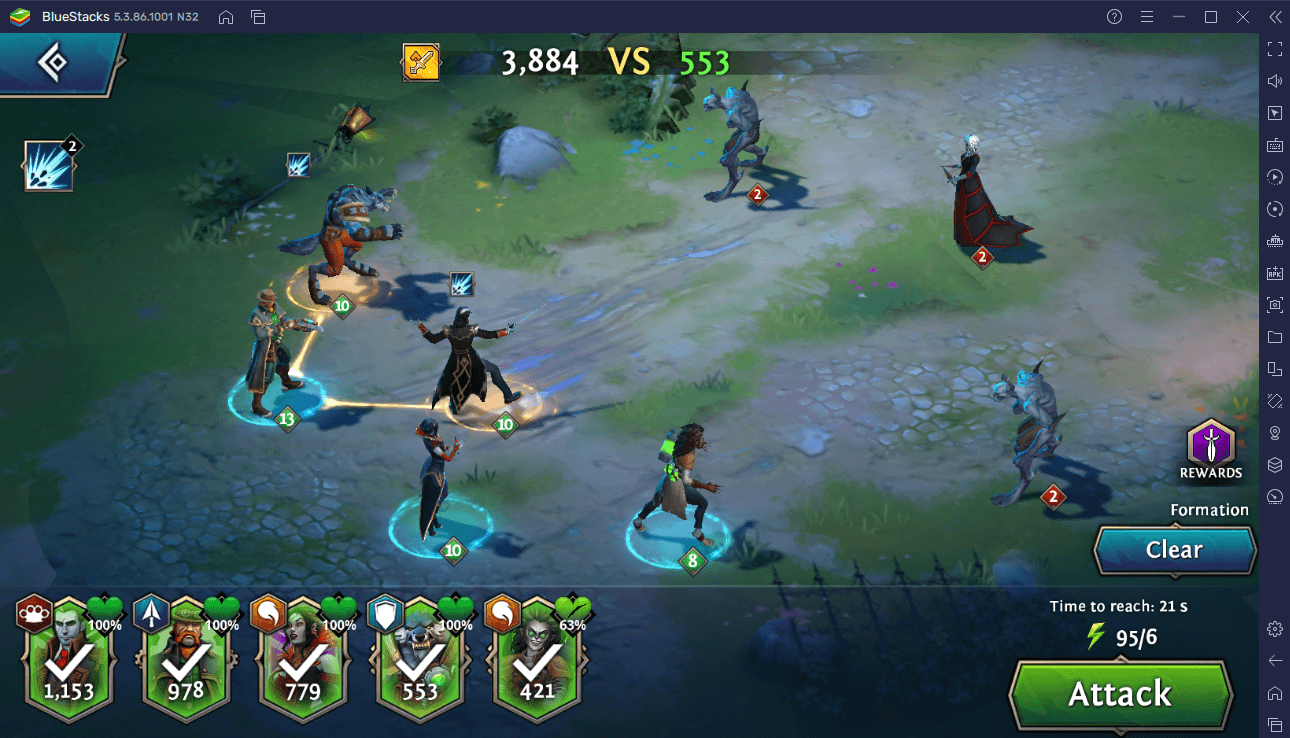
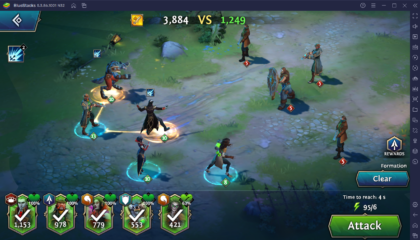
There are five slots in the battlefield. Three of those are front slots while the other two are back slots. You can place your heroes on any of the five slots but then again, strategy matters in this game, so you need to be wise. Heroes are segregated into classes which determine their fighting style. Heroes with the class Ranger, Nuker, or Support are best placed on the back slots as these heroes either specialize in long-range damage or general support to other heroes (i.e., healing, active buffs) at the expense of lower health. Heroes with the class Bruiser, Tank, and Assassin are best placed on the front slots as they are responsible for dealing a bulk of the damage to enemies, or absorbing damage to protect other heroes as is the case with the Tank class.
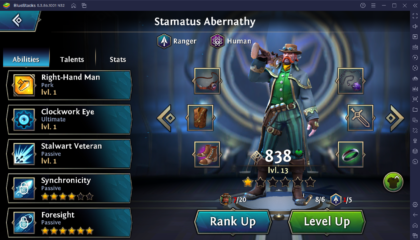
Another thing to note is that some heroes have a “hero aura” which means that they can give active buffs to heroes that are within their range. A hero who is affected by another hero’s aura has their slot’s color turned into yellow and a line connecting them to the hero with the aura is drawn. The list of usable hero auras is displayed on the left side of the screen, and you can also see the valid positions for the hero aura to take effect. An example of a hero with an aura is Stamatus Abernathy who can give 15% resistance to certain enemy attacks to two heroes who are in front of him.
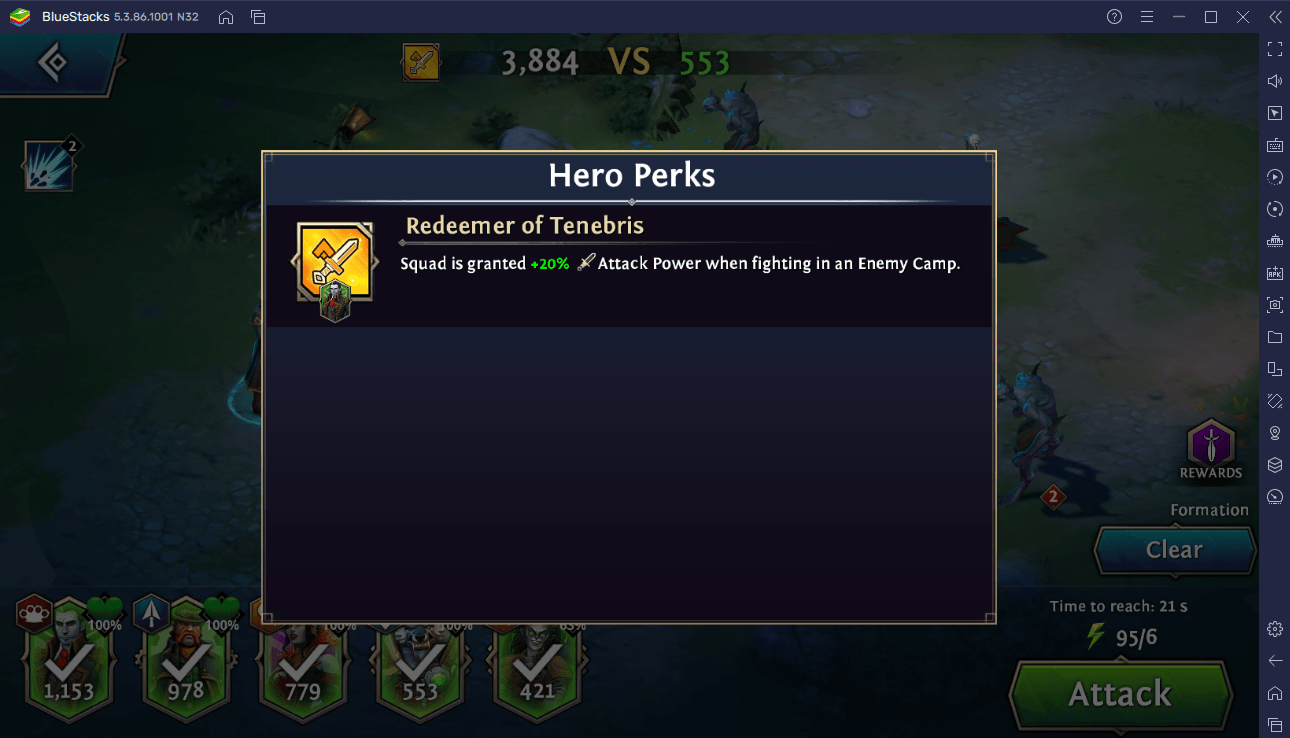
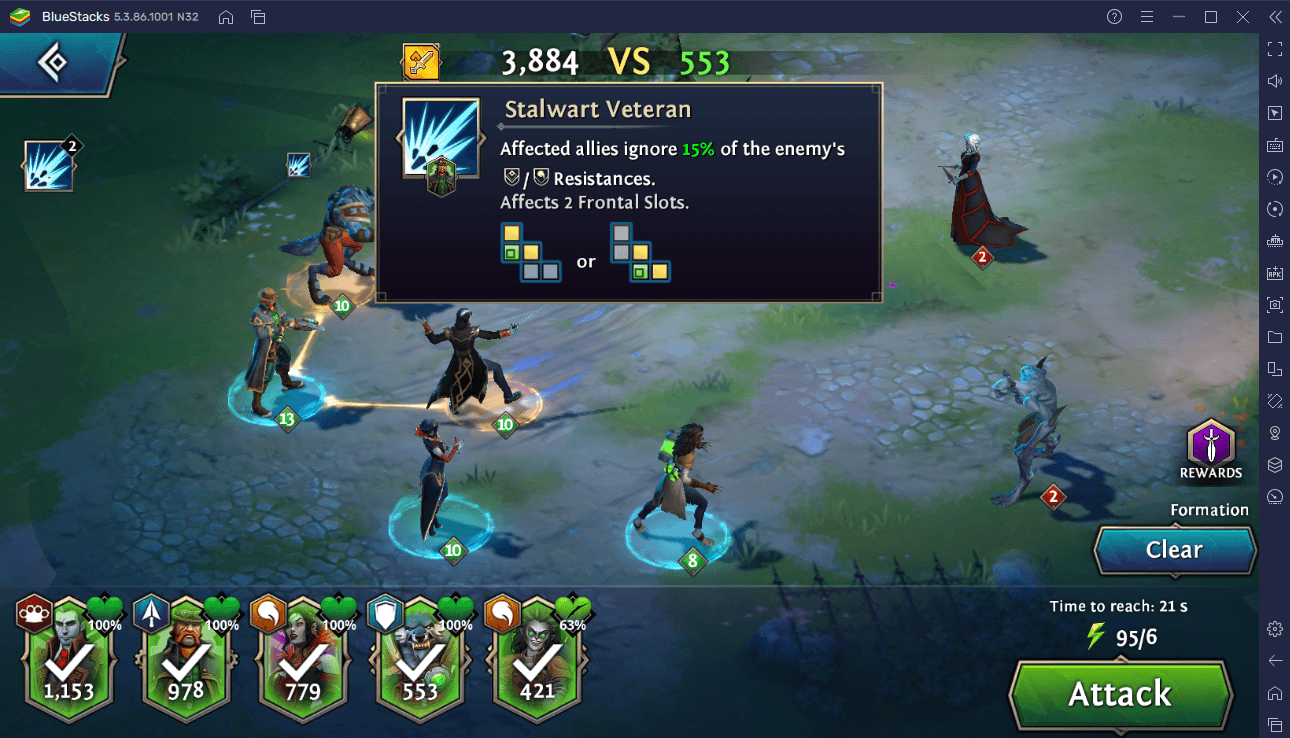
Some heroes also have “hero perks” which are like hero auras however these perks do not require a specific position. Hero perks will affect all heroes if the hero with the perk is present in the battlefield. An example of this is Birsha von Meremoth whose perk grants 20% attack power to all heroes when invading an enemy camp.
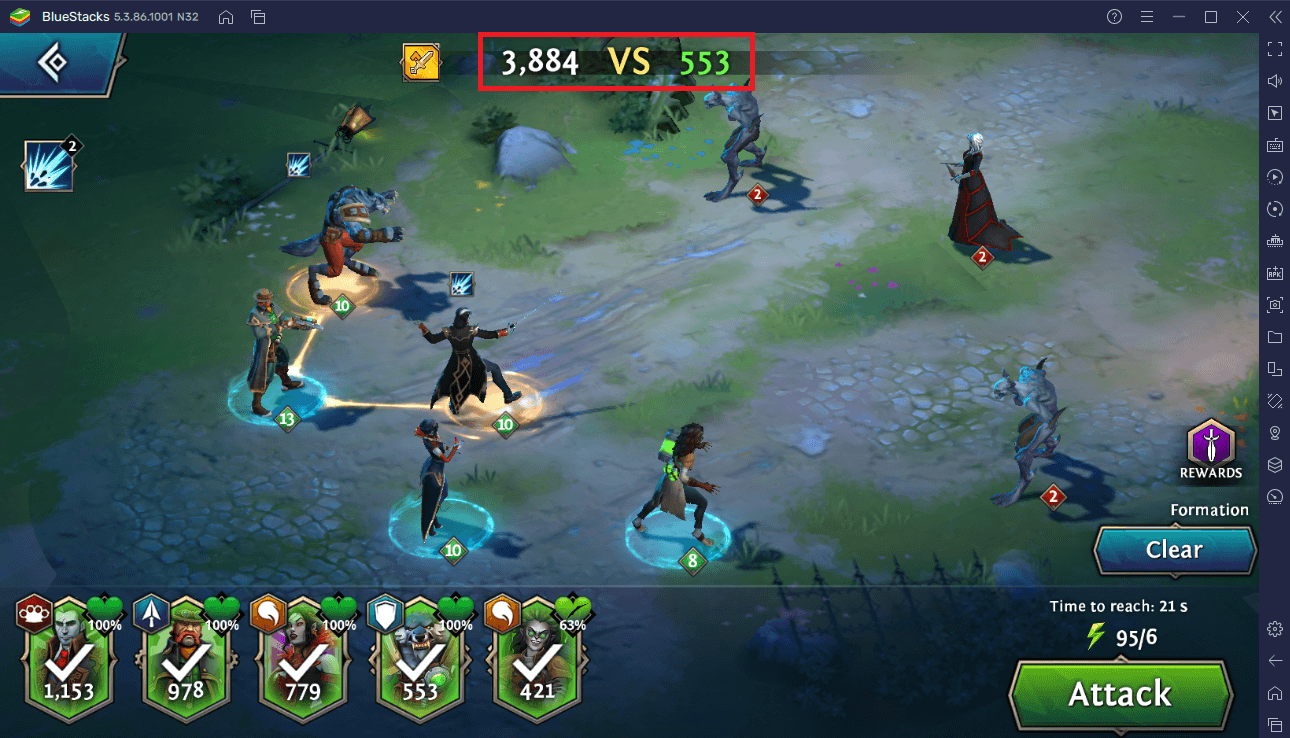
The chances of victory is contingent on your team’s aggregate strength which is quantified by a variable called power. The power of your teams versus the power of the enemy team is displayed on the top of the screen. If your team’s power is significantly higher than that of the opponent team’s power, then victory is guaranteed. If the margin of the two powers is close, winning may depend a lot on luck. If the enemy team’s power is the one that is higher, then you must upgrade your heroes first before fighting.
Overview of the World Map
The map of Heroes of the Dark is extremely large and filled with various territories that you can take over. Upon starting the game, your mansion will be built on a random spot in the map. When you join a guild, you are given the option to transfer your mansion beside the mansions of your guildmates.
Regional Crystallix
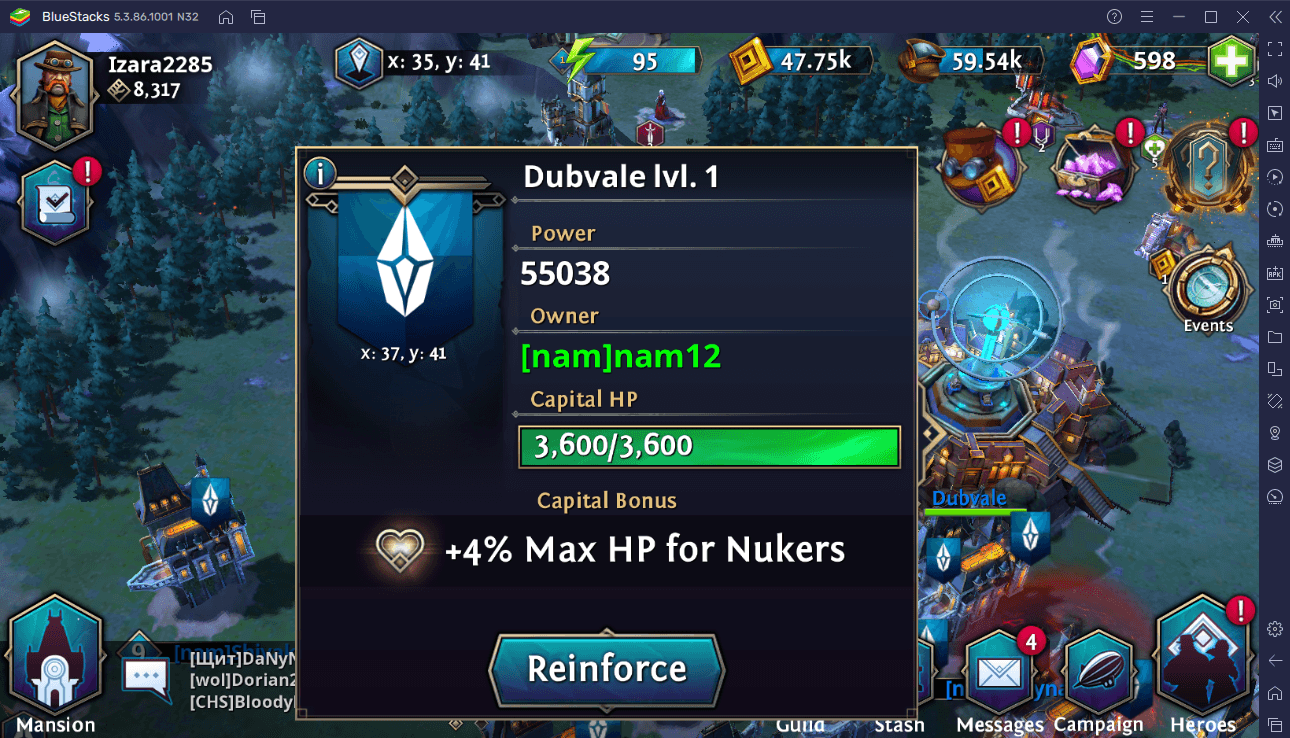
The map is divided into multiple regions and each region has its own Regional Crystallix. Guilds can capture this gigantic structure and upon doing so, members receive a bonus buff (i.e., +4% max HP for Nuker-class heroes) for as long as the Crystallix is owned by the guild. You can reinforce your guild’s Crystallix by deploying some of your heroes to protect it.
Crystallix Fort
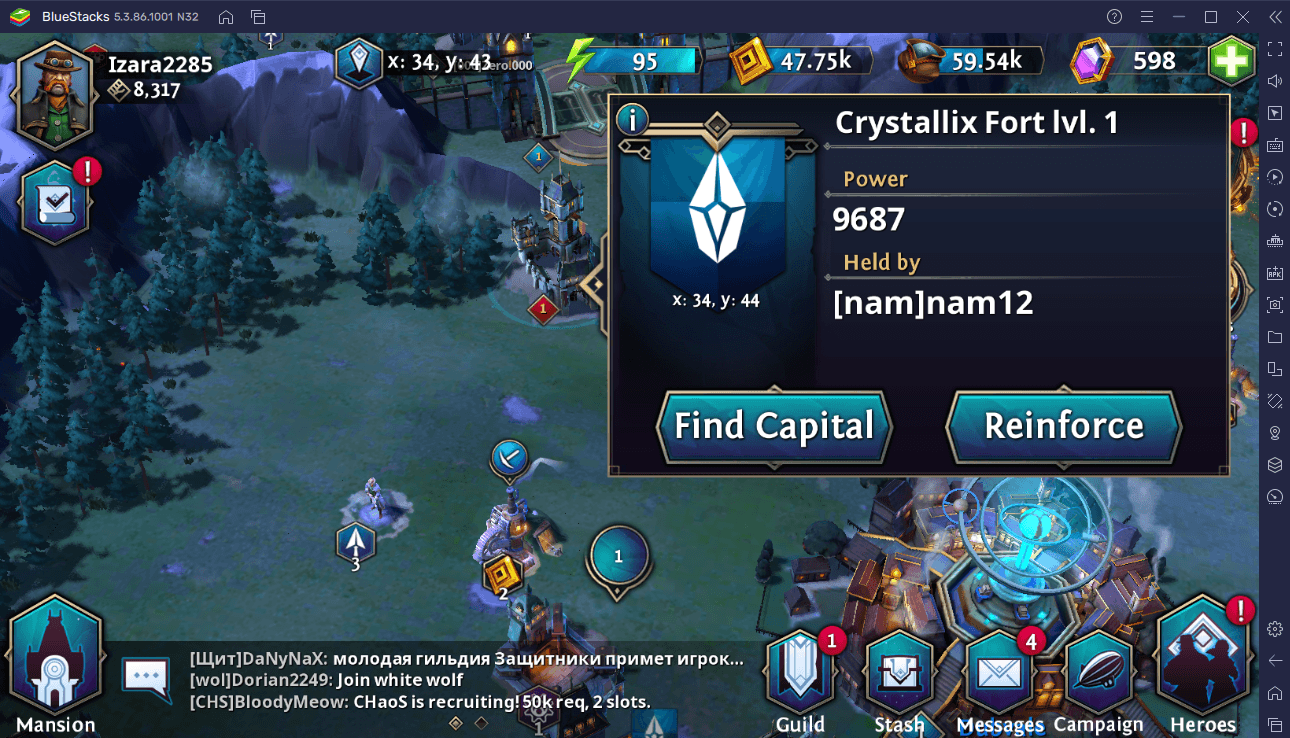
These forts serve as defense structures that protect the Regional Crystallix by sending reinforcements to fend off attackers who are attempting to capture it. If you are a part of a guild who owns a Regional Crystallix, you can send some of your heroes in the guild’s forts to serve as guardians. You can also attack the Crystallix Forts of other guilds to weaken their defenses.
Enemy Camps
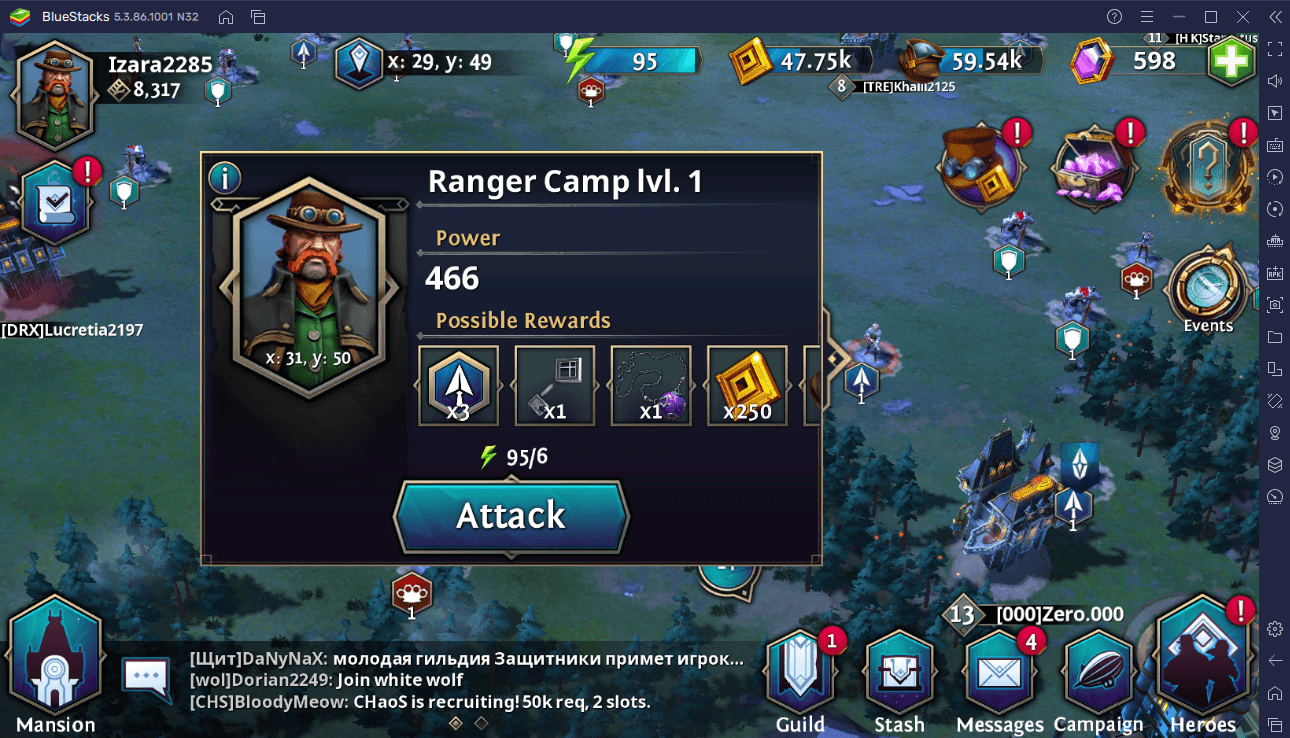
Class tokens that are required to upgrade heroes are primarily obtained from enemy camps. Each enemy camp holds a specific class token, and this is represented by the icon beside the enemy camp. These camps also come in various levels and the higher the level of the camp is, the better the rewards are when you successfully capture it. Invading high-level camps requires you to capture a camp with the preceding level first. For instance, you can only invade a Level 4 camp when you have already captured Level 3 camp.
Regardless of the level, attacking a camp always depletes six points of stamina. Before attacking, you must always check the power rating of the enemies situated there to know if you have a chance to win. Upon conquering an enemy camp, you are rewarded with the class token that its associated with, Gold, Moondust, dungeon keys, and equipment.
Dungeons
Dungeons can be cleared to garner hero fragments which can be used to rank up the hero associated with those fragments. To enter a dungeon, you must first acquire the required amount of dungeon keys. These keys can be obtained from enemy camps.
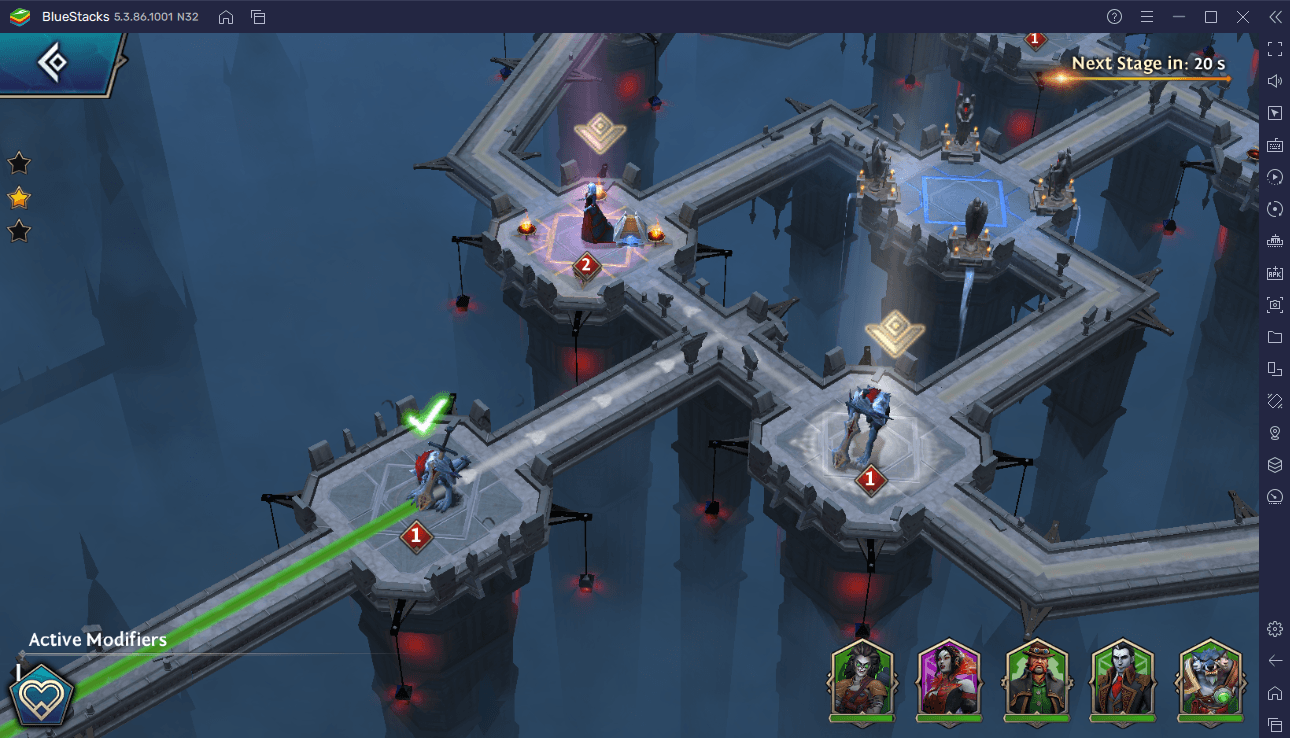
Each dungeon consists of multiple pathways. Most pathways lead your heroes to a wave of enemies that they must defeat to proceed to the next path. Some paths are more difficult than others and this is indicated with a number beside the path.
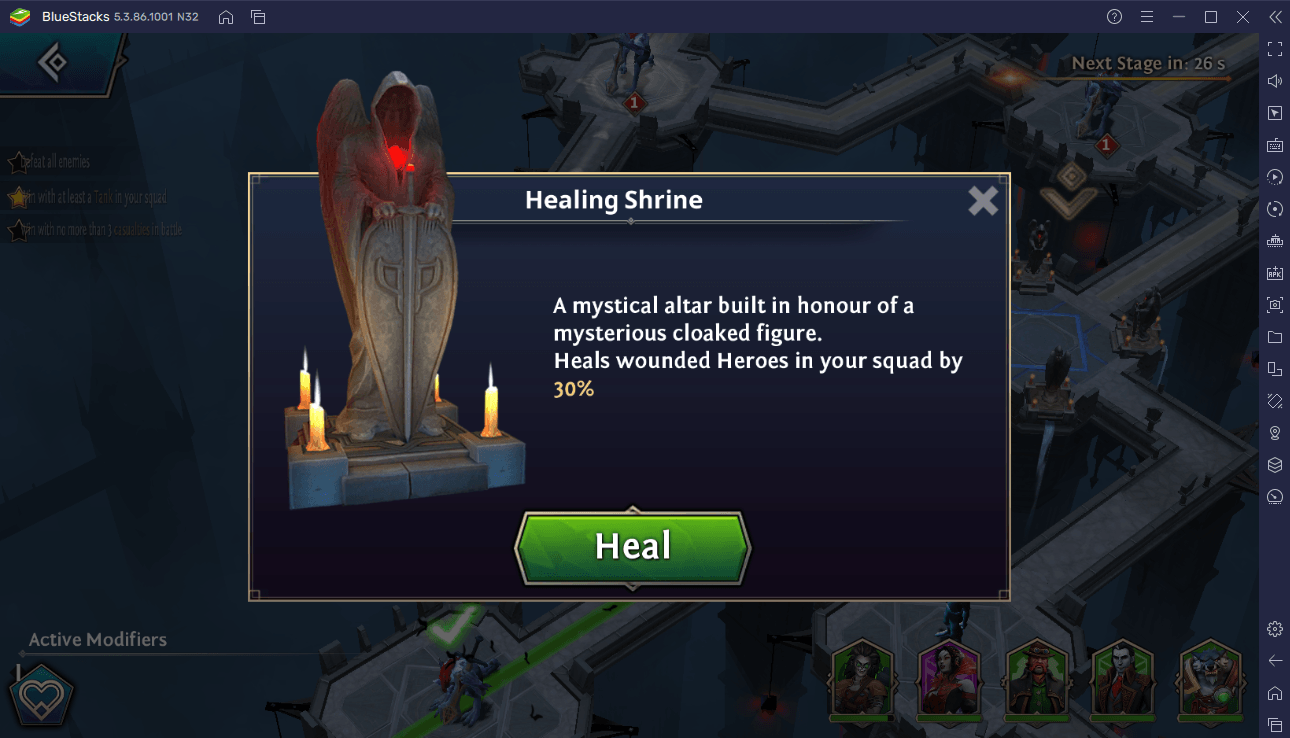
After the battle, your heroes can proceed to a healing shrine where they can replenish a portion of their health. The healing shrine only heals heroes who are still alive and does not resurrect dead ones. The dungeon ends once you reach the boss room and your heroes successfully defeat the boss.
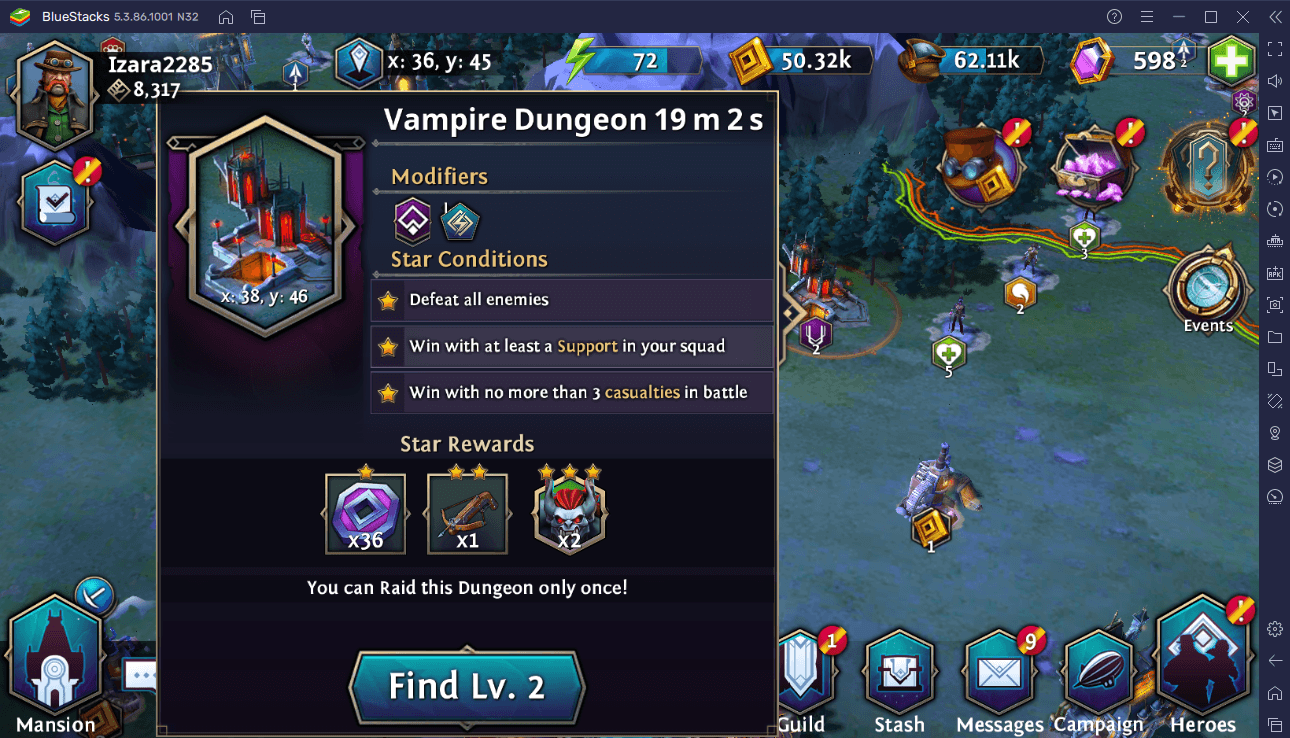
Dungeons have three challenges and completing one challenge grants you one star which then grants you one reward. You must complete all three challenges to acquire the dungeon rewards.
Mines
There are gold mines and moondust mines scattered across the map where you can harvest either resource for a specific amount of time.
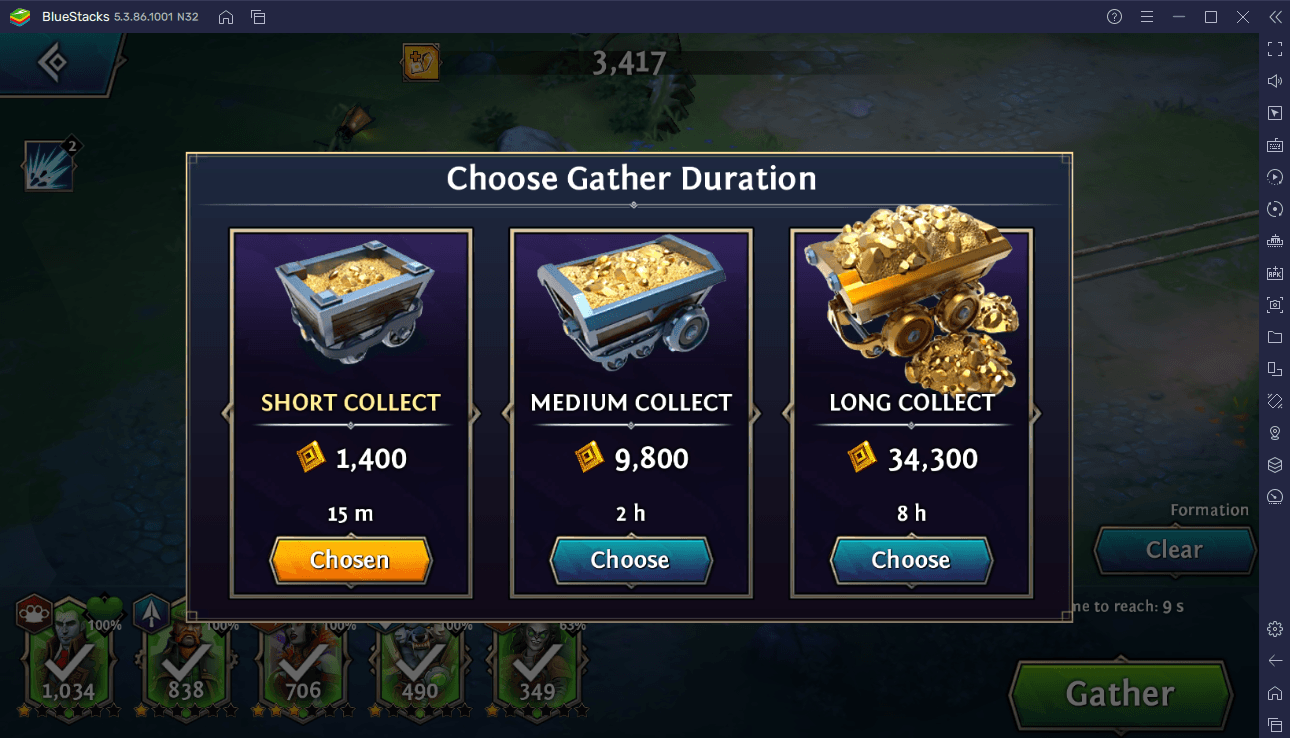
Heroes can be deployed to mines and you can choose one of three gathering durations.
- Short Collect – 15 minutes.
- Medium Collect – 2 hours.
- Long Collect – 8 hours.
The longer the gathering duration, the more gold or moondust you garner. Additionally, the level of the mine also affects the amount of resources harvested within the gathering duration.
Tenebrian Bridge
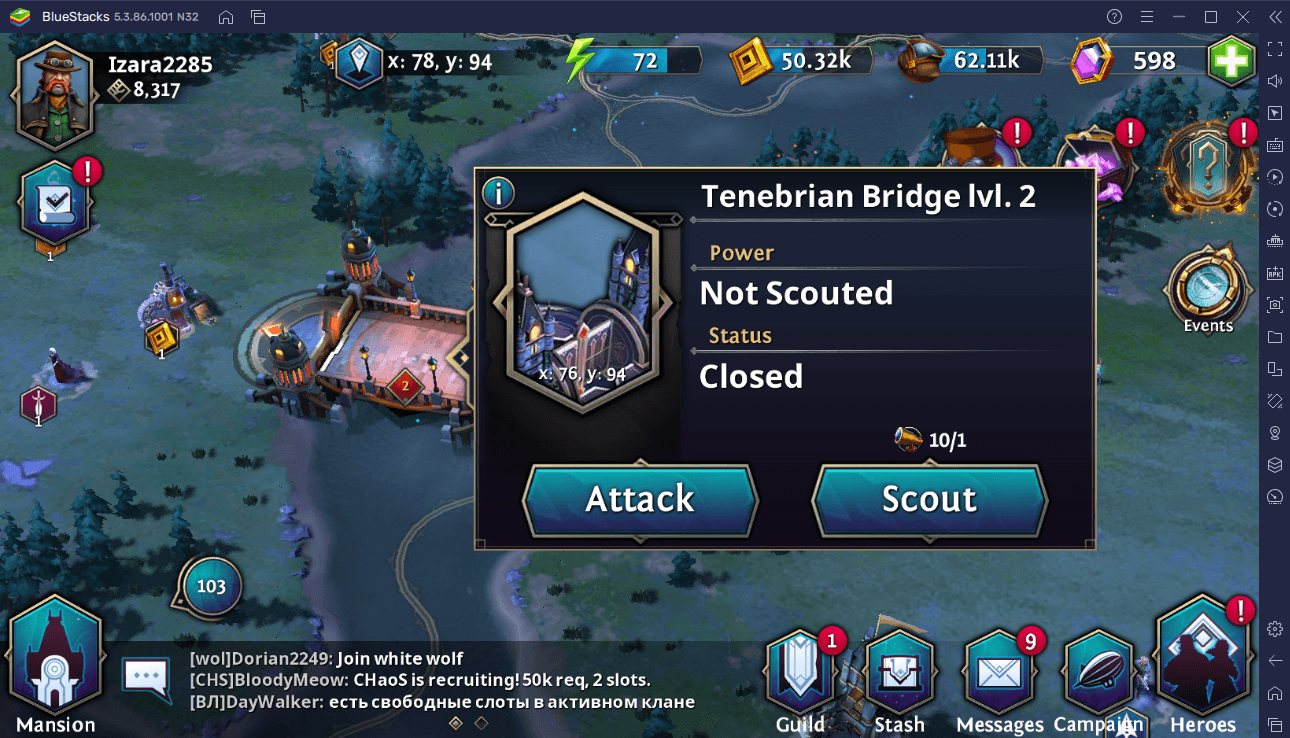
The Tenebrian Bridge connects one region to another. If you want to access the territories belonging to other regions, then you must capture the Tenebrian Bridge that connects that region to yours or to other regions that you already have access to.
Other Mansions
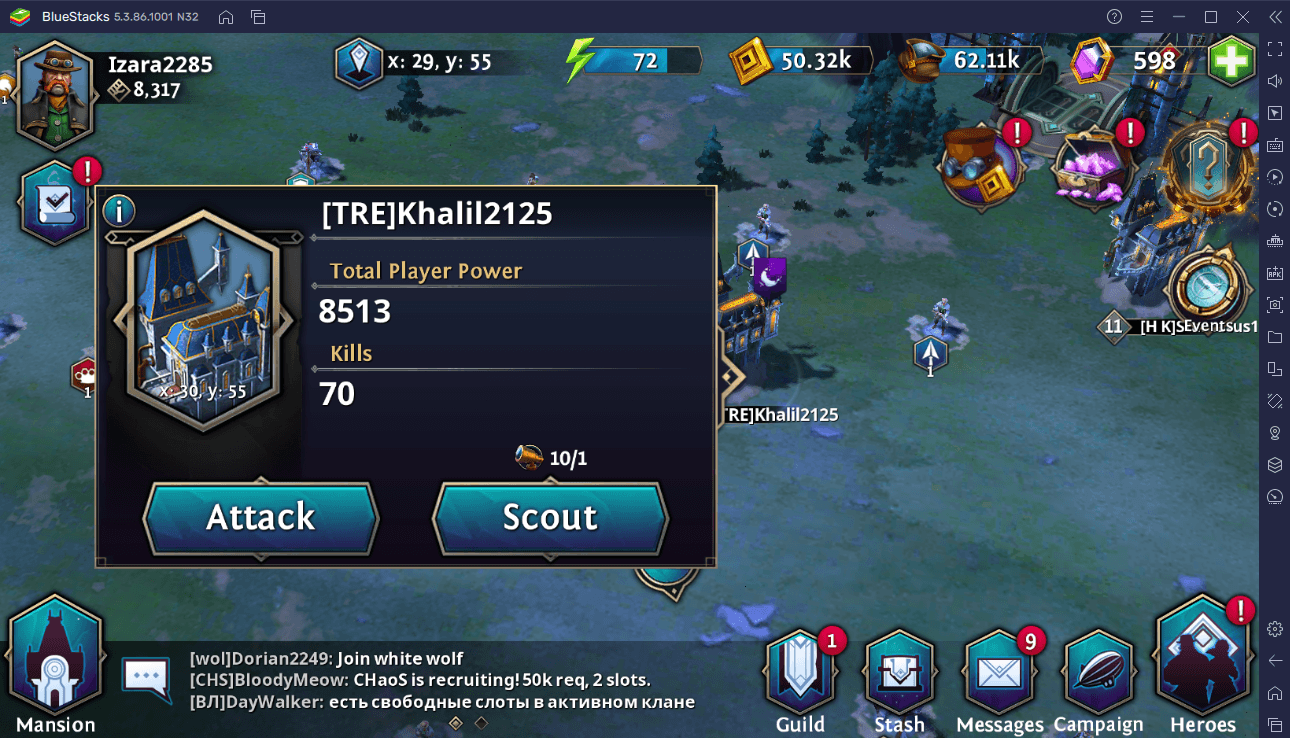
You can attack the mansions of other players to take away some of their resources from them. However, note that some mansions are temporarily protected by a red shield surrounding the building and this means that they are immune from foreign attacks until the shield dies off. When attacking unprotected mansions, you must scout it first to have an idea who you will be facing and to devise the ideal strategy.