Ember Ruin – Complete Gear Guide

Ember Ruin is built around steady power growth, and gear is the single most important system that determines how far you can push stages, bosses, and advanced modes. This guide explains how equipment, smelting, forging, enhancement, gems, and pets work together so you can invest resources efficiently and avoid common mistakes.
Gear Basics and Rarity Tiers
Gear in Ember Ruin occupies multiple slots such as weapon, gloves, boots, trousers, belt, cloak, and accessories, all visible on the main character screen and in the Enhance interface. As you progress, you see a clear color ladder from basic green pieces through blue and purple items to named sets like Evergreen and Azure gear, which offer higher base stats and stronger growth potential.
Your total power value is shown at the top of the interface and jumps whenever you equip a stronger item, craft an upgrade, or finish a major enhancement, making it a reliable quick check on your overall build. Whenever the game detects a direct upgrade, a small “Better equipment” panel appears, letting you equip the new item immediately from reward or crafting screens without hunting through menus.

How To Obtain Gear
Most early and mid‑game gear comes from story stages and idle combat, where your mounted character continuously defeats waves of monsters and automatically picks up loot boxes. Opening these boxes yields a mix of armor, weapons, gold, EXP items, and diamond cards, quickly filling your inventory with green and blue pieces to cover every slot.
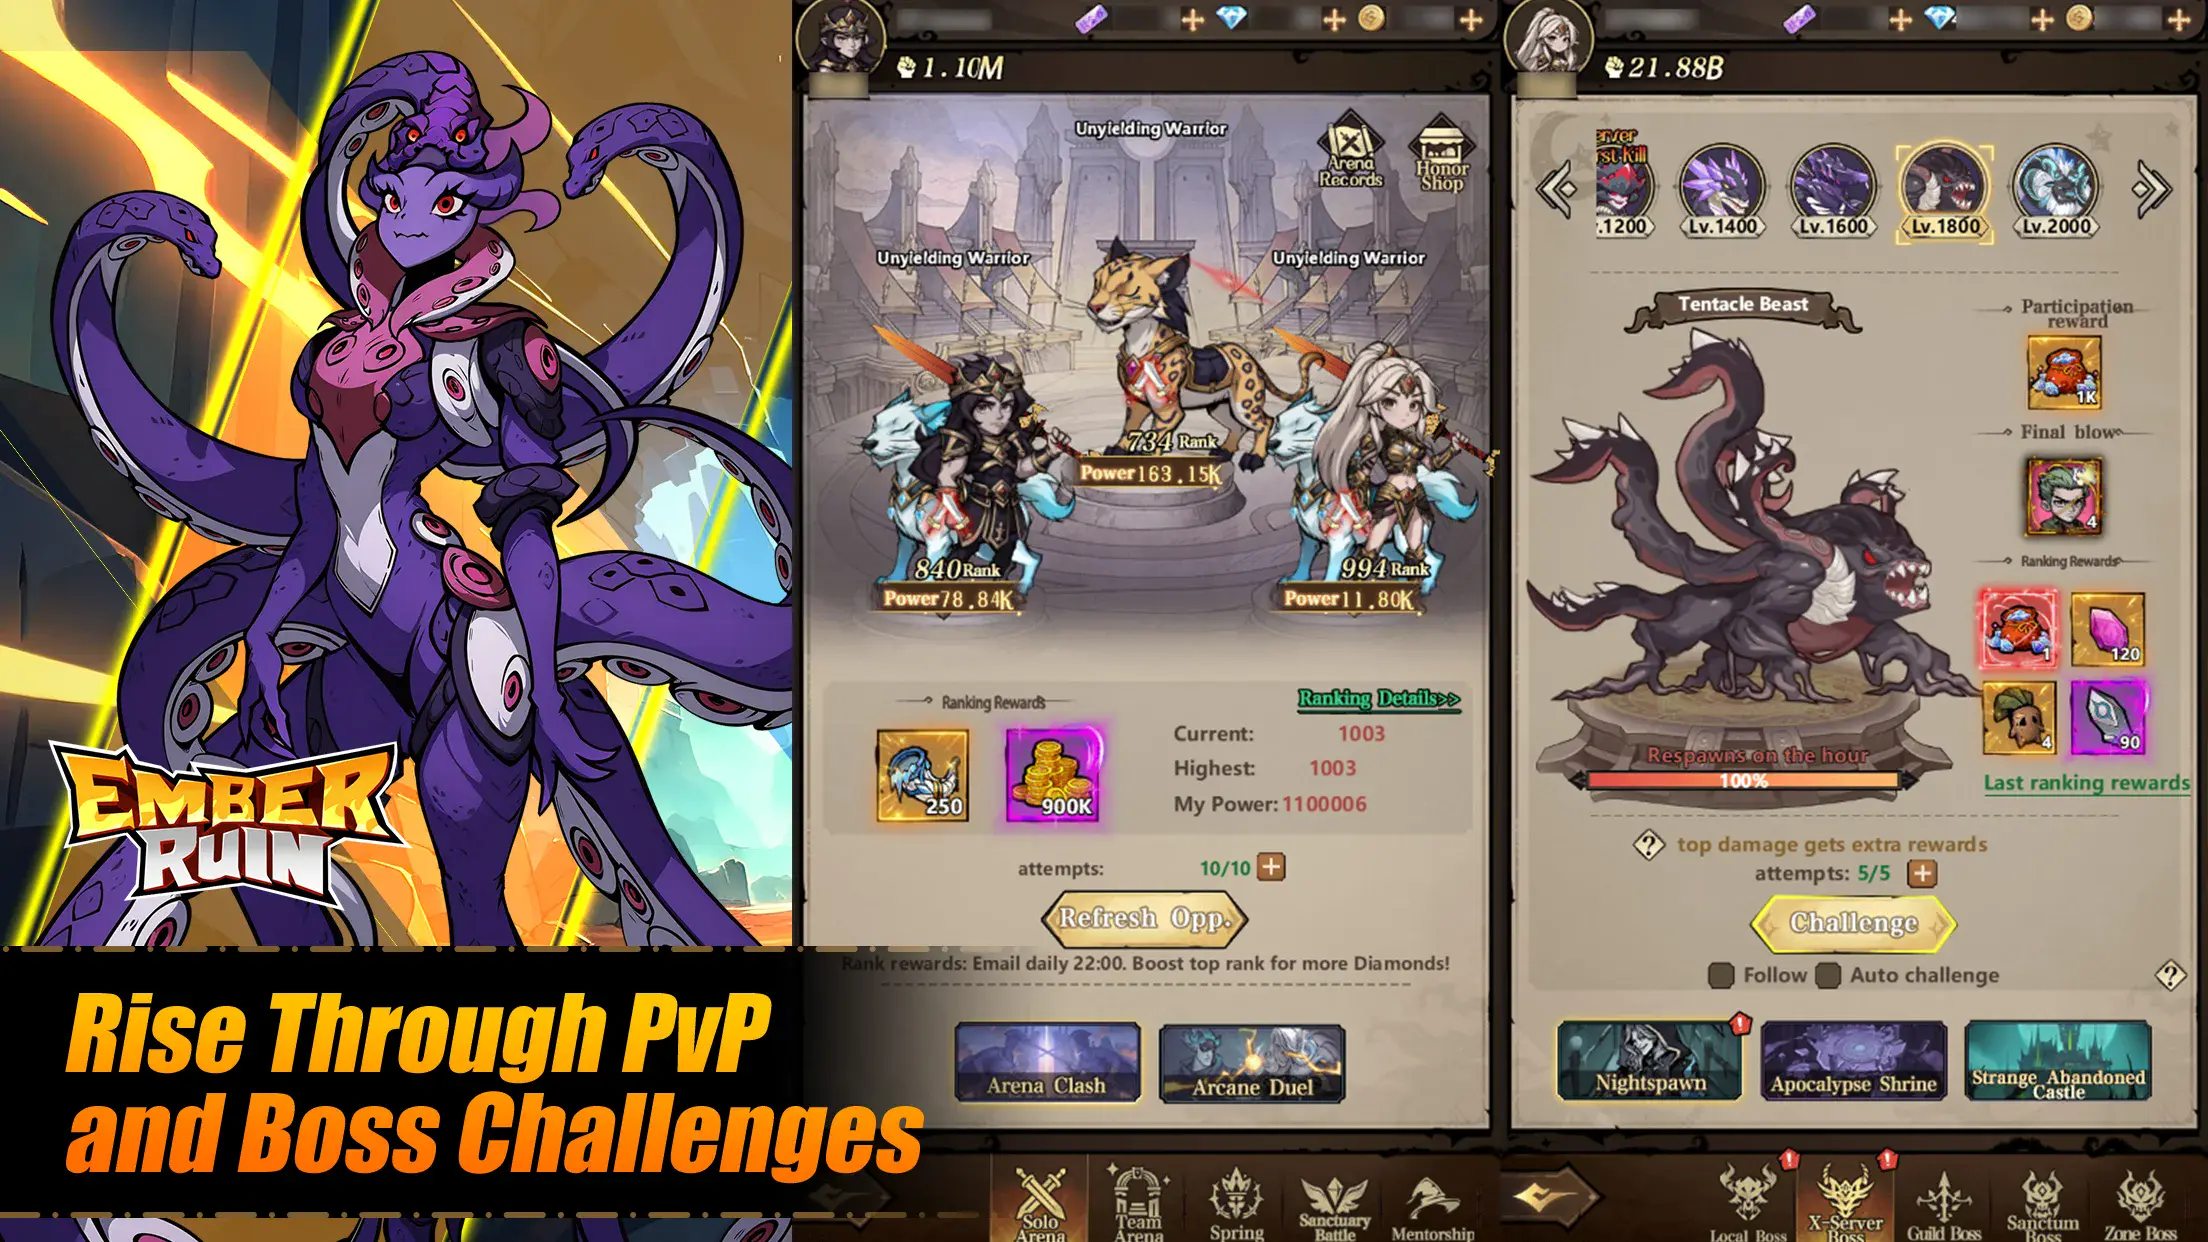
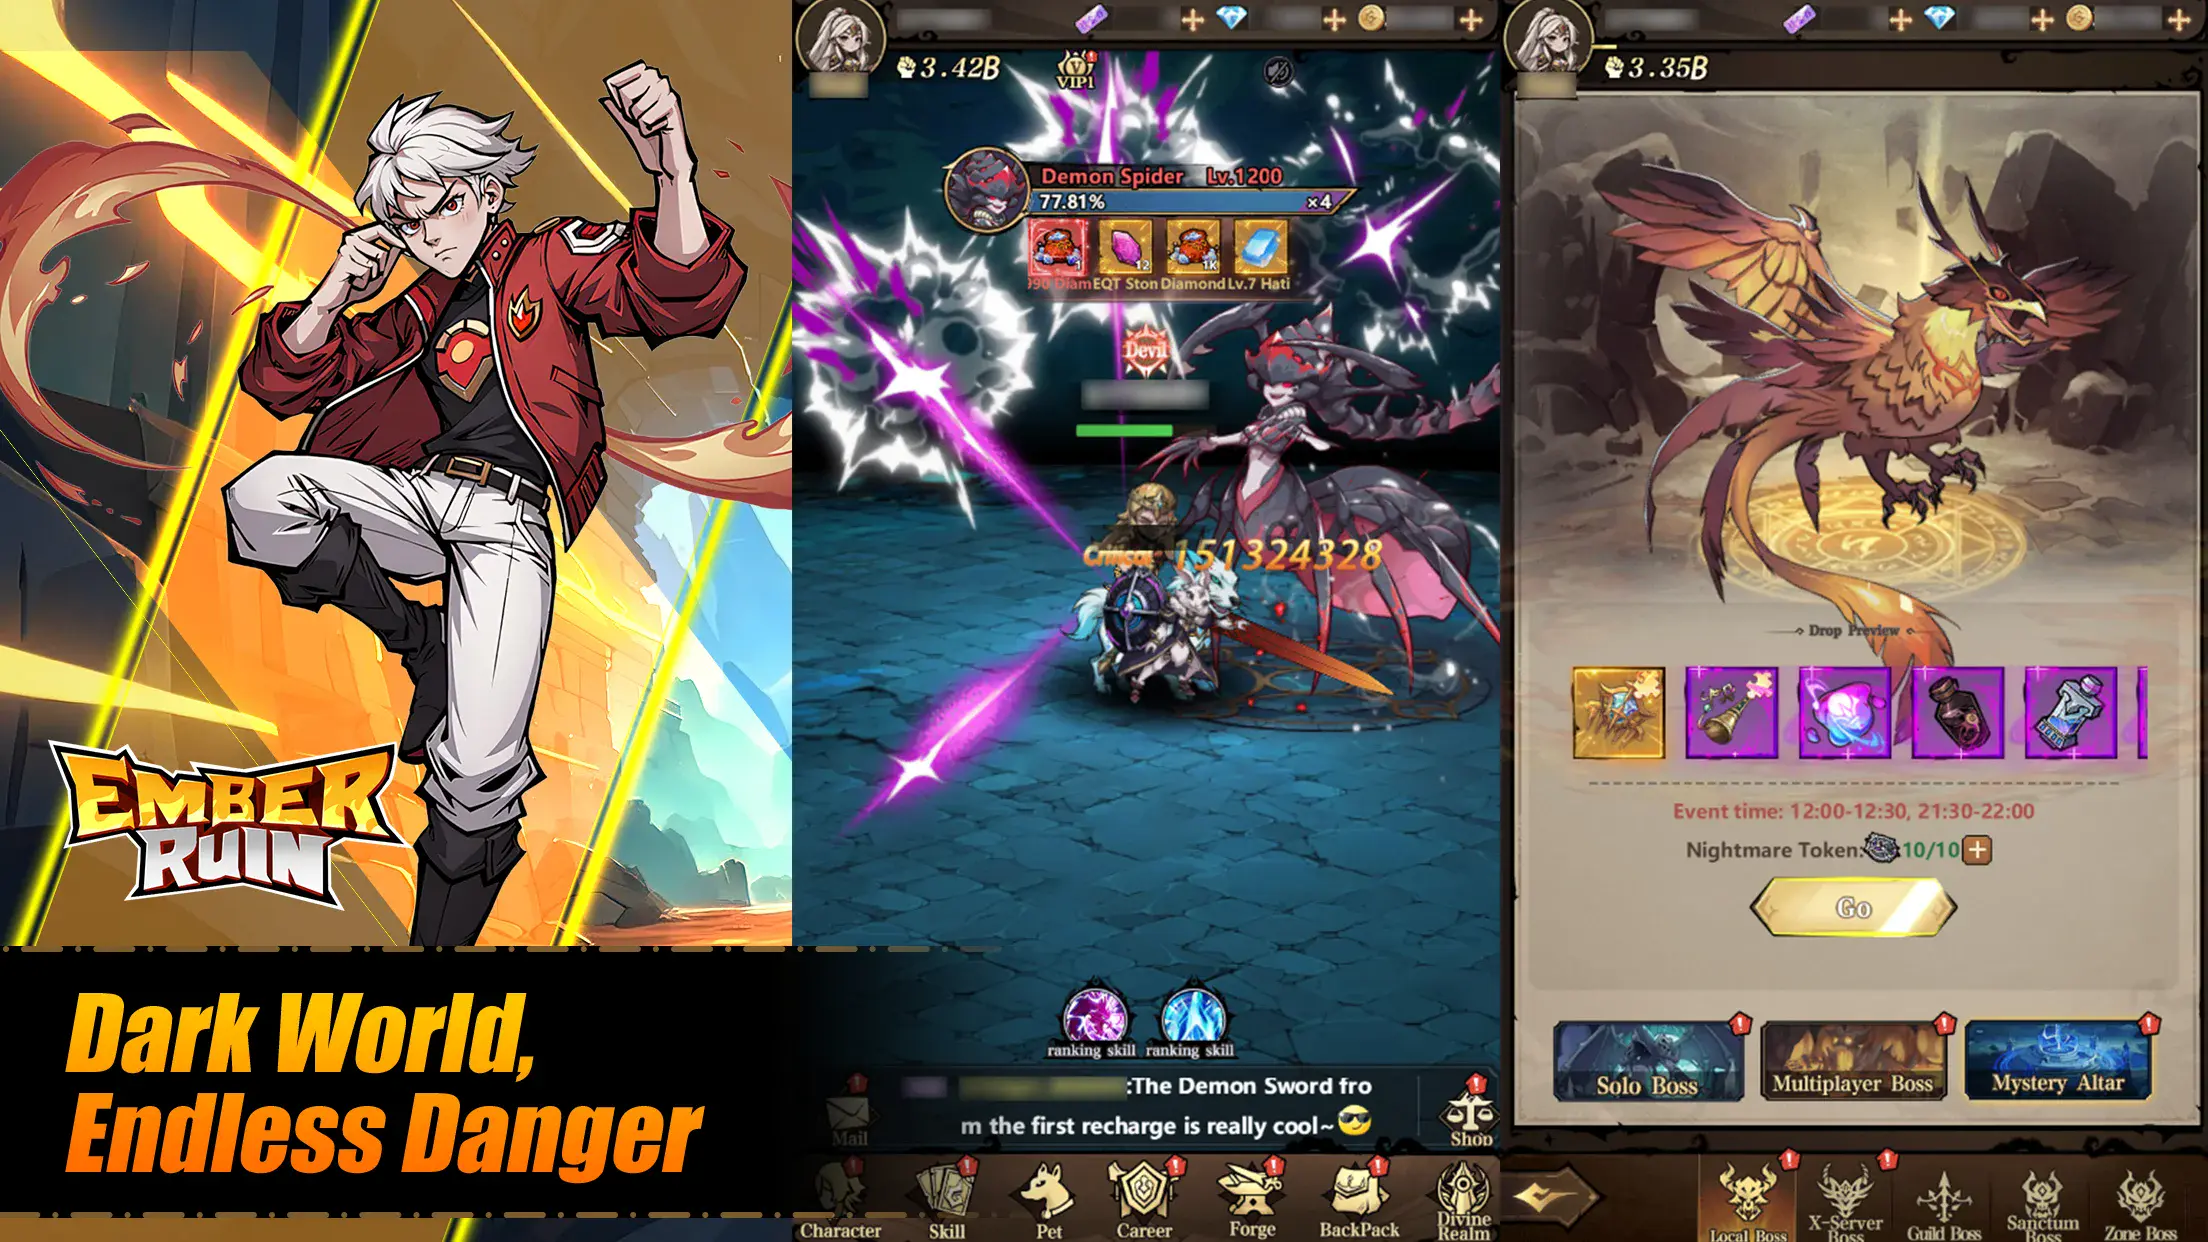
Boss content is the next major source. Solo Boss, Local Boss, and special event bosses display a reward bar that previews superior equipment, gems, and large bundles of diamonds for clearing specific stages or achieving first kills. Server‑First and All‑Player Welfare rewards are especially valuable because they give high‑tier gear and materials to everyone on the server once the first clear is achieved, even if you were not in the kill party yourself.
Feature unlock chains and novice objectives also hand out powerful items. As you unlock systems like Skills, Pet, Local Boss, Enhance, Realm, and cross‑server bosses, you receive diamond cards, upgrade stones, and gear fragments that accelerate your early gearing.

Managing Inventory and Smelting
Your backpack has separate tabs for items, equipment, magic stones, and relics, but the equipment section fills quickly as you farm. Once every slot is covered by at least green gear, most duplicate low‑tier items are better converted into long‑term resources rather than kept in storage.
The Smelt screen shows a furnace that processes selected equipment into smelt EXP, raising furnace level and granting flat HP and ATK bonuses for your account. By default it highlights low‑value boots, gloves, trousers, and accessories, and you can use Quick Smelt plus auto‑melting to periodically clear out junk without manual selection.
A good rule is to smelt excess green pieces as soon as you outgrow them and hold blue or purple items only if they are part of a set you intend to craft into better gear soon. This keeps your inventory manageable while steadily improving stats from the furnace, especially early when drops are frequent and cheap to replace.

Forging Evergreen and Azure Equipment
The Craft menu is where raw drops and materials become focused upgrades. Within T1 Equipment you can forge Evergreen pieces such as Evergreen Gloves by combining a base glove with a certain number of purple gem shards. The interface clearly shows the required material counts below the recipe, and a greyed‑out material icon indicates when you are still farming fragments or lower‑tier items.
Once Evergreen items are established, T2 Equipment introduces Azure versions like Azure Gloves, which require an Evergreen piece plus additional gems and serve as a major stat jump for that slot. Because gem costs increase sharply as you move into higher tiers, it is efficient to prioritize crafting Azure gear in your highest‑impact slots first, such as weapon and gloves, before filling out the rest of the set.
The craft menu also includes tabs for higher‑tier chaos equipment and special items, which you can explore later once you have a stable Evergreen or Azure foundation. For now, focus on consistently converting surplus materials into targeted Evergreen and Azure upgrades instead of spreading resources across many partial pieces.

Enhancing Equipment for Extra Stats
Even after you forge strong gear, enhancement offers another layer of growth. The Enhance screen arranges your equipment around a central magic circle, displaying the currently selected piece and its level, while the bottom panel lists total bonus HP and ATK from enhancements. Enhancing costs gold and star‑shaped materials that you earn from smelting, events, and quest rewards, and each upgrade step slightly increases key stats.
Quick Enhance automatically spends available resources across all eligible items, which is convenient but not always optimal if you are chasing specific breakpoints. When resources are tight, manually enhance your weapon, gloves, and main offensive slots first, since they provide the biggest contribution to damage and stage clear speed. Defensive pieces and accessories can be leveled later once offensive gear is in a comfortable place for your current chapter.

Crafting and Socketing Gems
Beyond equipment and enhancement, Ember Ruin lets you craft and use magic stones in the Gem Synthesis section under Craft. The Hati Gem line is a clear example: combining Lv.1 Hati Gems yields a Lv.2 Hati Stone, and the interface shows both the newly crafted stone and a visible increase in power once it is created. As you unlock more recipes, you can progress toward higher‑level Hati Gems and other specialized stones using the same synthesis logic.
These stones are then slotted into gear via magic‑stone or socket options, adding extra attack, HP, or other bonuses on top of your base equipment stats. Because each higher‑level stone requires many lower‑level components, it is best not to fill temporary early gear with expensive stones; instead, wait until you have crafted durable Evergreen or Azure items and then invest your best gems there for long‑term gains.

Pets, Mounts, and Related Gear Systems
Pets and mounts act like secondary pieces of gear that travel with your character and appear in both combat and dedicated Pet or Mount menus. The pet screen for companions such as the Spirit Rabbit shows level, HP, attack, defense, and an EXP pool, plus Quick Train and Upgrade options that consume pet shards and special items. Improving pets directly increases your total power and can also add useful combat effects, helping you handle bosses like the One‑Eyed Demon, Tentacle Beast, and Thunder Dragon more safely.
Mounts provide similar value by granting stats and movement or skill effects, and you often find mount‑related rewards mixed into boss drops and stage clear chests. Since pet and mount upgrades scale with your gear, investing in at least one strong companion is recommended once you have basic Evergreen or Azure equipment in place.

Early‑game Gear Priorities and Tips
In the opening hours, accept almost every “Better equipment” suggestion and focus simply on filling every slot with green or better gear, as the power from complete coverage outweighs micromanaging single stats. As your backpack fills up, begin regular smelt sessions to convert low‑tier duplicates into furnace levels, while using your first gem drops and hero shards to craft Evergreen Gloves and other T1 pieces in a few key slots.
Once you reach stable Evergreen coverage, shift your attention to Azure items and gem synthesis, using bosses and feature‑unlock quests as your main farming targets for gems, fragments, and higher‑tier drops. With a focused set of Azure gear, enhanced levels, and a couple of leveled pets or mounts, your power will rise fast enough to keep up with Local Boss, Realm, and other late‑game systems.

A strong gear foundation is what turns Ember Ruin from a simple idle RPG into a game where your decisions truly matter. By learning how to farm and smelt surplus items, forge Evergreen and Azure sets, enhance key slots, invest in the right gems, and develop at least one reliable pet or mount, you create a stable progression path that keeps your power ahead of new stages and bosses.
Apply these principles as you play and you will find each upgrade session noticeably smoother, letting you focus more on tackling challenging modes and less on wondering where your stats should come from. For the best gaming experience, play Ember Ruin on BlueStacks!