How to Use BlueStacks 5 Multi-Instance Sync to Easily Develop Multiple Cities in Rise of Kingdoms


Strategy war games in the mobile gaming industry are some of the most challenging and popular titles in the platform. This isn’t because they’re difficult or complex, but rather because their gameplay elements perfectly combine construction, exploration, development, and warfare, into an awesome blend of fun, strategic action. Plus, they also offer lots of team gameplay as you can group up with other players to create alliances and collaborate in fighting against other alliances in PvP, as well as for engaging against tough NPC enemies in the world map.
Rise of Kingdoms is one of the most iconic titles in the genre, offering all the elements mentioned above and constantly innovating by adding new game modes, fun community events, and other interesting elements to the mix. However, like in most strategy war games, the best way to progress is by constantly monitoring your town and sending troops out to gather resources in order to continuously develop your town. With that in mind, and in order to speed up the process, many players opt to create several “Farm” towns, which only exist to funnel resources into the main base.
While having Farm towns in strategy war games like Rise of Kingdom can be very useful, they’re also a bit cumbersome to manage, considering that you need to constantly swap back and forth between your different accounts. However, by playing Rise of Kingdoms on PC with BlueStacks 5, you can not only have all your towns open simultaneously and on one screen, but you can also streamline your efforts by controlling and developing all of them at the same time using the Multi-Instance Sync feature.
In this article, we’re going to show you how to access and use the Multi-Instance Sync feature to expedite your progress in Rise of Kingdoms.
How to Activate and Use the Instance Sync Feature in Rise of Kingdoms
Before you’re able to access the Sync tool, you will first need to create several instances of BlueStacks 5 which is something you’ll always want to do when it comes to playing Rise of Kingdoms on PC with multiple accounts, regardless. Follow these simple steps to get started:
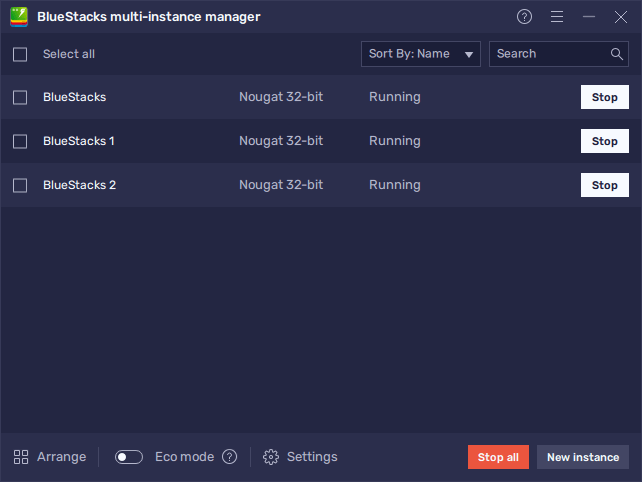
- Run BlueStacks 5 and open the Instance Manager by pressing Ctrl + Shift + 8.
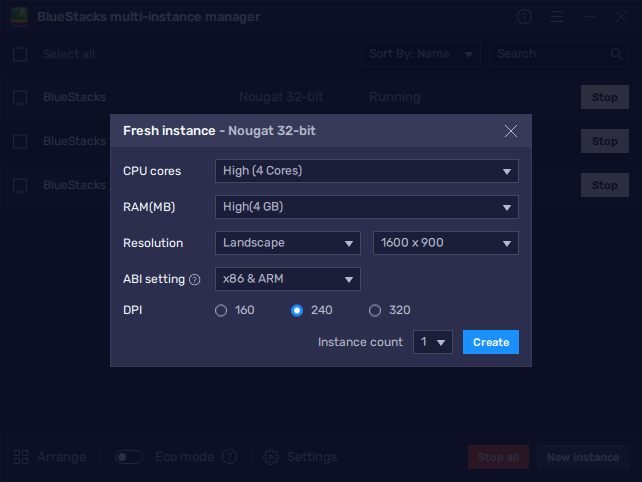
- Click on “New instance” on the bottom right, and fill out the dialog boxes and fields to assign sufficient resources to the new instances. Repeat this step to create as many instances as you want.
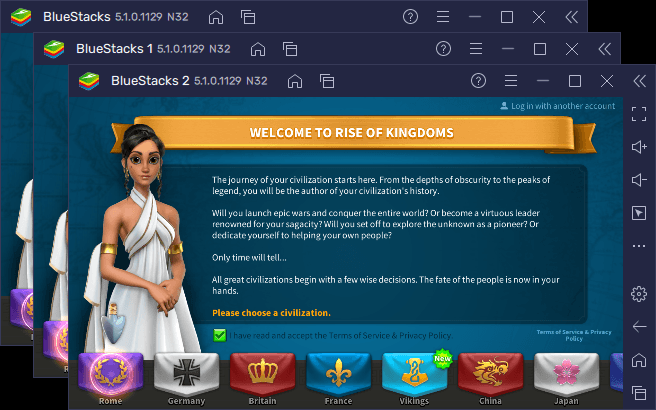
- Assign a unique Google account to each of the instances you created. It’s important that the accounts be unique, since Rise of Kingdoms doesn’t allow having multiple sessions on the same account at the same time.
- Download and launch Rise of Kingdoms on each of your active instances.
Once you’ve launched Rise of Kingdoms on each of your instances, wait until all your windows are on the main starting screen, and then press Ctrl + Shift + 9 to open the Instance Sync tool. In this new dialog box, tick the boxes corresponding to the instances you wish to synchronize, or simply click on “Select all”, followed by clicking on “Sync.
Once activated, the Instance Sync feature will make it so that everything you do on your main window will be replicated on all the selected instances. This means that, by playing as you normally would on your main instance, you will also be playing on your secondary windows. In this sense, you can easily progress and develop multiple cities, simply by playing on your main account.
The Multi-Instance Sync feature is pivotal for playing war games like Rise of Kingdoms. And now that the tool is arriving in BlueStacks 5 with the 5.1 update, you’ll now be able to unleash the full might of your armies upon your unsuspecting enemies.