How to Play Avatar Life: My World on PC or Mac with BlueStacks


Have you ever wanted to create your own digital avatar? If so, then now is the time to try out Avatar Life: My World, which allows you to explore and experience and cute and charming 2D world where you can be anyone you want! Join in on an awesome adventure where you explore beautiful locations, towns, and cities and meet plenty of friendly characters.

Avatar Life: My World presents you with a large open world that is packed with possibilities. Not only can you create and customize adorable characters, but you can also design your own city and truly create your own world. If you are into these kinds of games, then you might also want to try out a very similar game called Avatar World: City Life and Sims Freeplay .
Enter a magnificent world and start an Avatar life now by installing and playing Avatar Life: My World on PC or Mac with BlueStacks. In this guide, we’ll show you what you need to get the game running and also the steps to install it.
BlueStacks System Requirements
To get the best experience in playing AVATAR LIFE: MY WORLD on a Windows PC, you must install and play the game with BlueStacks 5 using an Android 11 OS instance. You can check out the minimum and recommended system requirements for Windows PCs here. You do not need an expensive and powerful gaming computer to run games on BlueStacks 5 unless you want demanding features such as 120 FPS. At minimum, your PC must be running Microsoft Windows 7 or above. Additionally, you can also run BlueStacks 5 on a virtual machine using software like VMWare, VirtualBox, or Microsoft Virtual PC.
Things are different when it comes to macOS systems. As of now, macOS only supports BlueStacks 4. More importantly, macOS systems older than 2014, systems that run the new M1 and M2 chips, and systems that run macOS 12 (Monterey) and macOS 13 (Ventura) do not support BlueStacks 4. If your macOS system can run BlueStacks 4, check out the system requirements here.
If you own systems that do not support BlueStacks 4, you can still experience gaming on BlueStacks using BlueStacks X, which allows you to play Android games on the cloud. BlueStacks X is designed for macOS systems running M1/M2 chips. However, there is still a wide range of compatibility with other macOS systems. Check out the system requirements for BlueStacks X here.
Once you have verified that your PC or Mac can run BlueStacks, it’s now time to learn how to install AVATAR LIFE: MY WORLD!
How to Install AVATAR LIFE: MY WORLD
- Download and install BlueStacks on your PC.
- Complete Google Sign-in to access the Play Store or do it later.
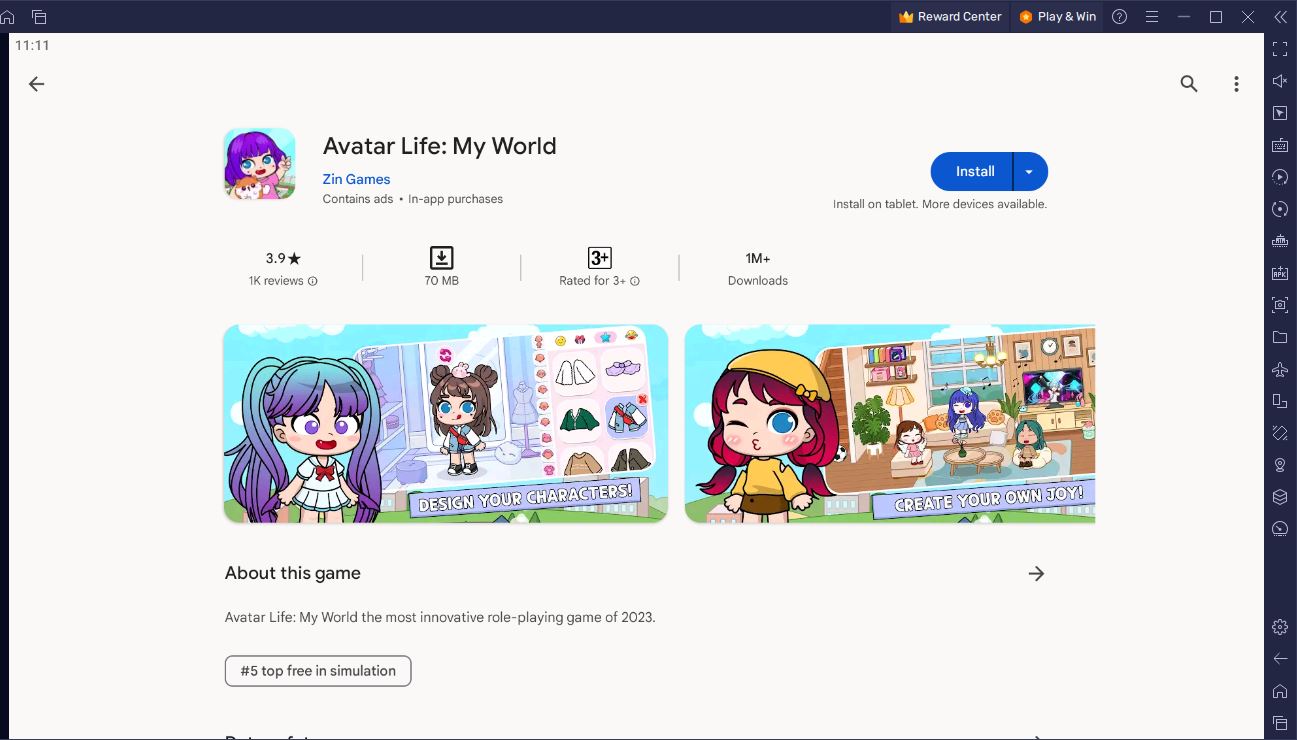
- Look for AVATAR LIFE: MY WORLD in the search bar at the top-right corner.
- Click to install AVATAR LIFE: MY WORLD from the search results.
- Complete Google Sign-in (if you skipped step 2) to install AVATAR LIFE: MY WORLD .
- Click the AVATAR LIFE: MY WORLD icon on the home screen to start playing.
Game Features
Avatar Life: My World puts you into an open world where you can do pretty much anything. You can create and customize your own character, make them do activities, and even build your own city with a diverse set of facilities. In general, it is really just creating your own cute 2D world.
You have plenty of freedom in customization. You can create and customize your avatar with a myriad of skins, tons of colorful and cute hairstyles and fashionable outfits, and beautiful faces. The game boasts up to 3000 cosmetic items you can use for your character so there are plenty of possibilities to create an avatar that suits your preferences. Aside from cosmetics, you must also take care of your avatar by making them eat delicious food and bathe regularly. Let them live a fun life by making them go to karaokes, the gym, and the movie theater.
House and city building are also important aspects in Avatar Life: My World. You can customize your home to give your character their dream house and even go beyond that and customize the city. There are plenty of facilities that you can build to design an adorable city. Additionally, there are other locations you can explore like towns, parks, amusement parks, and more! Make sure to explore the city often to participate in special events that give out special rewards.
Install and play Avatar Life: My World now on PC or Mac with BlueStacks and start building an amazing lifestyle and city inside the Avatar World. You can take advantage of features like macros to make your gameplay more convenient and the UTC time converter to keep synced with in-game events.