Optimizing Reverse: 1999 on PC with our BlueStacks Tools and Features


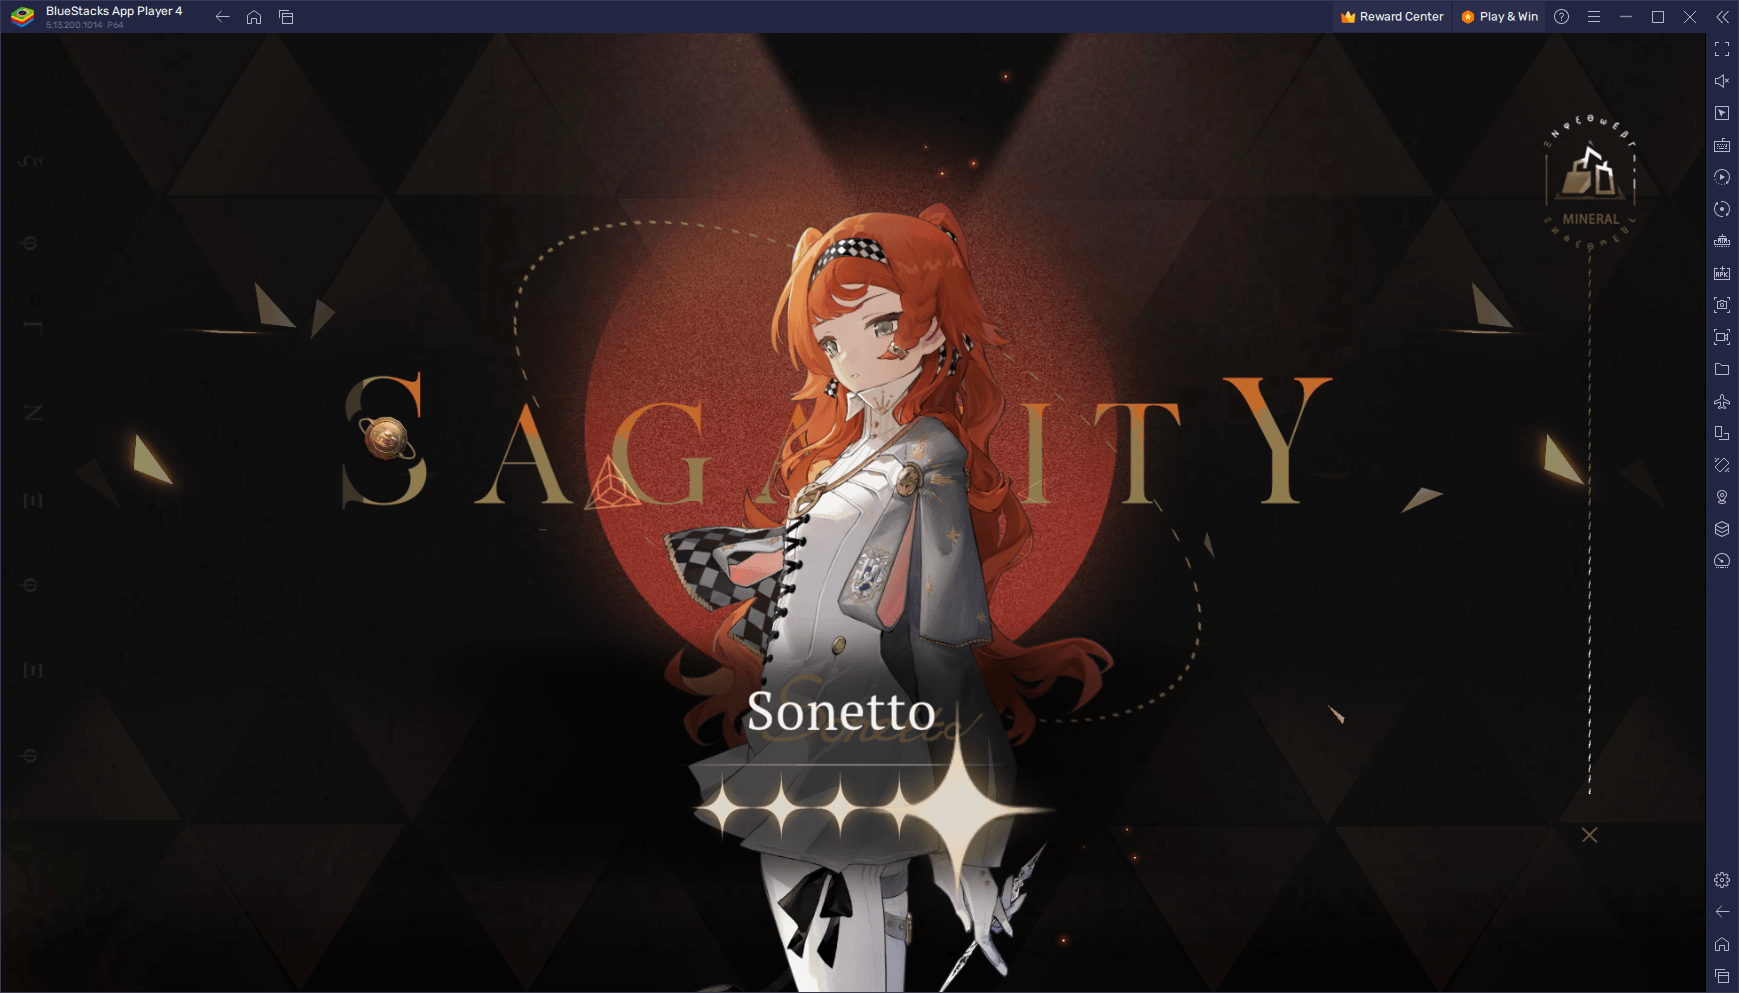
In the ever-evolving landscape of mobile gaming, Reverse: 1999 emerges as a shining star, setting a new standard for excellence. This gacha RPG takes players on a time-traveling adventure through the 20th century, with its stunning visuals, captivating narrative, and strategic gameplay. Developed by Bluepoch, this game not only redefines the genre but also reimagines the boundaries of what’s possible on the mobile gaming platform.
What makes Reverse: 1999 truly remarkable is its commitment to quality in every aspect. From the meticulously crafted art that blends retro and modern aesthetics to the full English voice acting with authentic accents that immerses players in ages past, this game stands out. However, its brilliance is magnified when experienced on a larger screen with the added capabilities of BlueStacks, our premier Android app player for PC. In this guide, we embark on a journey to unveil the hidden treasures of Reverse: 1999 by configuring and optimizing the game with the arsenal of tools and features that BlueStacks provides.
REVERSE 1999 CONTEST: WIN 3000+ GIFTS
Join the Reverse: 1999 code giveaway and unlock a treasure trove of in-game resources!
In the following sections, we will delve into the specifics of how you can harness the power of BlueStacks to enhance your Reverse: 1999 gaming experience, taking full advantage of this exceptional game’s potential.
Enjoy the Best Graphics without Any of the Drawbacks
Reverse: 1999 is undoubtedly a visual masterpiece, boasting an art style that seamlessly blends a highly stylized aesthetic with meticulous attention to detail. The result is a game world that is not just visually appealing but also profoundly immersive. However, to truly appreciate the breathtaking graphics that this game has to offer, you’d typically require a high-end mobile device. Even with such a device, you might still encounter some common drawbacks, such as overheating and rapid battery drainage during extended play sessions.
Fortunately, with BlueStacks, you can enjoy Reverse: 1999’s stunning visuals without any of these hassles. BlueStacks, the premier Android emulator for PC, comes equipped with features and settings that allow you to optimize your gaming experience, ensuring smooth performance and superior graphics.
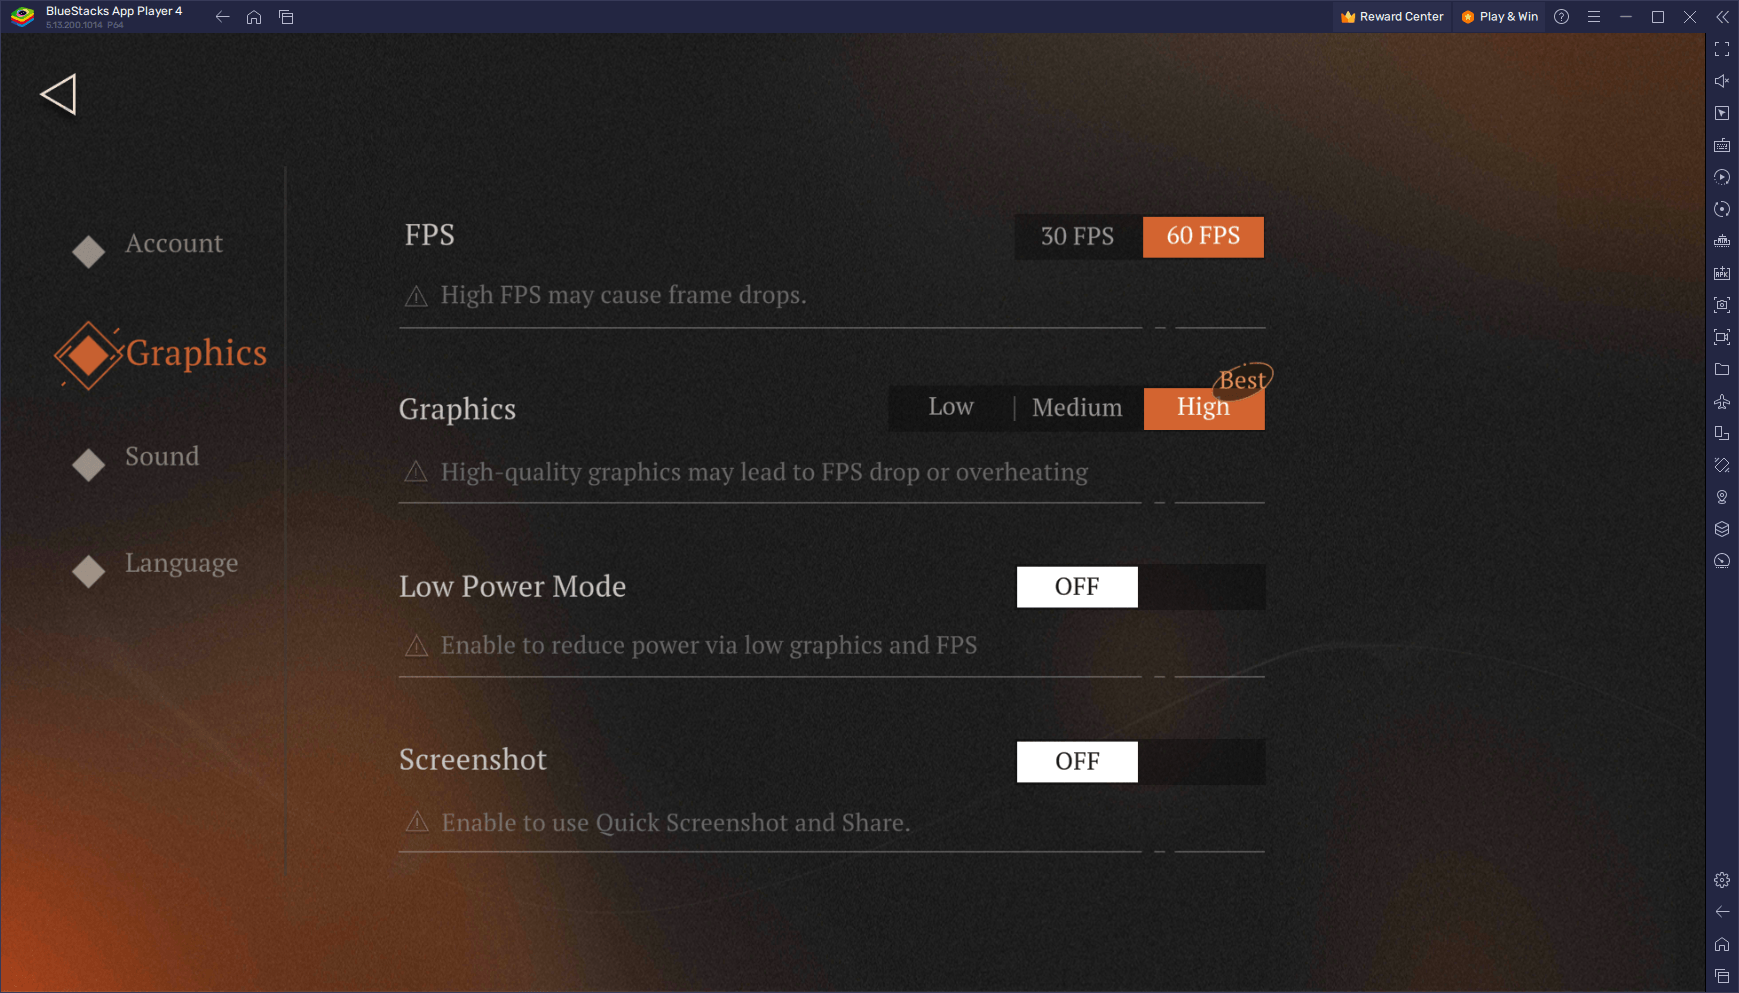
Here’s a step-by-step guide on how to configure BlueStacks to unlock the full visual potential of Reverse: 1999:
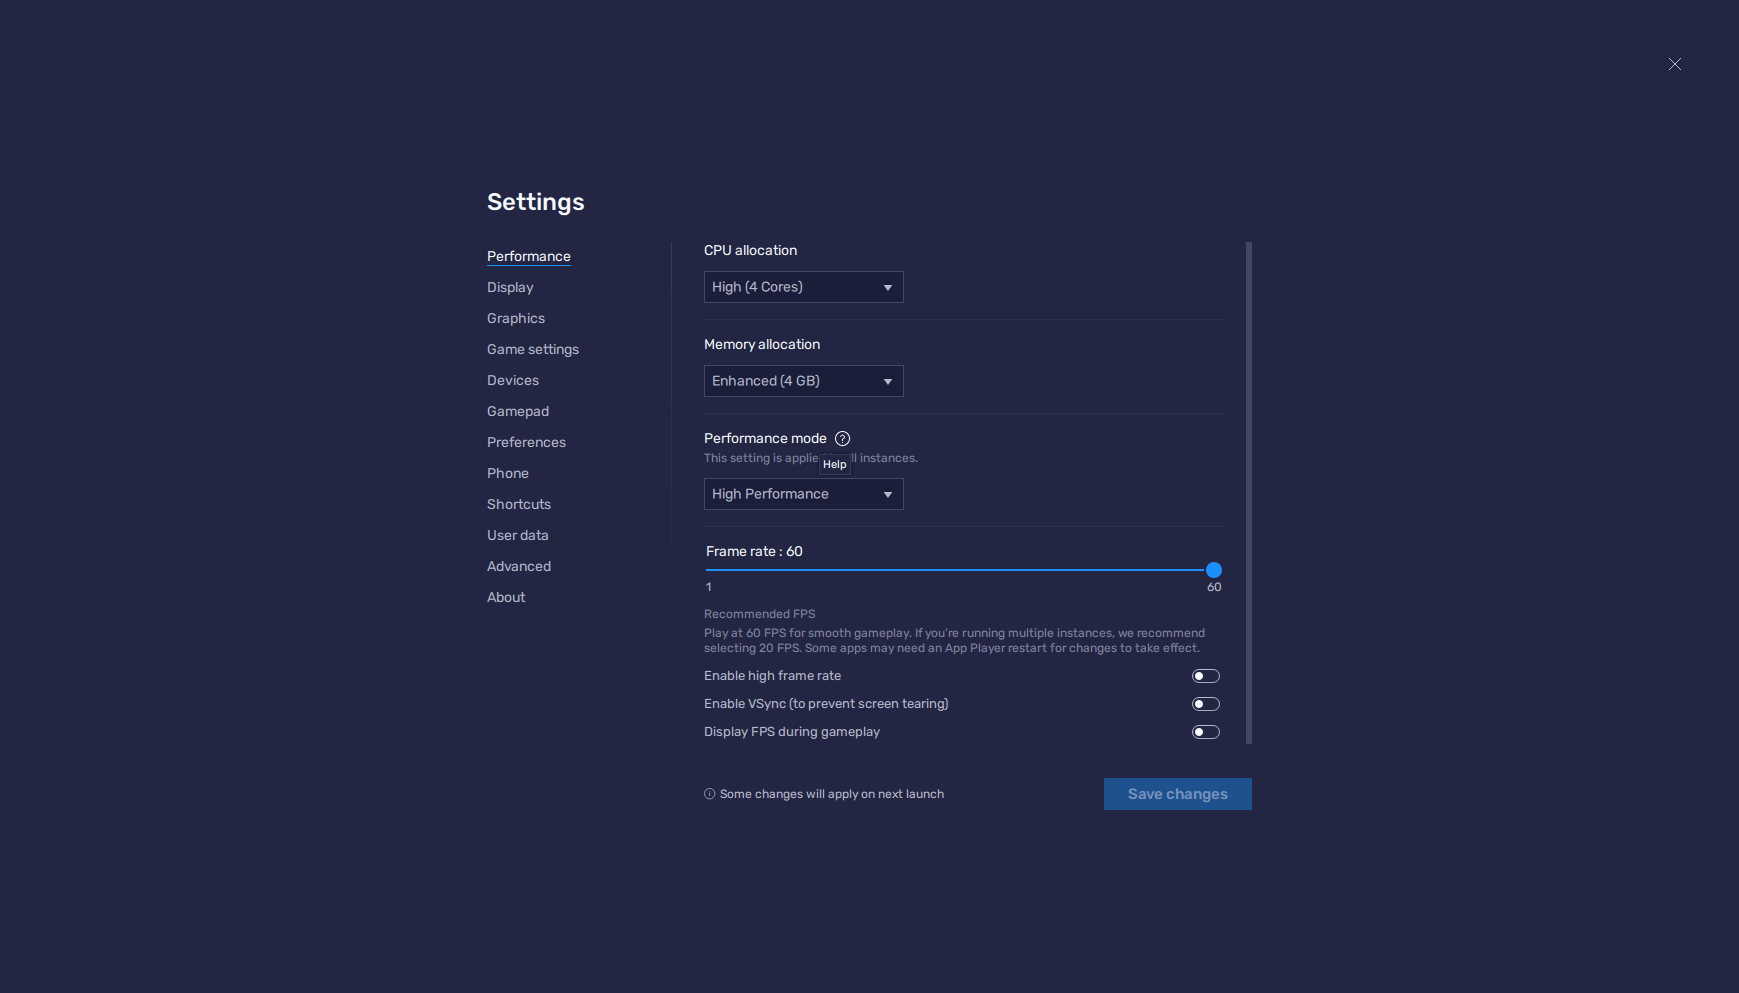
- In the BlueStacks settings, go to the “Performance” tab.
- Check that your emulator is using at least 4 GB of RAM, 4 CPU cores, and that the Performance mode is set to “High performance”.
- Set the FPS slider underneath to at least 60 FPS, and finish by clicking on “Save changes” on the bottom right.
- Launch the game and head to the in-game settings.
- Set your graphical options to the highest settings.
By following these straightforward steps, you can optimize BlueStacks for Reverse: 1999, allowing you to savor every detail of the game’s remarkable art style without the performance limitations that mobile devices often impose. Get ready to immerse yourself in the visual splendor of this epic journey through time.
Simplify Menu Navigation With Keyboard Shortcuts
While Reverse: 1999’s thrilling combat sequences involve clicking and dragging cards across the screen, much of your time outside of combat will be spent navigating a multitude of menus and screens. This can sometimes be a tedious process, especially if you’re accustomed to the ease of keyboard navigation on a PC. Fortunately, with BlueStacks’ Keymapping Tool, you can transform your gaming experience by creating customized control schemes that allow you to effortlessly navigate the game’s menus using your keyboard, eliminating the need for excessive clicking.
To access this tool, press Ctrl + Shift + A in-game, summoning the Advanced Editor screen. Here, you can visualize your current keybindings, effortlessly modify them by selecting a binding and pressing the desired keyboard button, or delete them with a simple click on the “X” that appears when you hover over a binding. What’s more, you can expand your control scheme by dragging and dropping functions from the panel on the right, assigning them bindings that suit your preferences. When you’re satisfied with your custom control scheme, a single click on the “Save” button in the lower right corner will put your tweaks into action.
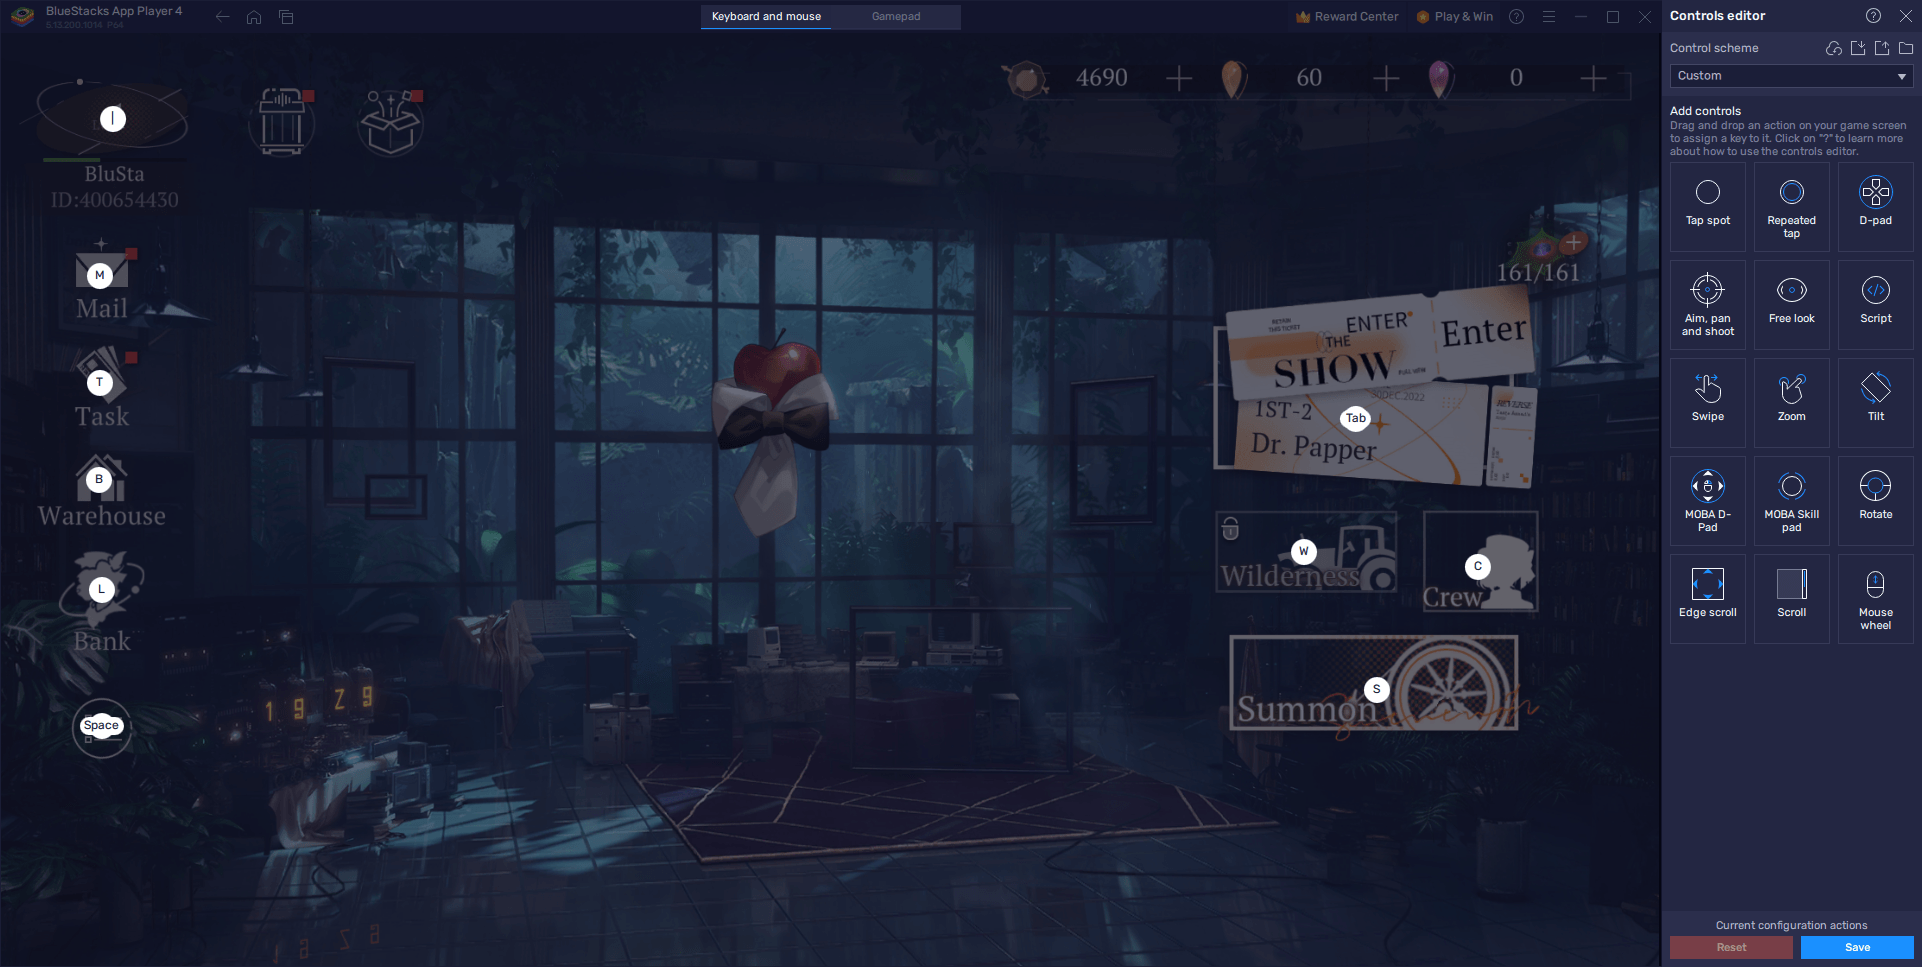
With this newfound ability to create a personalized control scheme, you can bid farewell to excessive clicking and embrace the convenience of keyboard shortcuts. Navigating the game’s myriad menus and screens will become second nature, allowing you to focus on the epic journey that Reverse: 1999 has to offer.
Streamline and Expedite Rerolling With the Instance Manager
In the world of gacha RPGs, securing top-tier characters early on can make all the difference in your journey. Fortunately, Reverse: 1999, like many other games in this genre, allows players to reroll to gain a significant head start. If you’re playing on PC with BlueStacks, the Instance Manager feature is your secret weapon for accelerating this process, enabling you to reroll on multiple accounts simultaneously.
The Instance Manager is invaluable because it empowers players to effectively operate multiple accounts concurrently. This versatility allows you to experiment with diverse strategies and team compositions to discover the optimal combination. Moreover, it proves indispensable for rerolling in games like Reverse: 1999, as you can reroll across multiple instances concurrently, potentially slashing the time needed for this process.
To harness the power of the Instance Manager, you just need to follow a simple procedure: While using BlueStacks, press Ctrl + Shift + 8 to bring up the instance panel. Here, you’ll find a list of your current instances. In this panel, you can launch and close instances, adjust their settings by clicking the gear icons next to each, and remove any instances you no longer require. To create additional instances, click the “+ Instance” button in the lower left corner, but remember to consider your system’s RAM and CPU limitations, as the more instances you’re running at any given moment, the more resources you will require. Once all your instances are up and running, follow the PC setup guide for Reverse: 1999 on each of them to install the game. With this setup, you can simultaneously engage in gameplay across multiple accounts.
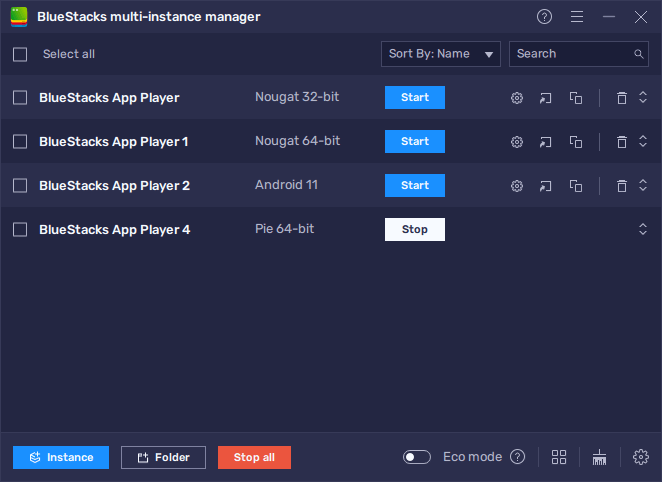
By utilizing the Instance Manager, you gain a remarkable advantage in Reverse: 1999. Whether you’re honing your strategies or seeking coveted characters through rerolls, this tool allows you to efficiently manage multiple accounts, enhancing your overall gaming experience on BlueStacks.
With this comprehensive guide, you’re well on your way to mastering Reverse: 1999 while harnessing the full potential of BlueStacks, your trusted Android app player for PC. We’ve covered essential aspects, from optimizing graphics and simplifying menu navigation with keyboard shortcuts to streamlining the rerolling process using the Instance Manager.
REVERSE 1999 CONTEST: WIN 3000+ GIFTS
As you embark on your epic time-traveling adventure through the 20th century in Reverse: 1999, remember that BlueStacks is your faithful companion, enhancing your gaming experience every step of the way. Enjoy stunning visuals, streamlined gameplay, and efficient navigation, all within the comfort of your PC.
Now, armed with these tools and insights, it’s time to immerse yourself fully in the captivating world of Reverse: 1999. May your journey be filled with thrilling battles, unforgettable characters, and countless victories. Happy gaming!