DIY Joystick

DIY Joystick

Simulation

| CrazyLabs LTD

Play on PC with BlueStacks – the Android Gaming Platform, trusted by 500M+ gamers.

Play on PC with BlueStacks or from our cloud

  • Overview
  • Game Features
  • How to Play

Page Modified On: April 25, 2022

Play DIY Joystick on PC

DIY Joystick is a Simulation Game developed by CrazyLabs. BlueStacks app player is the best platform to play this Android Game on your PC or Mac for an immersive Android experience.


Download DIY Joystick on PC with BlueStacks and start a business in custom controller crafting!


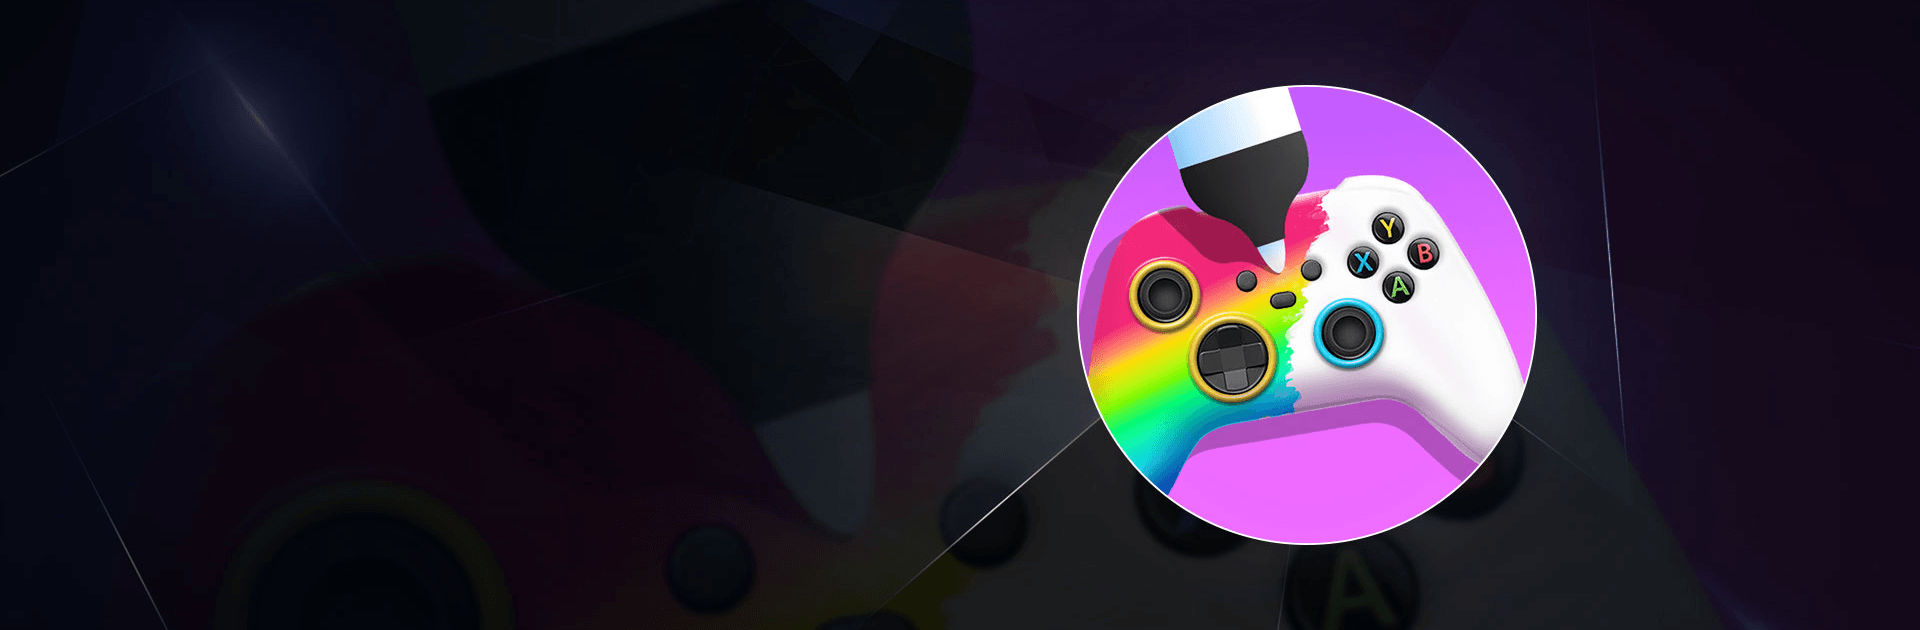
Your clients come to you to create one-of-a-kind console controllers. Let your creative juices flow as you utilize a number of artistic tools to give these joysticks a bit of pizzazz, from paints and stencils to stickers and marble dip!


You are an artist and video game controllers are you canvas. Modify and customize recognizable controllers from your favorite home video game consoles and arcades: controllers, gamepads, light guns, headphones, VR headsets, portable console controllers, and more!


Download DIY Joystick on PC with BlueStacks and create the ultimate gamer gear!

You can also Play DIY Joystick in your browser on your PC or mobile without downloading. Click and Play instantly!

Game Features

Enhancements

  • Macros
  • Multi Instance
  • Multi Instance Sync
  • Script
  • Enhancements

Macros

Automate the predictable in DIY Joystick and transform your gameplay with Macros. Get access to inventive Macros in the BlueStacks Macro Community

Multi Instance

Play DIY Joystick on one window. And chat with your friend on the other. Press CTRL + Shift + 8 to open the Multi-Instance Manager. And start creating fresh instances or clone an existing one.

Multi Instance Sync

Play DIY Joystick with the power of Multi-Instance Sync. Replicate what you are doing on the main instance on all other instances. Level up faster, play more.

Script

Script your way to gaming glory in DIY Joystick with BlueStacks Script. Write and run a set of commands to automate repeated tasks. Trigger the command by assigning it to any key.
Read More

How to Download and Play DIY Joystick on PC

  • Download and install BlueStacks on your PC

  • Complete Google sign-in to access the Play Store, or do it later

  • Look for DIY Joystick in the search bar at the top right corner

  • Click to install DIY Joystick from the search results

  • Complete Google sign-in (if you skipped step 2) to install DIY Joystick

  • Click the DIY Joystick icon on the home screen to start playing

Watch Video

Download BlueStacks, the incredible app player that lets you run Android games and apps on your PC. Enjoy a slew of amazing features that will help you crush your opponents and farm faster than ever before!

Play with a true gamer’s device with the Advanced Keymapping feature in BlueStacks and enjoy the precision and speed of your mouse, keyboard, or gamepad! Use the built-in control scheme to jump right into the action, or craft a custom layout with the simple drag-and-drop interface.

Unleash deadly combos and execute intricate sequences with a press of a button. With Macros you can record your input sequence and assign it to a key that you can press for instant, perfect execution.

Kickstart your career as a content creator with high-quality video game footage. BlueStacks lets you hit record to store your gameplay as a standard format video that you can edit and share with friends and family!

With BlueStacks, you’ll be able to run all of your favorite apps on your computer. A single PC may run Multiple Instances of the same game without having to reload or decache!

With BlueStacks 5, it’s easier and lighter than ever to run multiple copies of your favorite Android titles. The Instance Manager has been reworked so that each instance consumes less RAM and CPU than in prior versions. More instances are now possible than ever before.

BlueStacks requires a PC or Mac with at least 4GB of RAM. Now supports simultaneous 32- and 64-bit apps.

Minimum System Requirements

With BlueStacks 5, you can get started on a PC that fulfills the following requirements.

  • Operating System

    Microsoft Windows 7 or above

  • Processor

    Intel or AMD Processor

  • RAM

    at least 4GB

  • HDD

    5GB Free Disk Space

Note:

* You must be an Administrator on your PC. Up to date graphics drivers from Microsoft or the chipset vendor.

DIY Joystick - FAQs

  • How to play DIY Joystick on Windows PC & Mac?

    Play DIY Joystick on your PC or Mac by following these simple steps.

    • Click on 'Play DIY Joystick on PC’ to download BlueStacks
    • Install it and log-in to Google Play Store
    • Launch and play the game.
  • Why is BlueStacks the fastest and safest platform to play games on PC?

    BlueStacks respects your privacy and is always safe and secure to use. It does not carry any malware, spyware, or any sort of additional software that could harm your PC.

    It is engineered to optimize speed and performance for a seamless gaming experience.

  • What are DIY Joystick PC requirements?

    Minimum requirement to run DIY Joystick on your PC

    • OS: Microsoft Windows 7 and above
    • Processor: Intel or AMD Processor
    • RAM: Your PC must have at least 2GB of RAM. (Note that having 2GB or more disk space is not a substitute for RAM)
    • HDD: 5GB Free Disk Space.
    • You must be an Administrator on your PC.