Top Reasons BlueStacks Is the #1 Emulator for Playing Destiny Rising on PC


For players who love competitive consistency, smooth framerates, and precise controls, BlueStacks makes Destiny: Rising play at its best on PC. The sci-fi shooter brings first- and third-person action, fast-paced PvP, and deep gacha progression to mobile—but on a bigger screen with BlueStacks, the experience feels far more intuitive. Here’s why.
Recommended by NetEase (In-game)
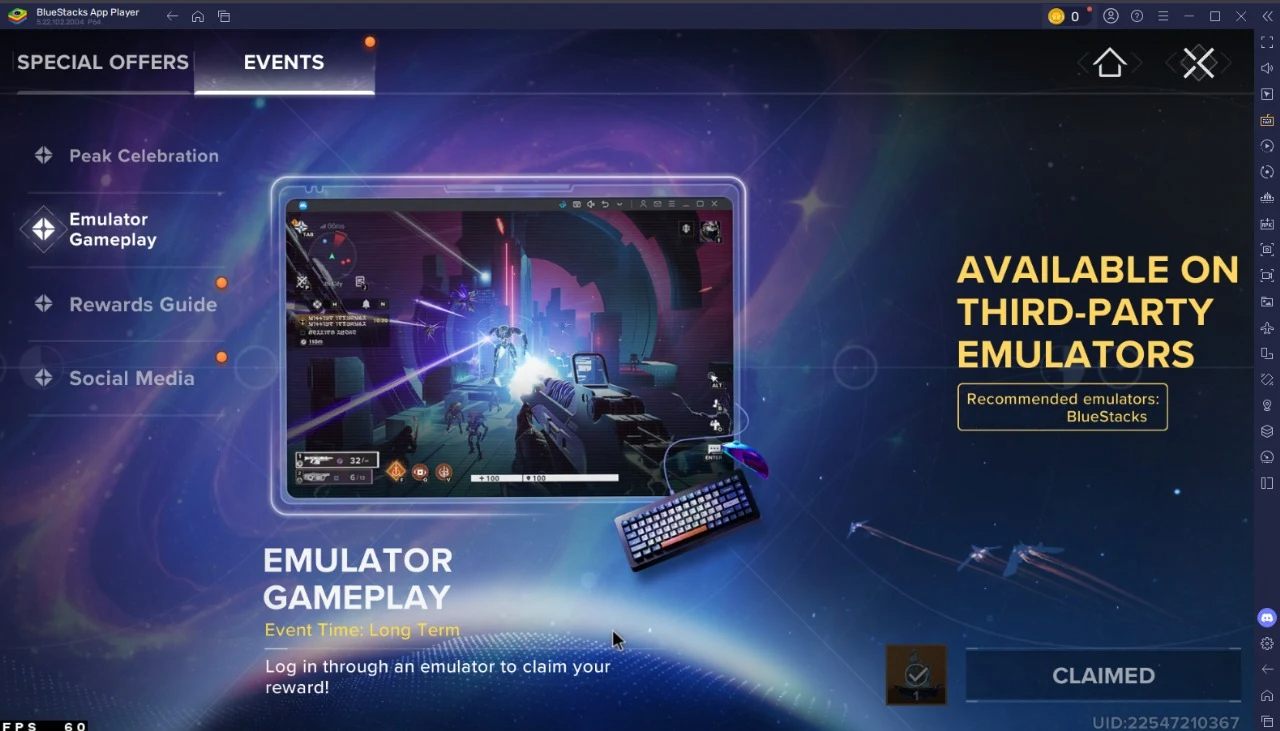
Destiny: Rising isn’t just playable on BlueStacks — it’s officially supported and recommended by NetEase in-game. Once a new player finishes the initial tutorial, they’re shown an in-game event screen highlighting the best recommended emulator. It’s a direct signal from the makers that BlueStacks is the trusted way to enjoy Destiny: Rising on PC.
120 FPS with Consistent Performance
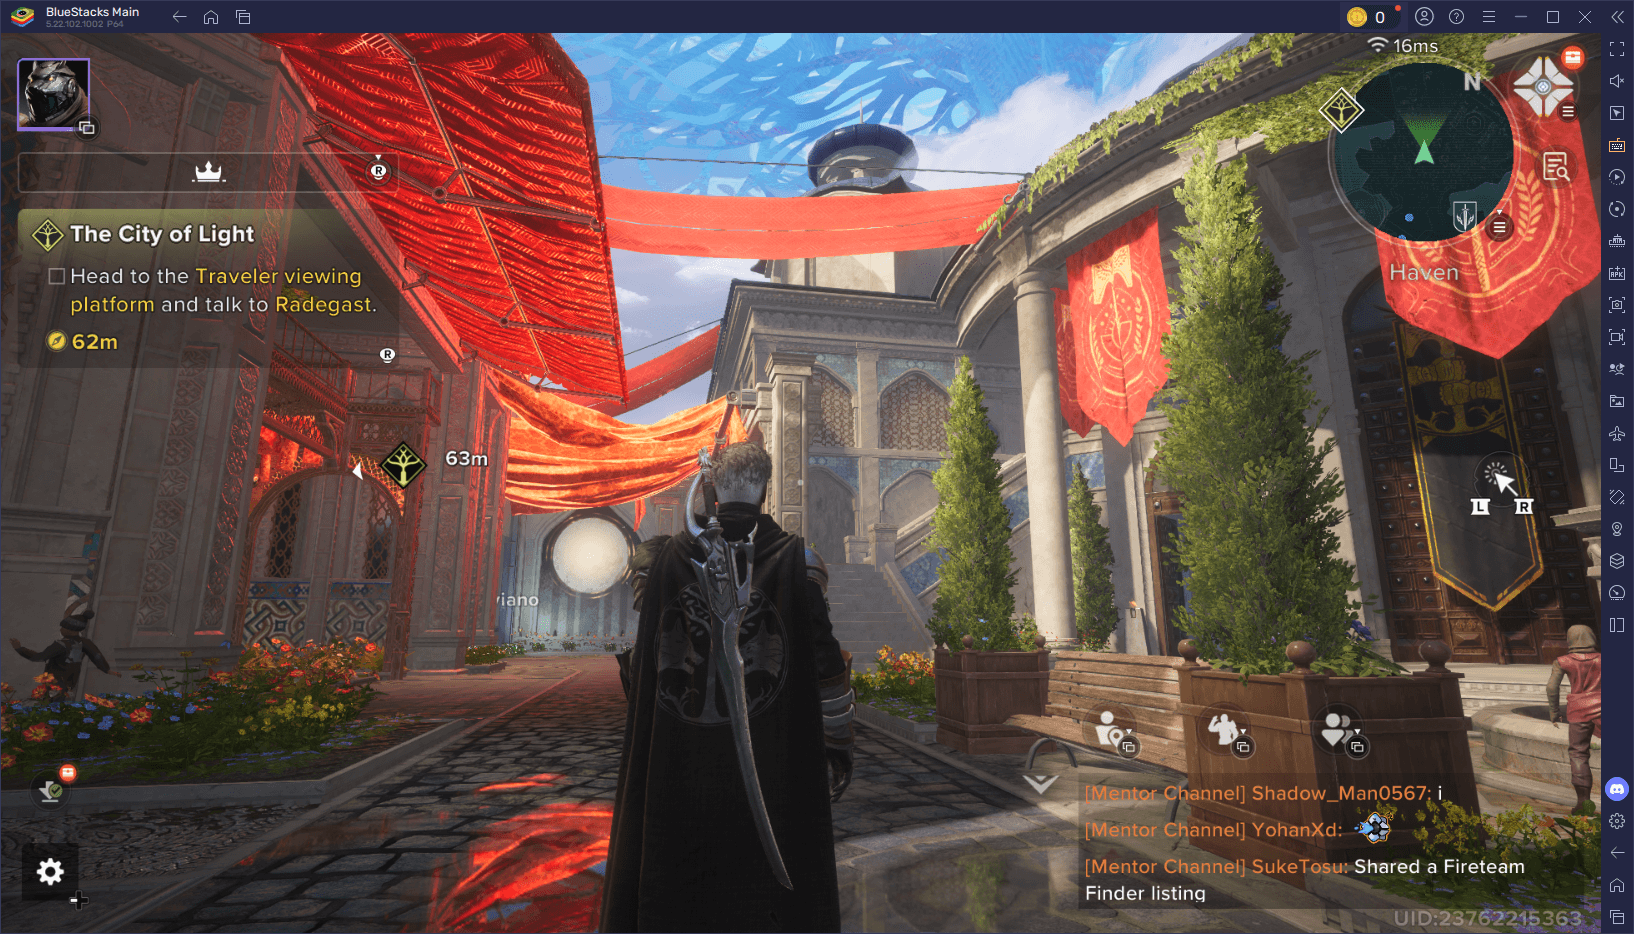
Destiny: Rising runs at full stability and performance levels on BlueStacks, with graphical settings maxed out. Players can expect up to 120 FPS, smooth animations, and no input lag across both PvE and PvP content. Past issues like mouse stuttering or inconsistent framerate are no longer relevant and have been optimized to give a grand experience.
We’re pushing it as high as it can go in the settings, and the game simply runs and looks perfectly!
Optimized for Low-End and High-End PCs Alike
Destiny: Rising runs smoothly on BlueStacks across low-end PCs as well as high-end rigs. With built-in optimizations, the game works great out of the box, and only a few setting tweaks can further boost performance. Add in full keyboard, mouse, and gamepad support, and you get a stable, responsive experience from day one.
Full Control with Key Mapping Tool
While Destiny: Rising offers support for both mouse and keyboard as well as gamepad setups, the Keymapping Tool in BlueStacks gives you granular control over every action. It lets you bind movement, aiming, abilities, and interface commands exactly how you want. You can also create hybrid layouts that combine keyboard precision with mouse speed, to add more versatility to the default control scheme. And if you’re using a controller, BlueStacks handles input just as well, without requiring any extra plugins nor third-party tools—just plug and play! More on it in the next section!
Gamepad Support That Actually Feels Native
BlueStacks offers full native controller support—and it’s the only platform where playing Destiny: Rising with a gamepad actually feels correct. While other emulators technically support controllers, their implementation is far from ideal. Analog sticks are locked to just eight directions, movement feels stiff, and there’s no deadzone tuning, making it a poor match for a game that demands responsive, fluid inputs. It doesn’t feel like a real controller setup. It feels compromised.
As soon as you connect a controller to your BlueStacks, your icons and scheme will instantly swap to a gamepad layout—no additional setup required!
BlueStacks, by contrast, offers true 360-degree analog input and detects all major controllers automatically. Whether you’re using an Xbox, PlayStation, or third-party gamepad, BlueStacks handles the mapping out of the box. You don’t even need to configure it since the game natively supports both keyboard and mouse, as well as gamepads—it feels exactly like playing Destiny or Destiny 2 on your PC or console.
Multi-Instance Manager for Easy Rerolls
BlueStacks makes rerolling in Destiny: Rising faster and smoother, even on mid- to low-end PCs. With the Multi-Instance Manager, you can create multiple game instances, clone them instantly, and reroll them all at once—no need to reinstall the game each time. The game also runs flawlessly on BlueStacks with full support for keyboard, mouse, and gamepads, letting you enjoy a seamless start to your Destiny journey. Read more in our detailed guide on ‘how to reroll in Destiny Rising’.
Goes Beyond Mobile Limitations
It’s a given but by optimizing and leveraging your PC’s power and bypassing mobile limitations like thermal throttling or screen size constraints, BlueStacks ensures that Destiny: Rising plays like a proper shooter, not a mobile compromise.
How to Set Up Destiny: Rising on PC with BlueStacks (Best PC-Settings)
Most mobile games run out of the box on BlueStacks, with no configuration needed. Destiny: Rising is no exception in terms of basic functionality; simply download and install it on PC with BlueStacks on a Pie 64-bit instance and you’re set. However, if you want the smoothest possible gameplay and full controller compatibility, a few quick tweaks are recommended. Luckily, BlueStacks simplifies this setup since, when running Destiny: Rising on PC for the first time, you should get a prompt allowing you to switch to the best configuration with just a click.
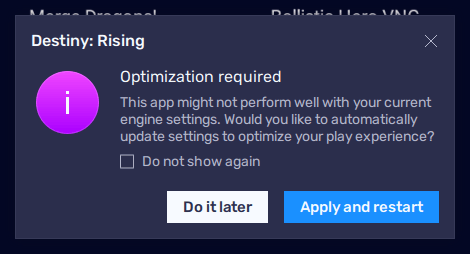
When launching the game for the first time, click on “Apply and restart” to skip the entire config process and jump right into the action.
If you don’t get this prompt, this manual process takes less than a minute and ensures the game loads correctly, runs at peak framerate, and responds properly to all input types: Here’s what you need to do:
- Ensure you are running the latest version of BlueStacks (as of writing this, it’s 5.22.102.1002).
- Launch BlueStacks and open the Instance Manager by clicking its button on the right-side panel, or by pressing Ctrl + Shift + 8.
- In the Instance Manager, click on “+ Instance” to create a fresh instance using “Pie 64-bit” as the Android version.
- Launch the new instance and download and install Destiny: Rising on it.
- Before launching the game, go to your bluestacks settings by clicking on the gear icon in the BlueStacks panel, or by pressing Ctrl + Shift + I.
- In the “Performance” tab, set your CPU allocation to 8 cores, and assign at least 6GB of RAM to this instance. Additionally, check the “Enable high frame-rate” setting and set your frame rate to 120 FPS.
- Navigate to the “Graphics” tab and select Vulkan & OpenGL as your renderer.
- After restarting your BlueStacks, you can now enjoy Destiny: Rising on PC with the best performance.
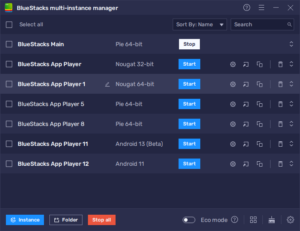
Start by opening the Instance Manager and creating a new instance.
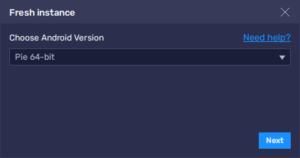
Choose “Pie 64-bit” as your Android version for this instance.
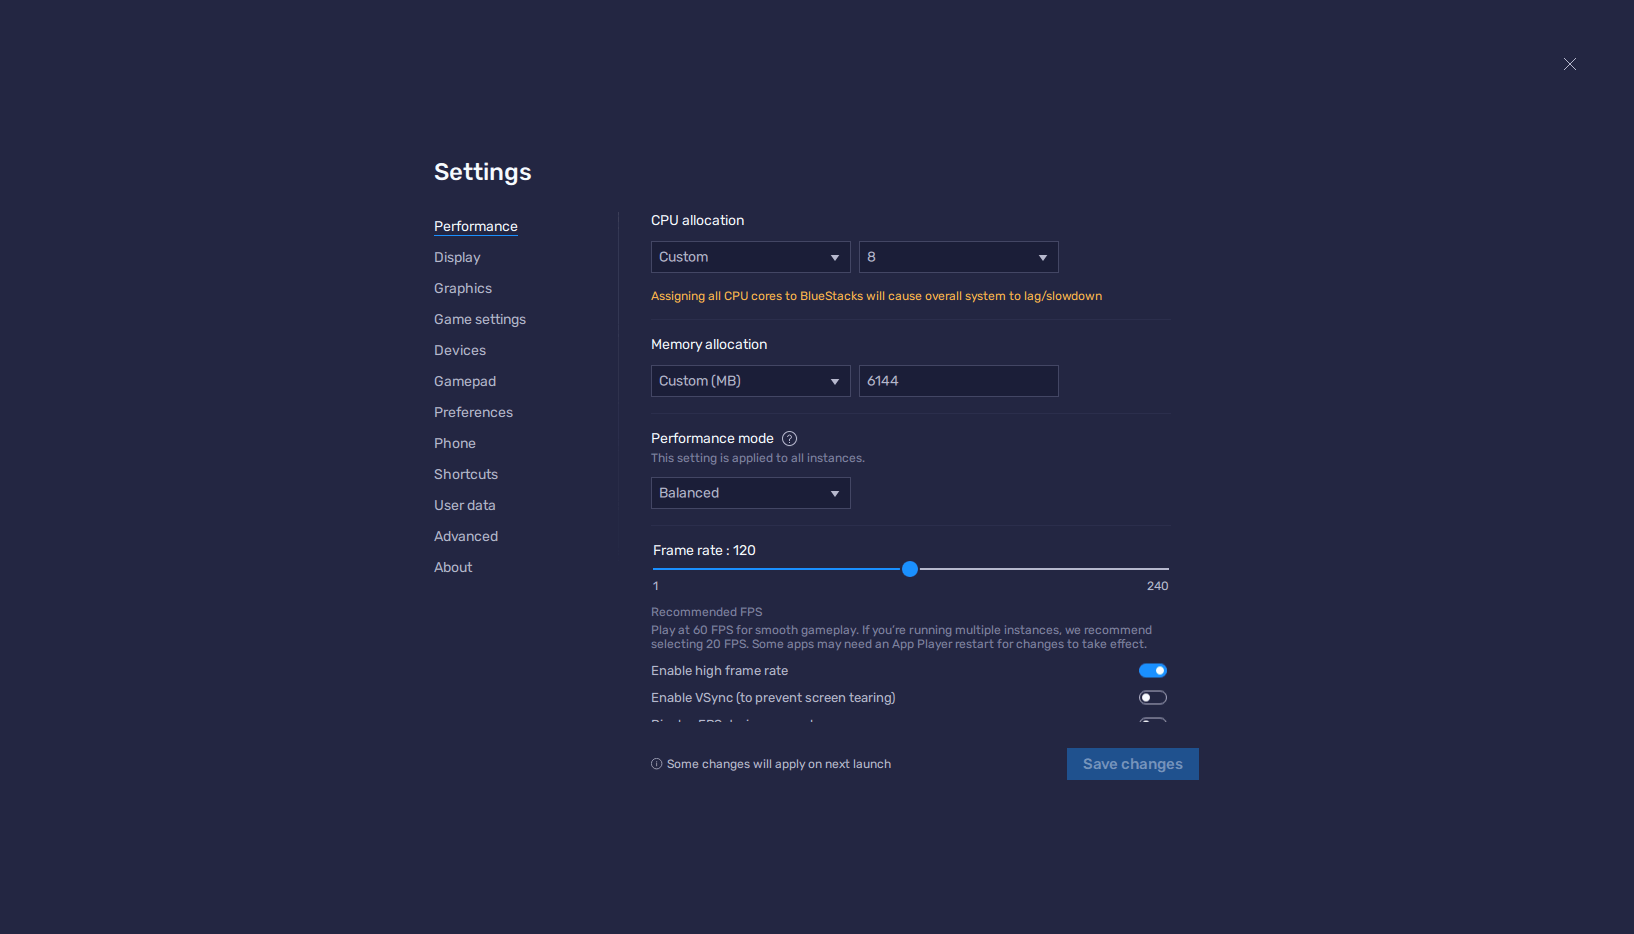
After creating and launching your new instance, head to the settings and set your Performance settings accordingly.
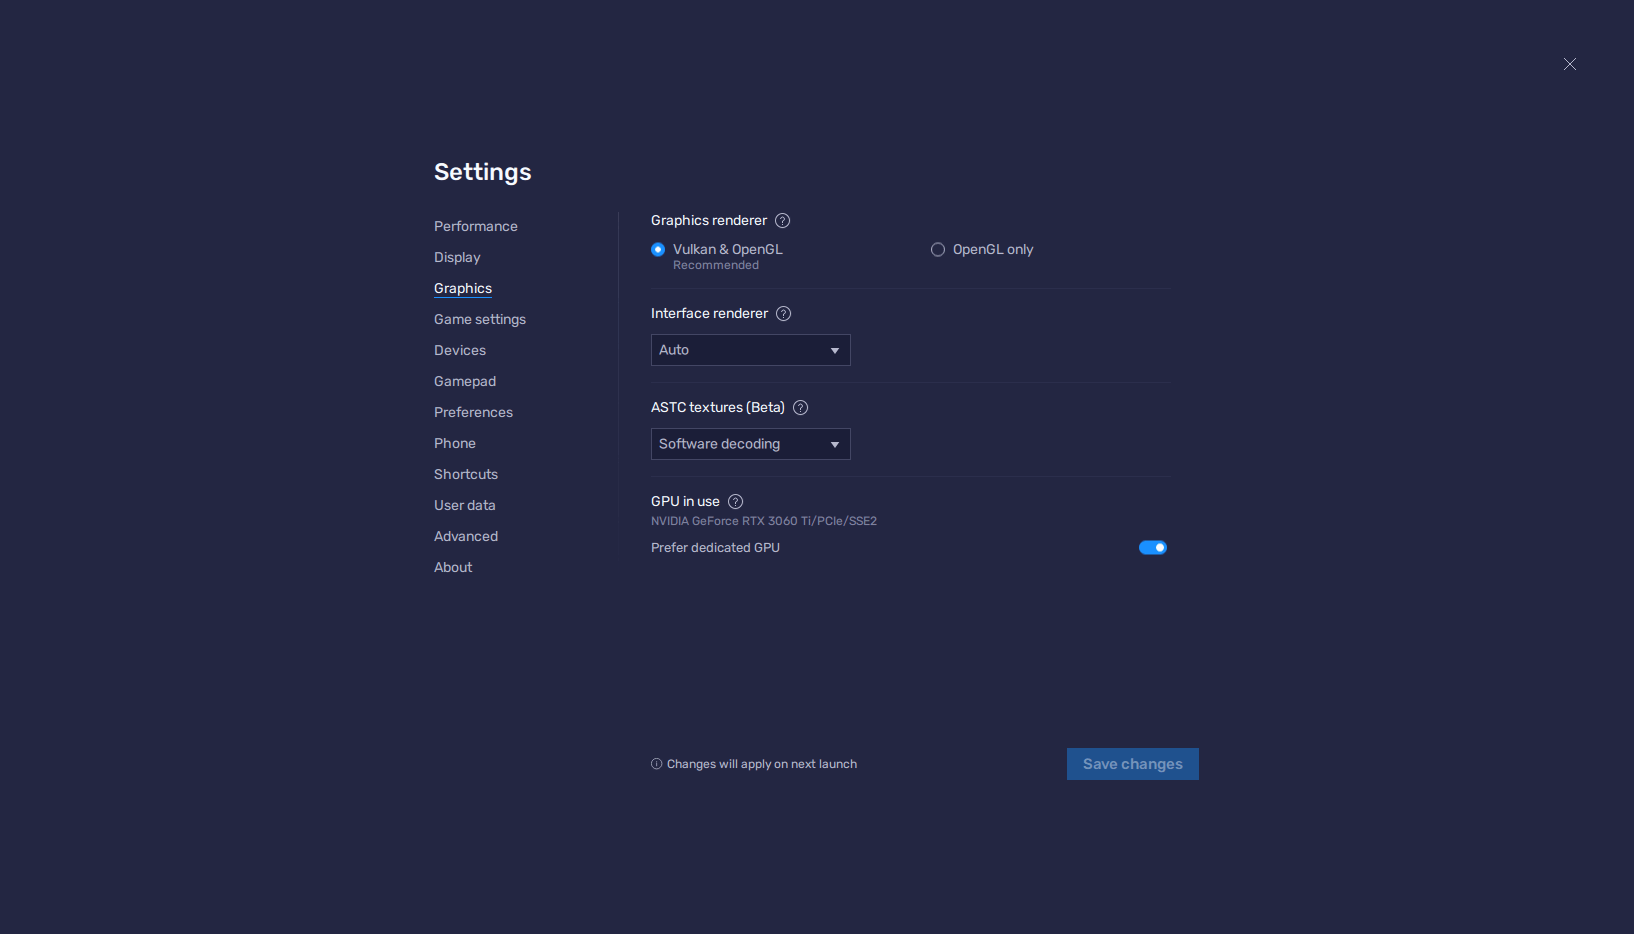
Do the same for your Graphics settings, and after a quick BlueStacks restart, you’re set to start playing!
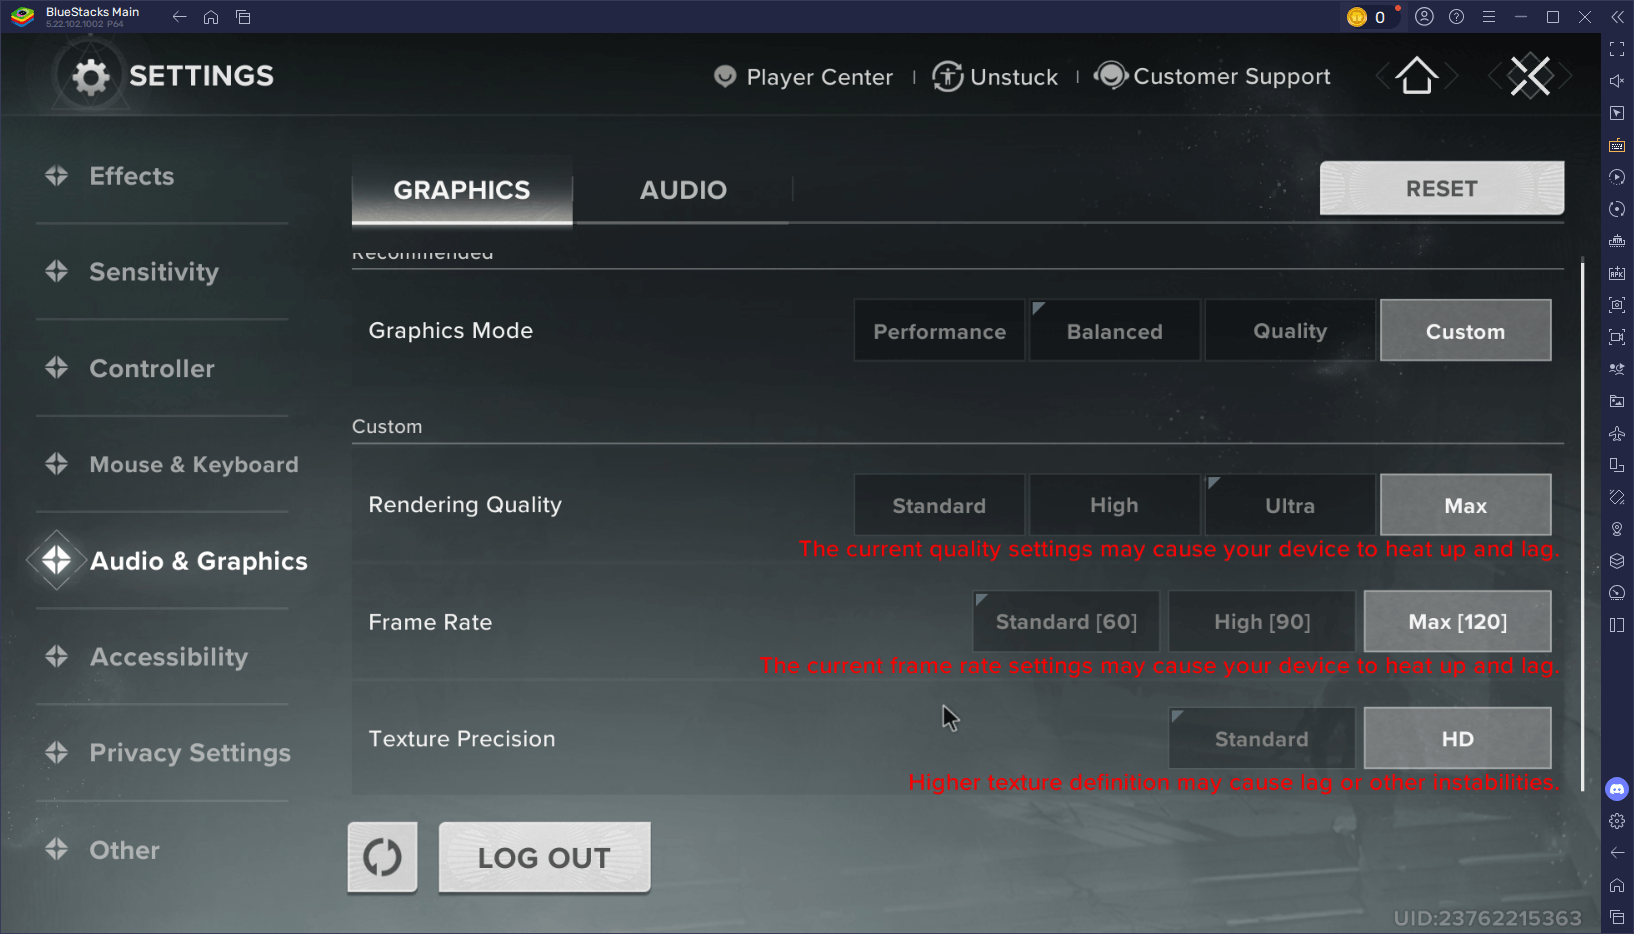
Once you’ve completed the setup, you’ll be ready to experience Destiny: Rising with higher resolution, cleaner inputs, and no visual hiccups. You only need to do this once, and the result is a consistent, PC-quality gameplay loop without the restrictions of mobile hardware. Bonus points if you set your in-game graphics and frame rate to Max and 120 FPS respectively, to ensure you’re getting the best visuals and performance.
Keep progressing in Destiny: Rising with our other in-depth guides: