Days After: Survival Games – BlueStacks Installation Guide

Civilization has been destroyed after bloodthirsty zombies took over the world and annihilated a large portion of the population. However, not all hope is lost as there is still a fair amount of people left in the apocalypse who are doing all they can to survive in the new world. Become one of those survivors and survive in the zombie apocalypse now by playing Days After: Survival Games by REACTGAMES STUDIO. Experience the game better by installing and playing it on your PC or Mac with BlueStacks.
How to Install Days After: Zombie Survival on PC
- Go to the game’s page and click on the “Play Days After: Zombie Survival on PC” button.
- Install and launch BlueStacks on your computer.
- Sign in to the Google Play Store.
- Start playing and begin your dark adventure!
You Already Have BlueStacks Installed?
- Open BlueStacks on your PC.
- Search for Days After: Zombie Survival using the search bar on the home screen.
- Click on the correct result from the list.
- Download the game and start playing to fight off the invaders!
Minimum System Requirements
Below is a list of what you need for smooth gameplay:
- Operating system: Microsoft Windows 7 and above.
- Processor: Intel or AMD Processor.
- RAM: At least 4GB of RAM (note: free disk space is not a substitute for RAM).
- Storage: 5GB free disk space.
- Permissions: Administrator rights on your PC.
- Graphics drivers: Updated graphics drivers from Microsoft or the chipset maker.
Collect Resources to Survive
Resources are very important in Days After: Survival Games as you will need them to maintain your character as well as your home base.

In Days After, you do not simply build some contraption that automatically collects resources for you. Instead, you must manually collect resources either by collecting them from the ground, scavenging them from loot, or by using tools to harvest resources (i.e., cutting down trees with an axe to collect pine logs, smashing big rocks with a sledgehammer to collect stone). If you want to know more about collecting resources in Days After, you can read this separate guide (Resource Gathering and Management Guide – Days After: Survival Games) focusing on resource collection.
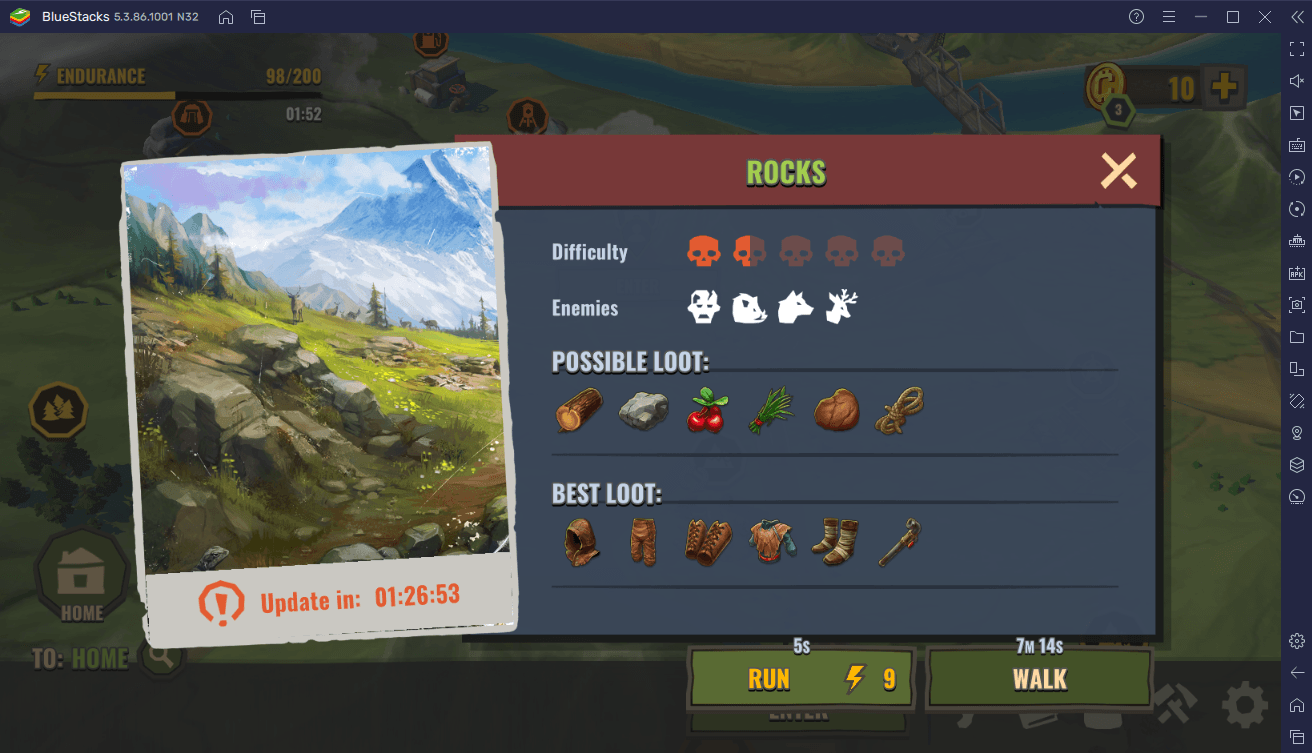
Another interesting feature of the game is that you can explore multiple locations to scavenge for resources. Each location has a different map layout, difficulty, set of spawned enemies, and set of loot. The more difficult a location is, the better the loot that you can scavenge there; however, this also means that you will face stronger enemies that can kill you quickly if you are not careful.
Craft Weapons and Clothes
The resources that you collect over time as you play Days After can be used to craft various weapons and clothes.
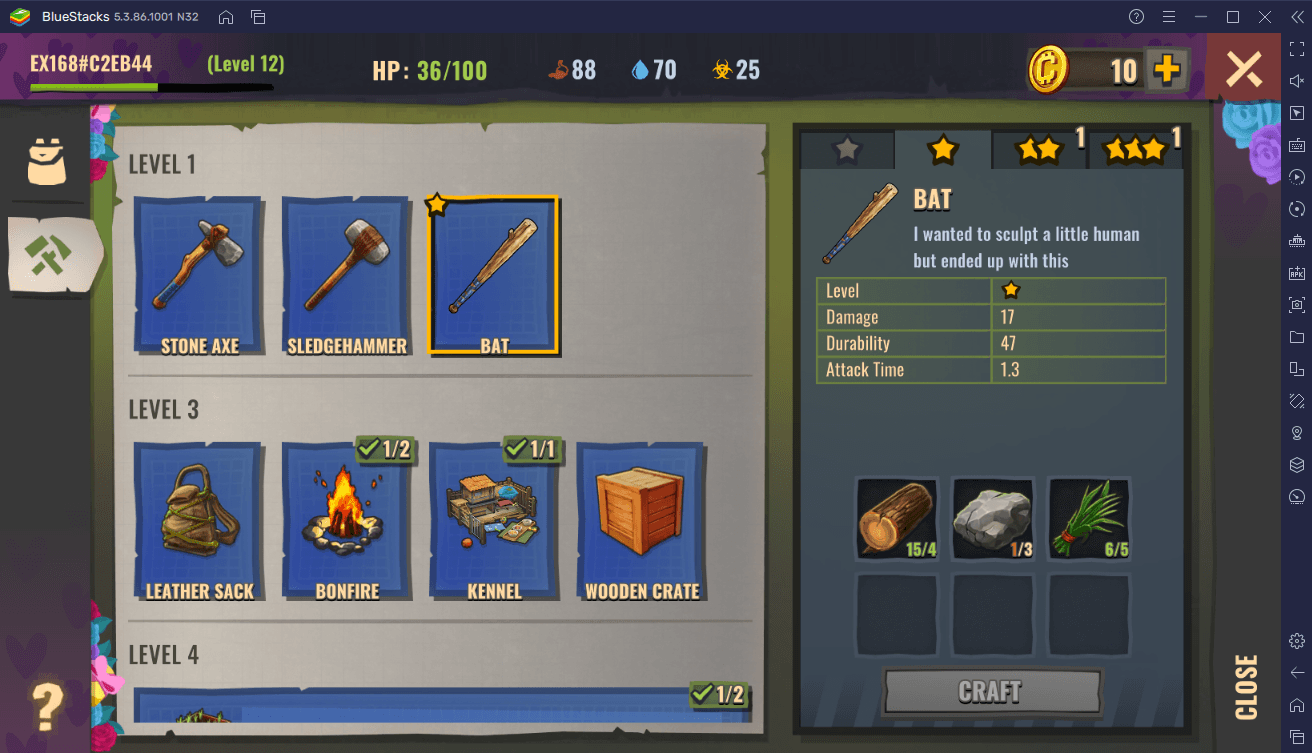
The game has a crafting menu where all the craftable items are consolidated. Each craftable item requires specific resources. For instance, a bat requires 3 pine logs, 2 stones, and 3 grass. Crafting can be done at anytime and you do not need a special item such as a crafting table to do so.
Note that weapons and clothes have limited durability. As you use them more (i.e., killing enemies), their durability goes lower and lower until they break. Once they break, you will need to craft it again and that is precisely why crafting is a crucial feature in Days After and it is also why having enough resources are important.
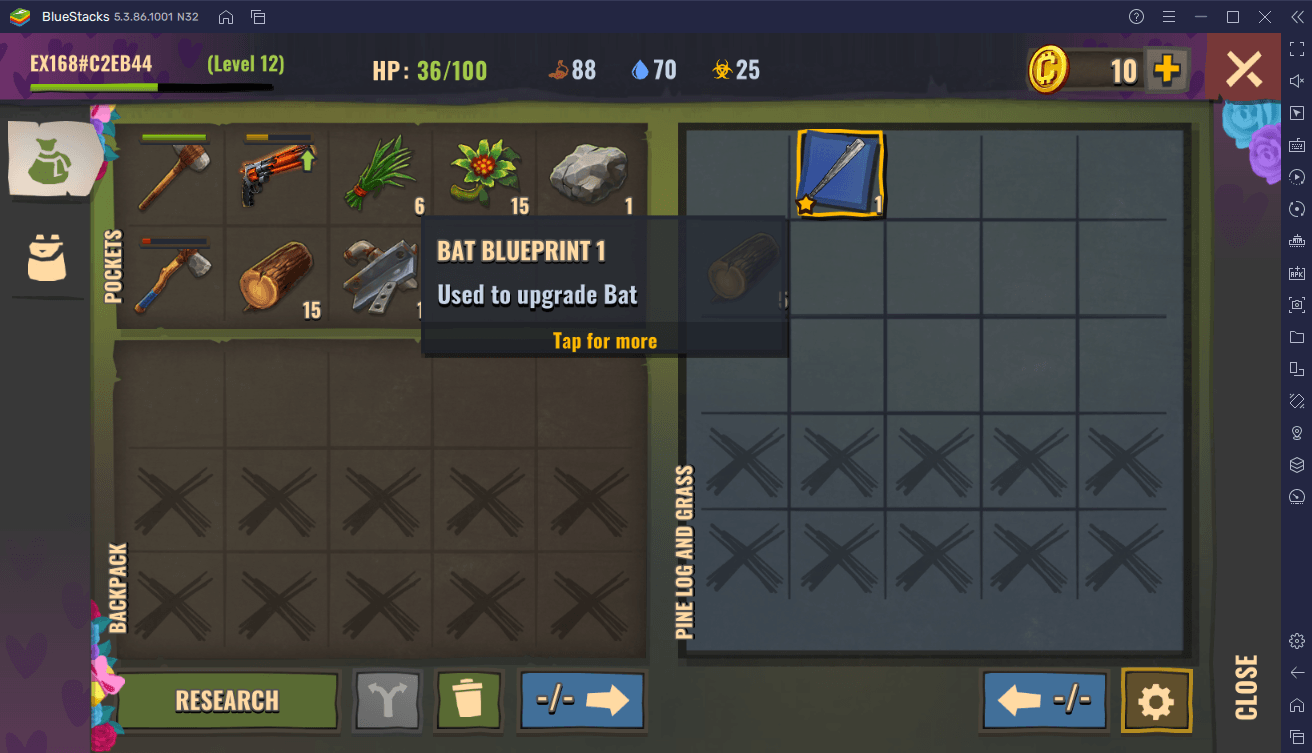
Weapons and clothes can be upgraded by collecting blueprints. These blueprints can randomly be acquired as loot from the game’s many explorable locations. You will need a certain amount of these blueprints to upgrade the item. Upgrading a weapon increases its damage, durability, stealth attack damage, and attack time. On the other hand, upgrading clothes increases its armor rating and durability.
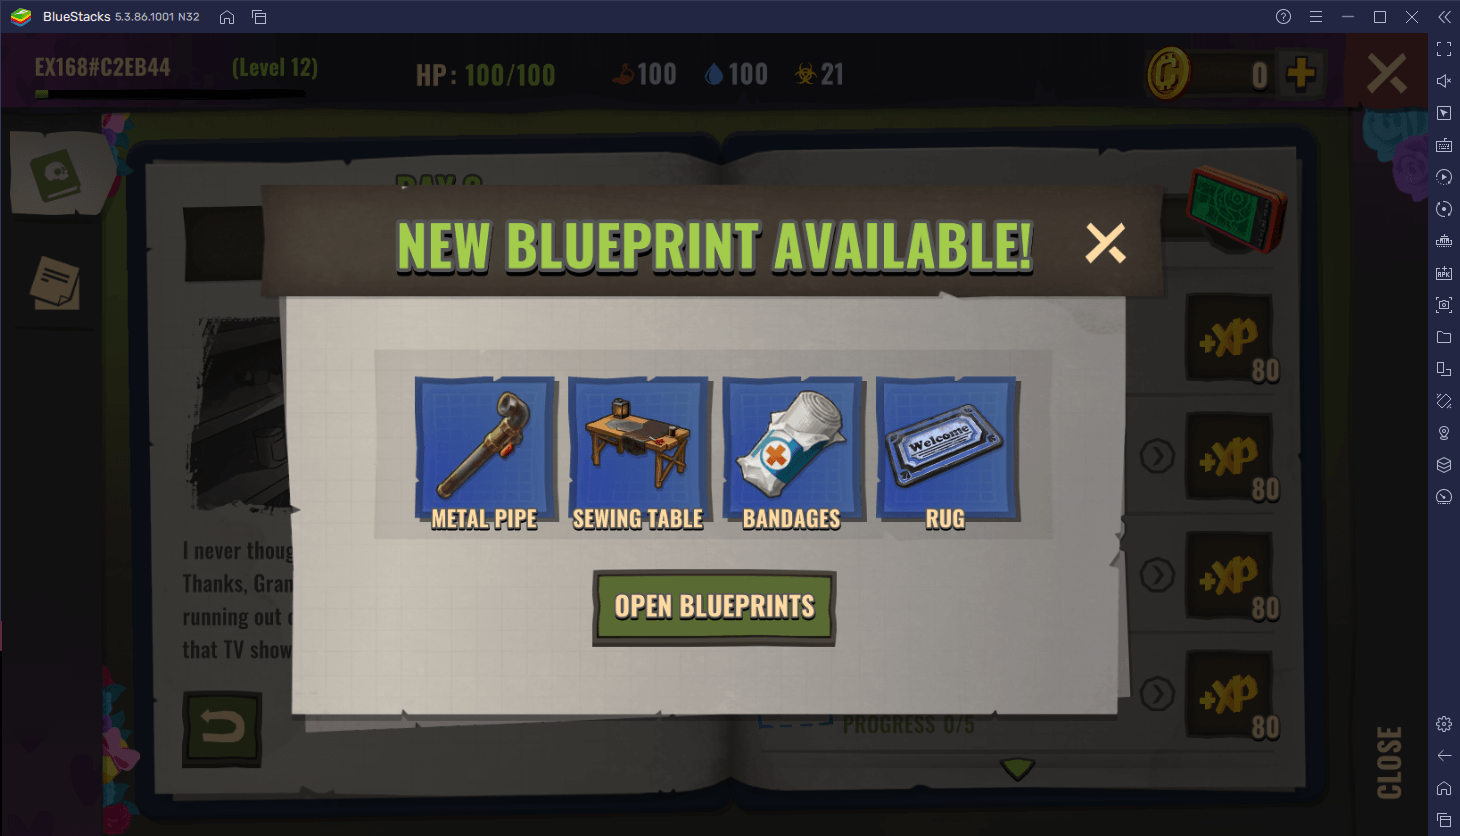
You unlock new weapons and clothes to craft by leveling up your character. Leveling up is done by collecting enough XP. XP is earned by collecting resources as well as killing enemies.
Build Your Home Base
Your home base is a crucial part of your survival in Days After. This is where you are completely safe from zombies and this is also where you can cultivate food, water, and even pets to serve as companions.
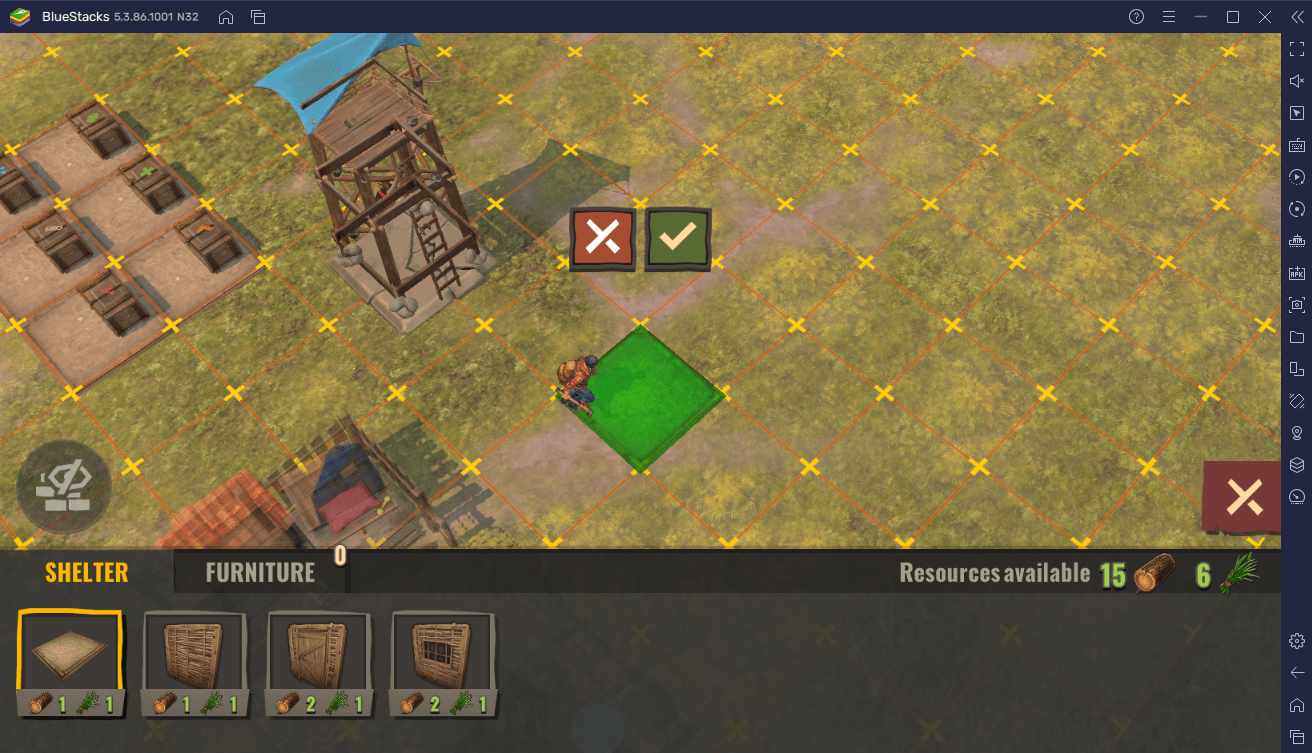
You can create your very own house in your own base with the game’s home editor. With this, you can create bases, walls, windows, and doors (at the expense of certain resources) to make your house in the way you see fit. Additionally, you can also craft and place furniture and other contraptions such as a garden bed to grow pumpkin crops and wooden crates for resource storage.
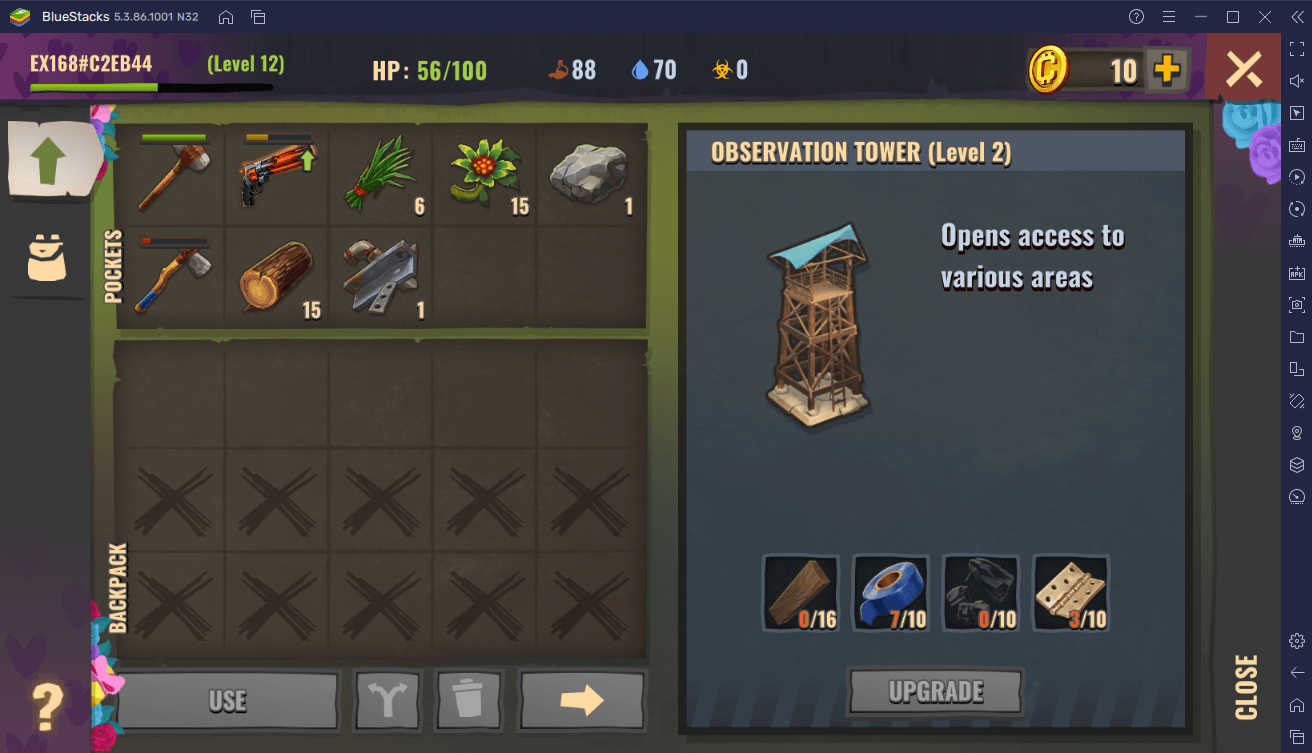
The home base also has pre-built structures that just need to be repaired to make it operational again. Examples of these are the Observation Tower, the Hangar, and the Basement Door. The Observation Tower is very important as repairing it and upgrading it allows you to access more locations outside of your home base to loot.
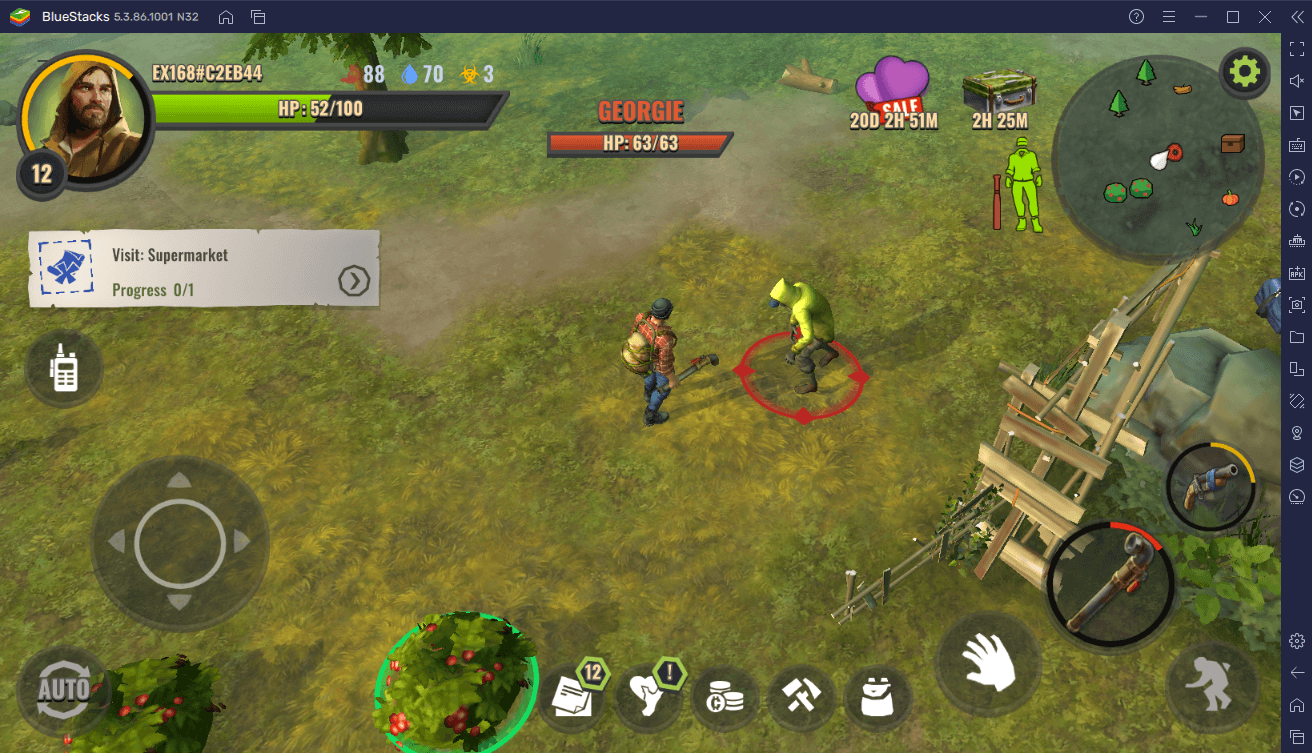
Fight Zombies and Wild Animals
The world has been ravaged by zombies, so it has become common occurrence to fight them. However, it is not just zombies that you have to fight but also wild animals who have become more aggressive than ever.
There are many types of zombies in Days After. There are normal zombies who are fairly slow and can be killed in at least two hits and there are zombies that are not only more aggressive but also have higher HP. However, the most threatening of these are infectious zombies that increases your infection level when you get attacked by them. These are zombies characterized by the green gas emitting from them and they can also attack you by spitting toxic liquid at you. When your infection level becomes too high, your max HP gets reduced, and you need to consume special items to remove it.
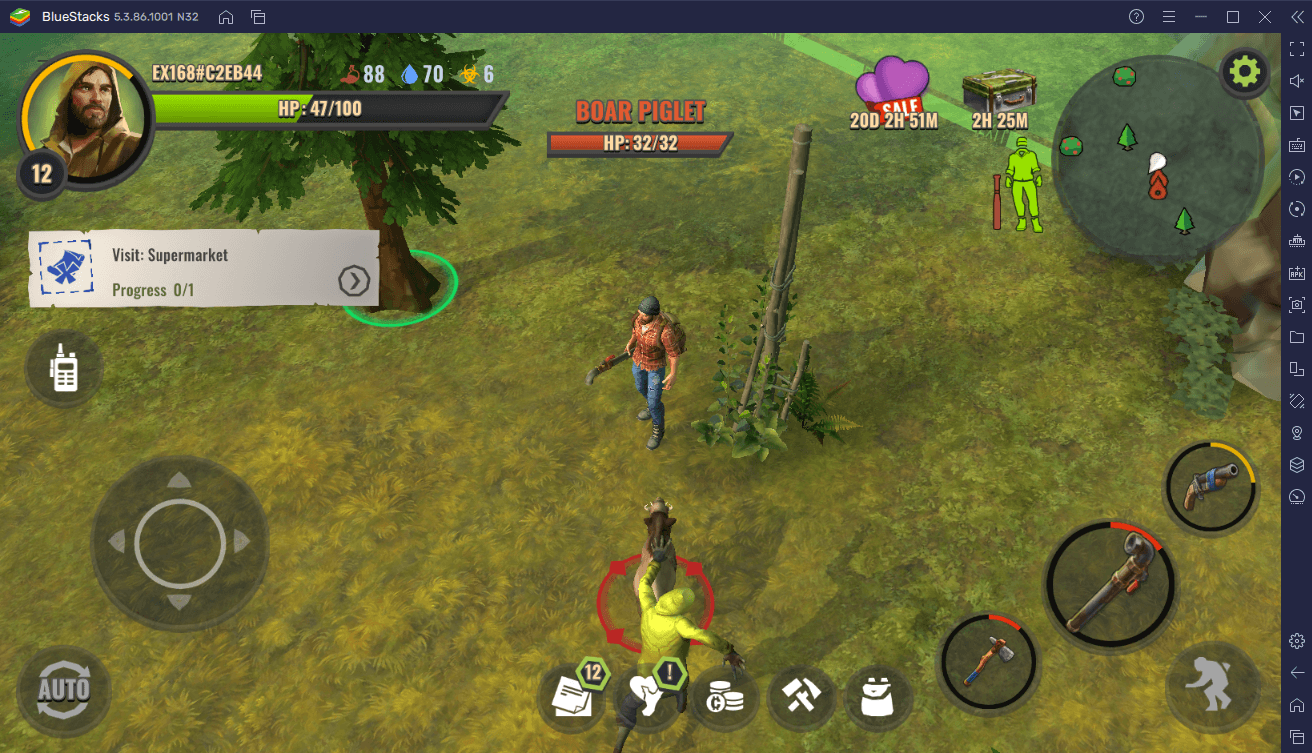
Wild animals such as boars and wolves can also randomly attack you while exploring. Unlike zombies, wild animals can drop useful resources upon being killed. They can drop pelt which can be used to craft new clothes.
Survive the Apocalypse with BlueStacks
Enter the apocalypse now by installing and playing Days After: Survival Games on your PC or Mac with BlueStacks.
With BlueStacks, you can enhance your Days After experience by customizing the game controls to however you see fit. You can also create Macros to record a specific sequence of actions and bind them to one key.
Additionally, you can also utilize BlueStacks’ multi-instance tool to reinstall Days After on a separate Android engine and start the game all over again with a new account. But that is not all as with the multi-instance tool, you can run more than one instance of Days After at the same time. You can run your main Days After account on one window while you can run your alternate account on the other.
The zombie apocalypse has started, and you must collect resources, craft weapons and clothes, and upgrade your home base now by playing Days After: Survival Games on BlueStacks.