Free Fire Solara Map Guide – Competitive Tips and Strategies to Win in OB49
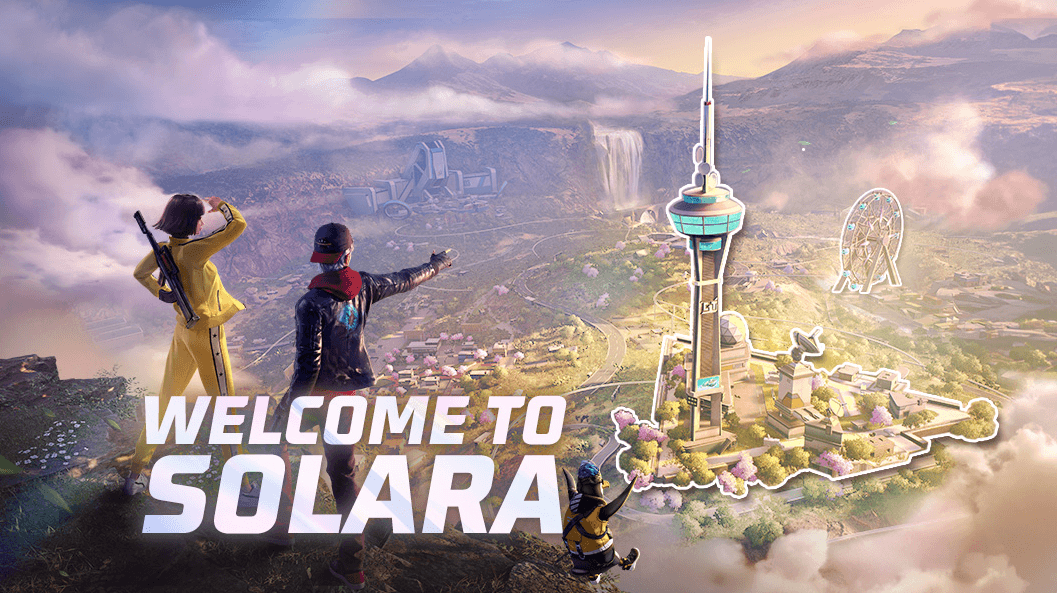
Solara is the newest addition to Free Fire’s permanent map pool, introduced with the OB49 update. It combines layered terrain, interconnected urban areas, and high-risk traversal action that reward players who can adapt on the fly. Each region on the map serves a different function—from loot-heavy hot zones to wide, sniper-friendly edges—and mastering how to rotate, fight, and reposition is key to gaining the upper hand.

One of the most important additions on this Free Fire map is the Slide Rail system, which allows players to move rapidly across key points while also doubling as a warning system when enemies are nearby. Whether you’re planning to loot, rotate, or pressure enemies, understanding Solara’s layout and rail network is essential for competitive success. This guide breaks down everything from drop zones and engagement types to loadout choices and tactical map usage.
Map Layout Overview
Solara is a coastal map with varied topography—dense townships, open hills, vertical compounds, and sniper positions on cliffs. The layout emphasizes elevation and space, offering strong flanking routes and multiple vantage points. Combat zones are well-dispersed, making the early game more flexible depending on where the plane flies. Solara doesn’t restrict players to just central drops, allowing high-value gameplay on the outer edges as well.

The Slide Rail system is central to how Solara flows. These rails link different zones and give players the ability to cross long distances without using vehicles. Because they are elevated and fast, they allow for wide rotations and late entry plays. Even if you land at the edge of the map, you can loot freely and still make it into the safe zone using the rail system as the circle starts to close. To plan your movement, open the map and trace the slide rail connections—they’re all clearly marked, and understanding the layout before you jump can give you a major edge in controlling tempo and movement mid-match.
Key Zones and Hotspots
As mentioned just now, Solara has a variety of zones featuring a wide slew of tactical elements and ways to utilize them to your advantage at just about every turn. However, when it comes to key areas with the best loot and features, you can’t miss out on these:
- Bloomtown: Tight alleyways and small buildings make this the go-to hotspot for early fights.
- The Hub: A symmetrical tech compound that supports mid-range duels and methodical clearing.
- Studio: Home to large props and a rotating train; dynamic and often chaotic with unpredictable third parties.
- Eco Drain: Multi-tier industrial area with pipes and platforms; perfect for vertical ambushes.
- Windmill & Delta Isle: Wide-open fields with few structures, ideal for snipers and long-range weapons.
- TV Tower: Among the highest structures on the map, offering full visibility of surrounding zones.

Each of these zones brings a different combat flow. For instance, Bloomtown favors SMGs and shotguns due to its confined layout, making it ideal for close-range specialists. The Hub and Studio provide more space and sightlines, where ARs or mid-range rifles excel. Windmill and Delta Isle reward players who pick up marksman rifles or snipers early and can hold angles as opponents rotate. Eco Drain and TV Tower, meanwhile, offer elevation and flanking potential, which is great for burst-ranged weapons like the Groza or FAMAS. Survival hinges on understanding the terrain and strategically selecting weapons that align with the zone and circle dynamics.
Always check the map to see where the circle is closing and adapt your loadout to the zones you will be rotating towards—while one loadout can be effective in certain areas, it can work against you in others.
Slide Rail System – Tips and Tactical Use
Beyond simple traversal, the slide rails in Solara open up a wide set of competitive options. Unlike vehicles, slide rails are silent and efficient, but they come with a catch: they flash red when enemies are nearby. This makes every ride a calculated risk—you could use them at the risk of revealing your position if someone runs by, or stand by and use the rail’s glow as an enemy detector. Alternatively, you could risk it and use them if you’re stuck and need to get away, such as when fleeing from a closing circle or when caught in the middle of a losing firefight.

REMINDER: Remember that you can purchase shields from vending machines that protect you while using rails.
While all of these are valid strategies, there are a few surefire ways to use slide rails to your advantage:
- If you see a rail turn red, you have two choices—either jump off early to avoid ambush, or prep your weapon and anticipate a fight at the landing zone. Smart players can use this feature as a proximity sensor to track movement patterns.
- You can also bait enemies by deliberately triggering a rail and then exiting before arriving, waiting for them to peek or rotate in response.
- Additionally, in late-game circles where movement becomes risky, slides can offer an escape route out of bad zones or let you rapidly reposition after a third-party attempt.

Just don’t rely on them blindly—always pre-check landing spots with your camera or sound cues before committing.
Rotations and Landing Strategy
The OB49 update rebalanced loot distribution across the map, increasing the rarity and quality of loot in edge zones. This means players can now reliably land far from the plane’s path, gear up with high-tier weapons, and rotate in safely using either footpaths or the slide rail network. Early combat zones like Bloomtown, The Hub, and Studio will still attract the most players, but off-center areas offer strong strategic value for those who prefer a survival-first approach.

If you’re solo, these edge zones let you reset, loot in peace, and play the zone edge effectively. Make sure to plan rotations early; check the slide rail network from the map and aim to rotate through unoccupied rails to minimize ambush risk.
Zone Control and Endgame Strategy
Despite the diversity of zones, most final circles on Solara tend to close in transitional areas, which are the open zones between major landmarks. This makes it difficult to rely on hard cover from buildings alone. Instead, elevation becomes your best asset. Holding a high ground lets you spot and punish enemies rotating late, while also giving you cover from lower players trying to sneak up.

However, that visibility comes at a cost. If you sit indoors or in obvious corners, you risk being exposed by tracking skills or grenades. Instead, focus on maintaining visibility and concealment simultaneously. Trees, rocks, or awkward terrain can provide vision without making you a target. Always bring Gloo Walls to create instant cover and watch for opportunities to third-party ongoing fights. Before you engage, scout the area and make sure you’re not walking into a three-way standoff. Final circles demand awareness—know where every shot is coming from, and don’t be afraid to rotate away if your position gets compromised.
Character Recommendations for Solara
Solara doesn’t drastically change team-based class synergy, but for solo or competitive ladder play, some characters gain extra value:
- Paloma benefits heavily from Solara’s cover-heavy combat zones. Breaking Gloo Walls and gaining precision helps her win tight firefights, especially in Bloomtown or Eco Drain.
- Lila generates Gloo Walls with every kill and slows enemies she tags—great for controlling slide rail exits or locking down zone transitions.
- Ignis provides flame walls for cutting off movement or flushing enemies from corners—useful in building-heavy zones or when covering your slide exits.
- Moco still offers recon value, particularly when trying to track enemies across open terrain or near slide paths.
- Clu or Kenta provide situational support through detection or damage absorption in chaotic final circles.
Build your loadout to match the terrain you’re likely to fight in—and adapt as the circle shifts. Being flexible with your character’s utility is key to getting ahead on Solara.
Solara is a smartly designed, combat-driven map that rewards players who think ahead, rotate smart, and fight with purpose. With OB49’s Slide Rail system, elevation-heavy design, and flexible loot distribution, the key to success lies in planning your movement, choosing the right fights, and knowing when to push or reposition. Whether you’re holding high ground or baiting slide chases, every decision counts more on Solara than in any map before.

For players who want to maximize their reaction speed, accuracy, and tactical vision, the best way to play Free Fire is on PC with BlueStacks. Enjoy precise aim, smoother mobility, and total control over every movement—perfect for dominating Solara’s demanding terrain.

