Advanced Keymapping Guide to Mighty Quest on PC

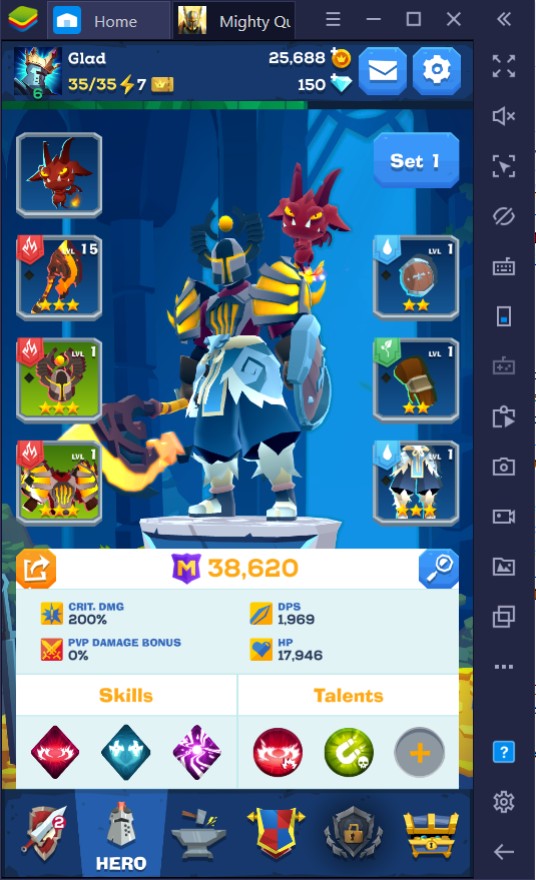
The Mighty Quest for Epic Loot is one of the more interesting dungeon-crawler RPGs out there especially since Ubisoft, the game who developed the game, is known for making famous titles such as Assassin’s Creed. With the game being made specifically to have a light and funny theme, this is great for players to take outside and play casually on their smartphone. However, for serious players, BlueStacks can help take the game to the next level with its features on PC.
Taking these mobile games to the next level requires that players take upgraded features into their game. One way to do this is to switch from playing the mobile version to the BlueStacks PC version which will offer you an array of different features such as the Keymapping feature and Macro feature. With Keymapping being the most popular feature in BlueStacks, it’s designed specifically to ensure that you are equipped with what it takes to take the top of the ladder.
Advantages of Keymapped Controls
Keymapping is basically replacing your touch controls with buttons on your keyboard to create a synthetic PC-like experience to your game by using the more traditional WASD movement control map. In this sense, it creates a familiar set for all RPG fans out there where your muscle memory can take over. In essence, necessary skills like dodging, strafing, and general movement are enhanced just by being able to place your hands on the WASD buttons on your keyboard.
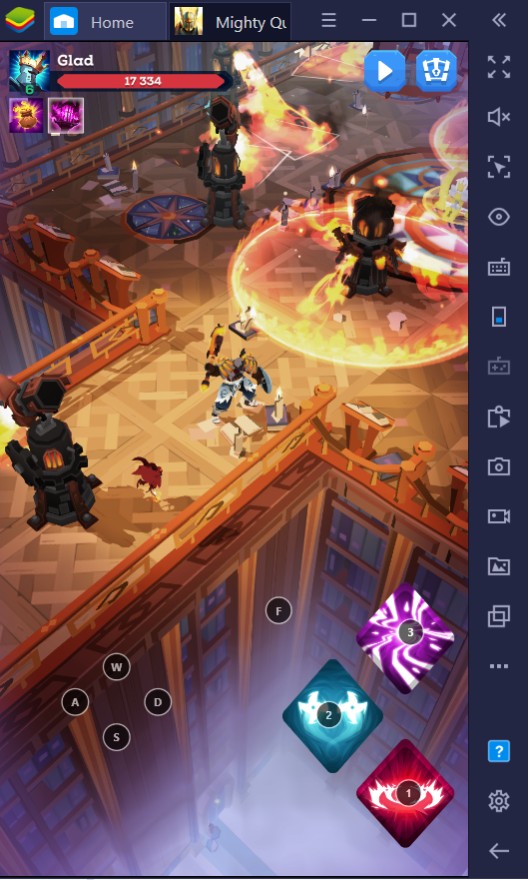
With a portrait-style gameplay, the amount of elements you can see on your screen at a time is extremely limited. This is made even more difficult with the fact that your two thumbs are constantly on the screen bumping into each other covering spots where hidden pathways towards chests or monsters are found. This hinders you from getting the very important 3-Crown completion you’ll need to get rewards, experience, and other quest related stuff in game.
How to Use Keymapping Feature in BlueStacks PC
While there is a default set of controls mapped into the game (if you chose the right-handed option) when you launch your BlueStacks instance, it can be difficult to use this if you’re not comfortable where the default keys are placed. In this instance, the best thing to do is to create your own custom set of controls so that you can better personalize the keys you want to use instead of forcing yourself to press buttons you’re not comfortable in using.
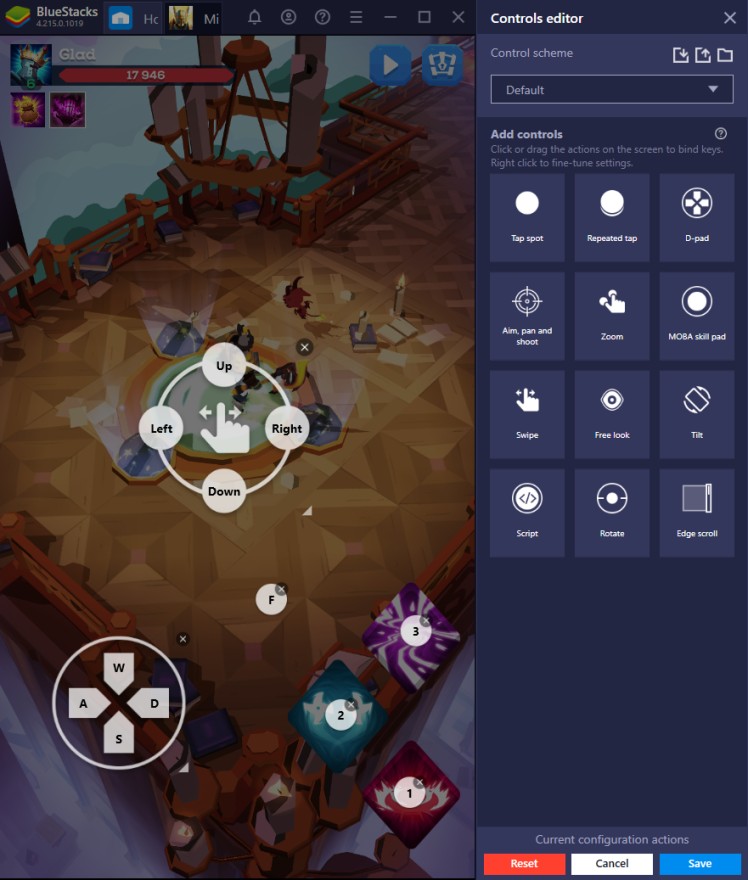
To customize your BlueStacks keymap, all you need to do is open your game and go to the Controls Editor button which is found on the right sidebar on your instance or press [Ctrl + Shift + A]. From here, you’ll see a set of controls you can add or remove from your current instance. You can also choose to show or hide the controls overlay by clicking on the eye icon on the right sidebar or pressing [Ctrl + Shift + F6].
The D-Pad!
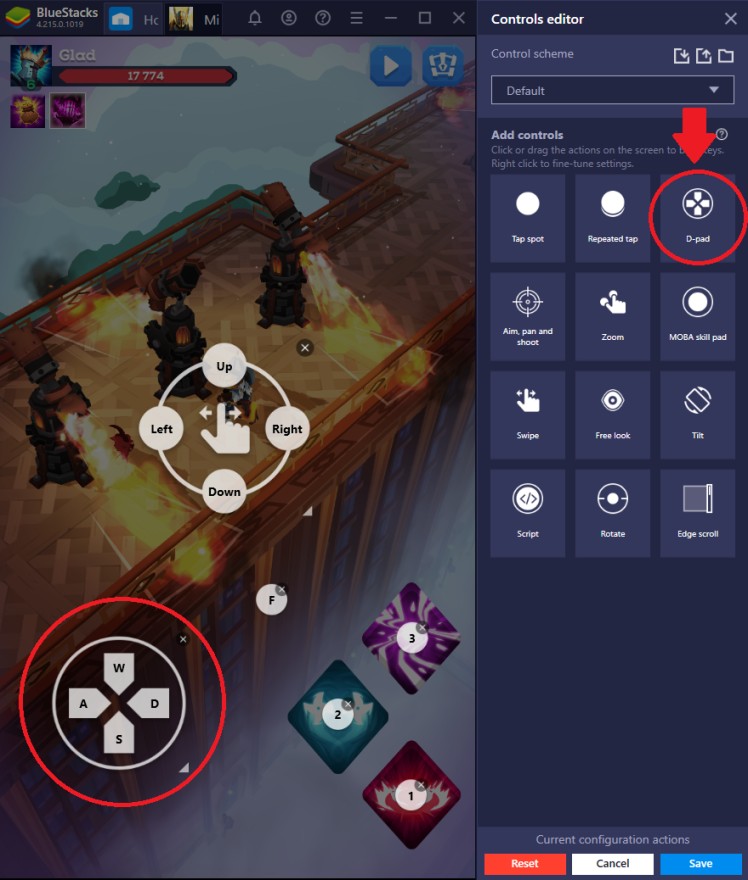
The D-Pad is a term used in console controllers which refers to the directional buttons used for movement. In the BlueStacks instance, the controls are set to WASD but you can choose to change these buttons to any button you wish to place. Placing the D-Pad on the bottom-right or bottom-left side of the instance (opposite side of your skills overlay) is the best place for it since it doesn’t interact with other controls during dungeon runs.
Swipe Buttons
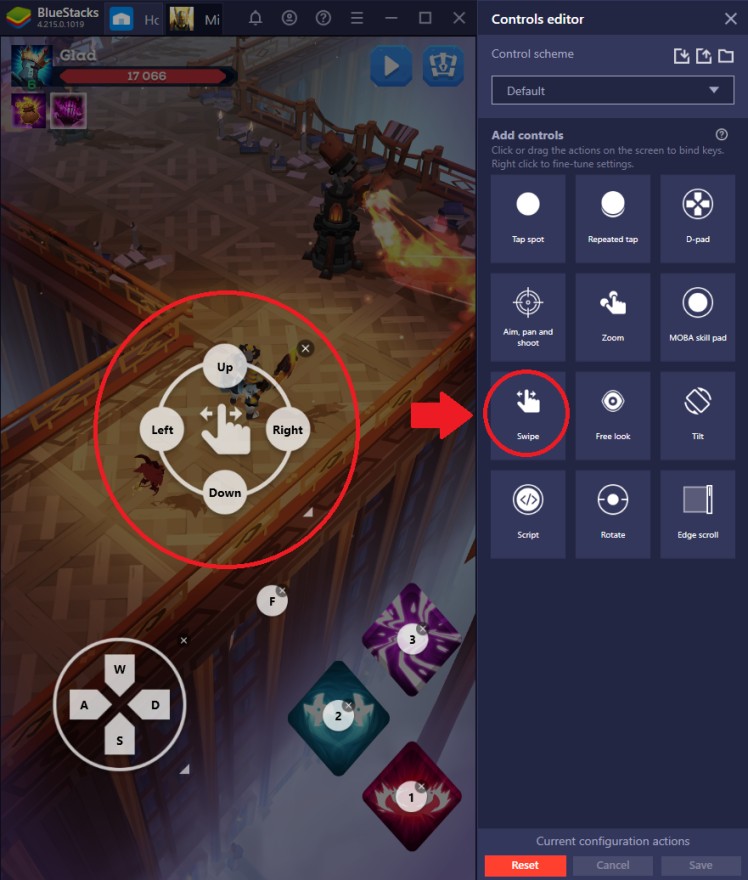
The Swipe Buttons is designed similarly to the D-Pad but instead of a single button press, it will imitate a directional swipe through the screen. This is important in Mighty Quest for dodging or dashing towards a specific location. In advanced boss fights, the deadly abilities give you only a short time to react which is why being able to set your Swipe buttons wisely can be the deciding factor on completion or failure of the dungeon.
Tap Spots
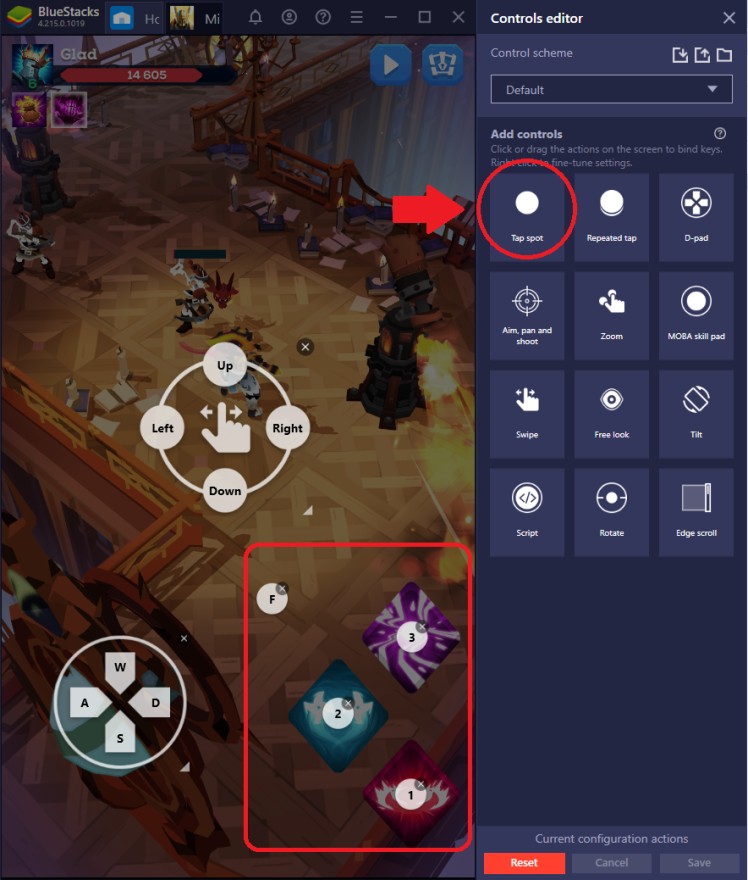
Tap Spots are the most basic key on your Controls Overlay and is mostly used for attacking and using your abilities. The best way to use this is to model it after traditional RPGs where the skills are placed on the number bars so that you have quick access to it while your fingers are always on the D-Pad keys. Make sure that when you choose an Auto-Attack Tap Key, you choose a key which is easy to press and doesn’t get detected by your Sticky Keys Windows function.
Creating Different Control Schemes on your BlueStacks Instance
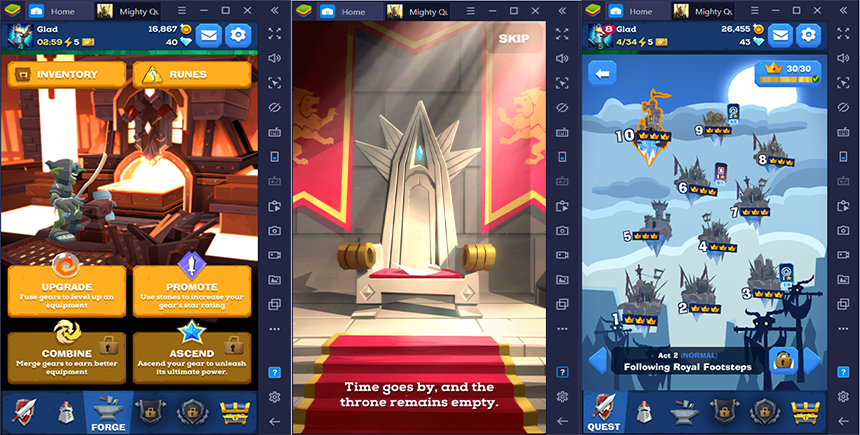
It is needless to say that the default controls you have are meant for when you are inside a dungeon. When you are in the lobby, you’ll be forced to use your mouse to press certain areas of the screen to redirect yourself where you want to go. While it would be nice to configure your controls overlay to cover all of the parts of the screen, it will look very cluttered and confusing especially if you have your control overlay visibility turned on.
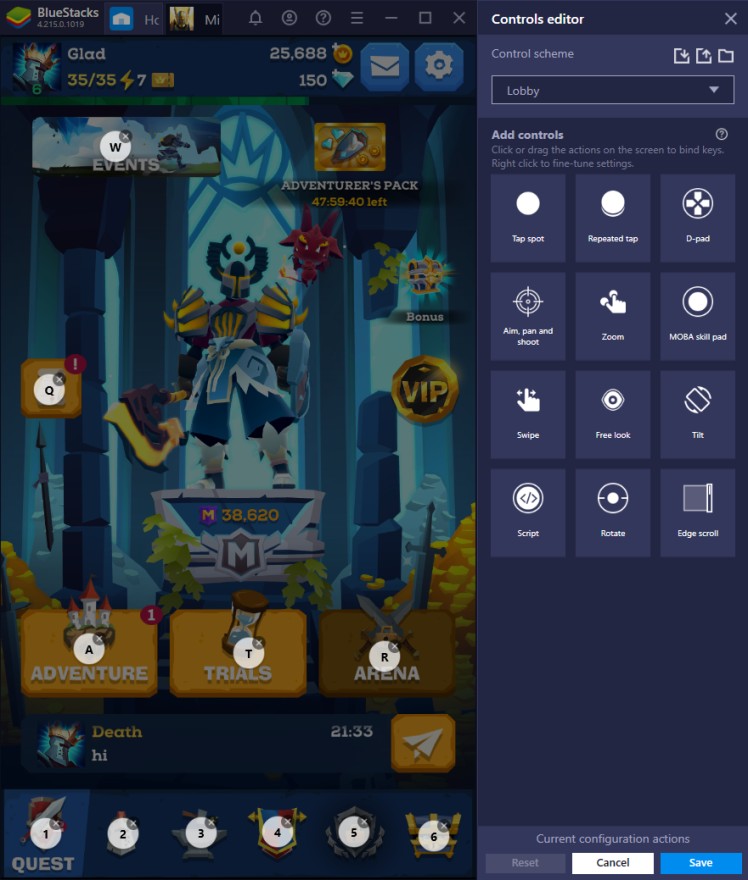
A great way to make your screen cleaner is to create various control schemes and map your controls for dungeons, lobbies, chests, guilds, etc. This should lessen the clutter on your instance and make it easier for you to memorize your controls overlay in a shorter period of time. Now you don’t need to worry about having too many buttons active at the time and accidentally activating or doing something you didn’t mean to do in the first place.
Resetting Your Controls Overlay
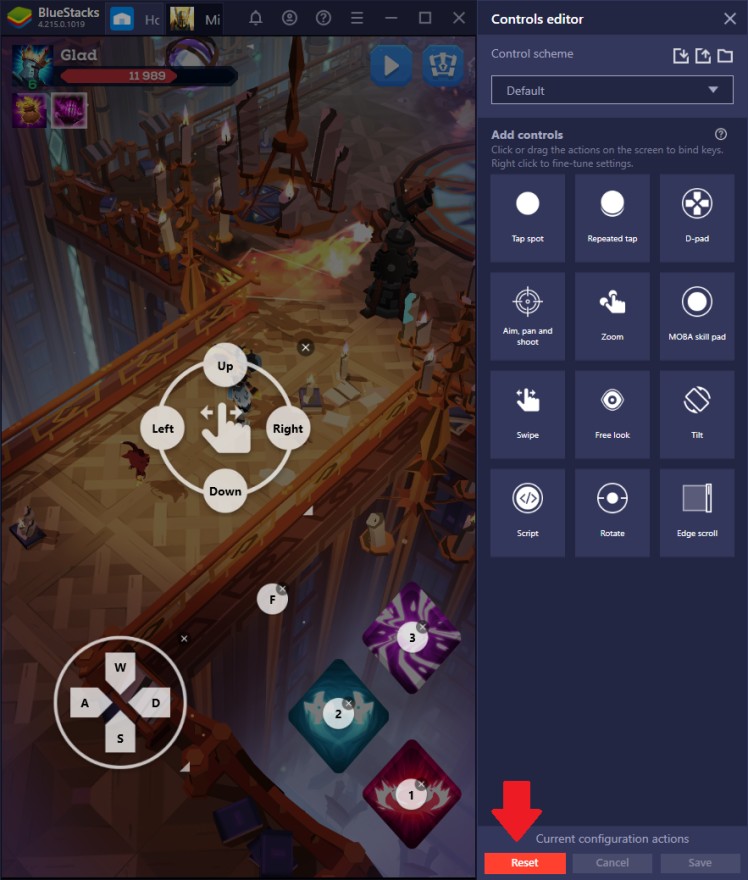
Of course, it’s easy to make a mistake and just slap all the buttons on a single control scheme which creates a cluttered user interface in the process. If you want to delete the mess you made, simply go back to the Controls Editor tab and press the Reset button found on the bottom side. This’ll reset the overlay back to the default so you can start again and re-experiment on which keys you want to place in the interface.