State of Survival on PC - How to Use BlueStacks to Automate Production and Enhance Your Experience


State of Survival is one of the big boys when it comes to mobile strategy and conquest games, combining an offering with not only base building and troop training, but also with high-stakes PvP and PvE encounters across a vast open world. However, while this is something that has quickly become a standard for the genre ever since the other iconic titles like Rise of Kingdoms and Guns of glory, to name a couple, entered the market, State of Survival also takes matters one step further with its unique “Explorer Trail” mode, which plays more like a single-player RPG with real-time combat, where you take your powerful commanders and use them to explore perilous levels to uncover the game’s story and obtain a wide wealth of rewards.
Suffice to say, State of Survival has carved a name for itself as one of the big games in the genre, which is a title that they have held ever since their release back in 2019. And while the game was clearly developed with mobile devices in mind, the best way to enjoy it is by playing State of Survival on PC with BlueStacks, since our emulator not only lets you play on your large PC monitor and with the best visuals and frame rate, but it also gives you all the tools you’ll ever need to streamline, and even automate your game at times.
In this article, we’re going to give a brief overview of some of the best things that you can achieve when playing State of Survival on BlueStacks, as well as how to configure and use our tools to your advantage in this strategy conquest game.
Optimizing Your Performance in State of Survival on PC
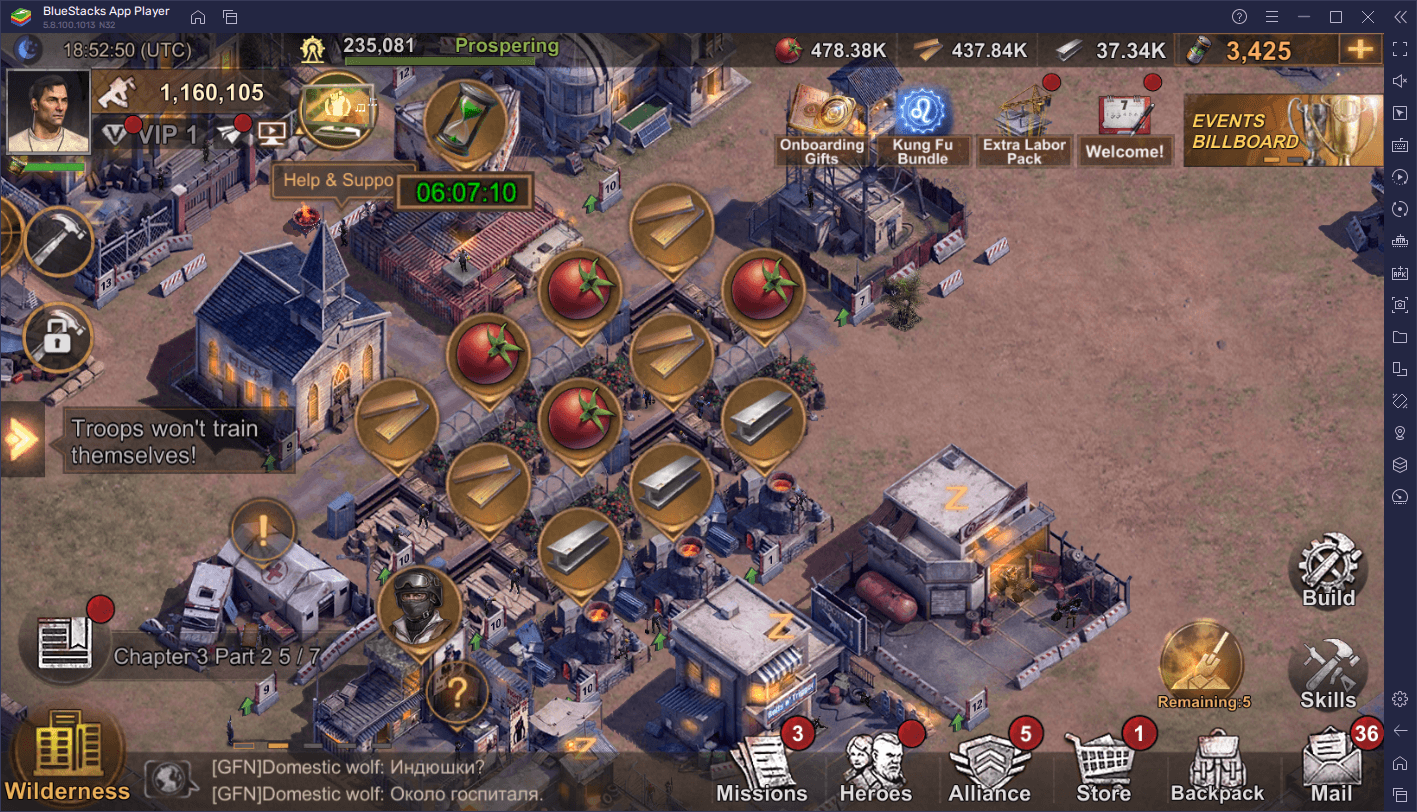
Despite having quite a few mechanics, systems, and game modes, State of Survival is actually quite visually simple, featuring mostly basic 3D models for the Explorer Trial sections, and hand-drawn assets for most of the UI and other elements. In this sense, the graphical settings are limited, in the sense that all users get the same visuals. However, what you CAN adjust are the frame rate settings, either to 30 FPS or 60 FPS.
Regrettably, those who seek to play at 60 FPS on their phones will have to deal with the fact that their devices might overheat, and also that their batteries will drain much faster. Fortunately, the same can’t be said for BlueStacks since you’ll be playing on your powerful computer. However, in order to get the best performance with State of Survival on PC, you’ll likely need to perform a few adjustments to your emulator to ensure you have the optimal settings:
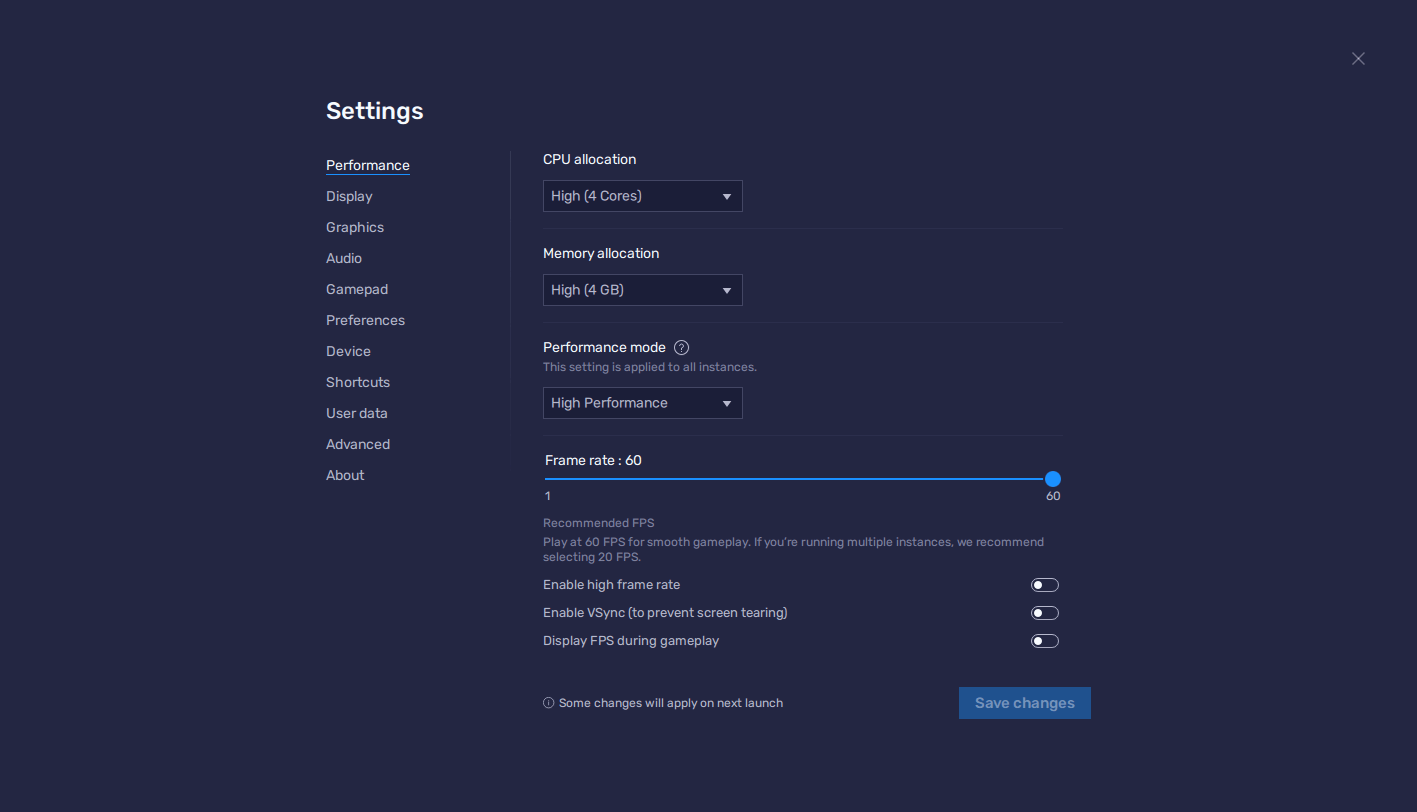
- Go to your BlueStacks settings screen by clicking on the hamburger icon on the top right, and then on “Settings”.
- Navigate to the “Performance” section, and make sure that your emulator is using 4GB of RAM, 4 CPU cores, and that your “Performance mode” is set to “High performance”. Additionally, check that your FPS slider underneath is set to at least 60 FPS, and finish by clicking on “Save changes”.
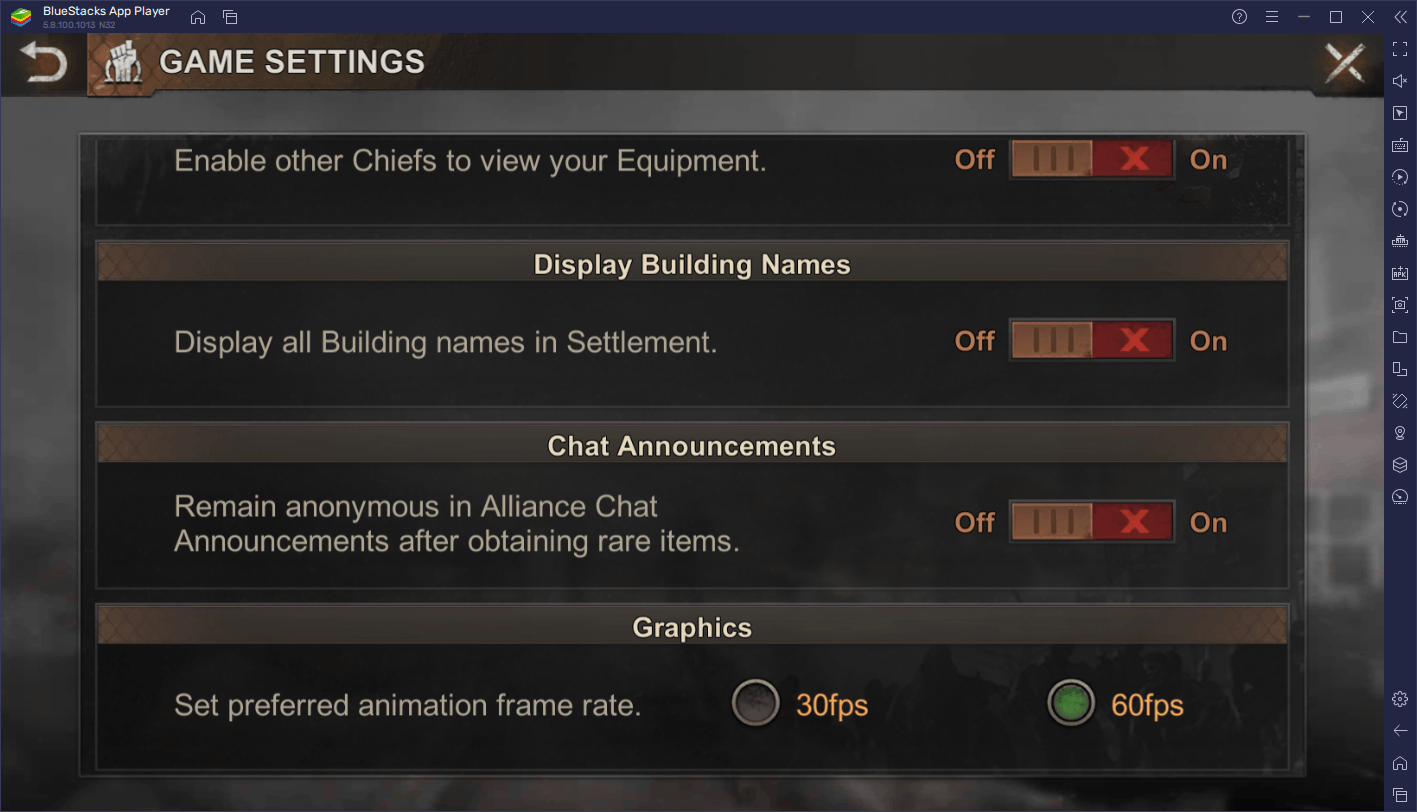
Once you’ve adjusted these settings, all you need to do to optimize your performance in-game is to go to the settings menu in State of Survival by clicking on your avatar to the top right of the city screen, and then setting your “Graphics” to “60 FPS”. With this final tweak, you’ll get the best performance in your game, without having to worry about your batteries running dry, or your phone overheating.
Develop Multiple Farm Accounts With Ease
One of the more common practices to speed up a player’s progress in strategy conquest games is the development of alt accounts with the purpose of funneling resources into one main account. This is referred to in the community as having “farm accounts”, and is something that a lot of top players do in order to multiply their resource production, and therefore cut down on waiting times when upgrading and developing their main accounts.
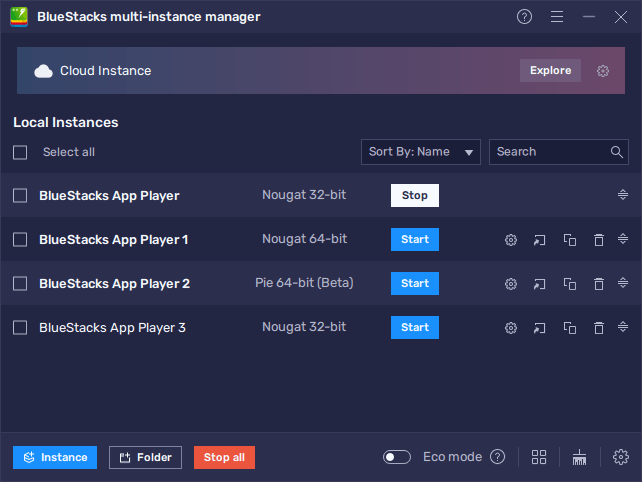
With the BlueStacks Instance Manager, it’s easier than ever to create and develop farm accounts, since this feature lets you have all your accounts up and running simultaneously, and on one same screen. To use it, all you need to do is press Ctrl + Shift + 8 to open the Instance Manager panel, and then click on the “+ Instance” button on the lower left to create as many instances as you want. Keep in mind, however, that you need extra RAM and CPU to sustain each additional instance.
Once all your instances are up and running, simply follow the steps in our PC setup guide for State of Survival to install the game on each of these, and get started with playing on all your accounts at the same time.
Streamline Farm Account Development With the Multi Instance Sync Tool
However, raising multiple accounts can be hard work, since you’d need to play on each account individually in order to progress, right? Well, with the Multi-Instance Sync Tool, you don’t even have to go through the hassle of playing individually on every account; you can simply focus on playing on one of them while BlueStacks mirrors your actions on all the others.
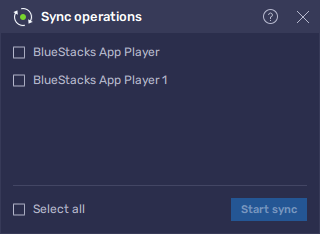
To use the Sync feature, you first have to have at least two instances running, and then press Ctrl + Shift + 9 to access the tool itself. In this panel, you can select the instances you wish to synchronize with your main instance, and then click on “Start sync” to initiate it. With this feature running, every single mouse click, swipe, or button press that you do on your main account will be instantly mirrored on all your other instances, effectively letting you play the same game on multiple accounts, without the added effort of going through each of them individually.
We’ve only barely scratched the surface when it comes to the things you can do in State of Survival when you play it on PC with BlueStacks. If you’re interested in getting the best experience and features to improve your gameplay, then BlueStacks is your best bet!