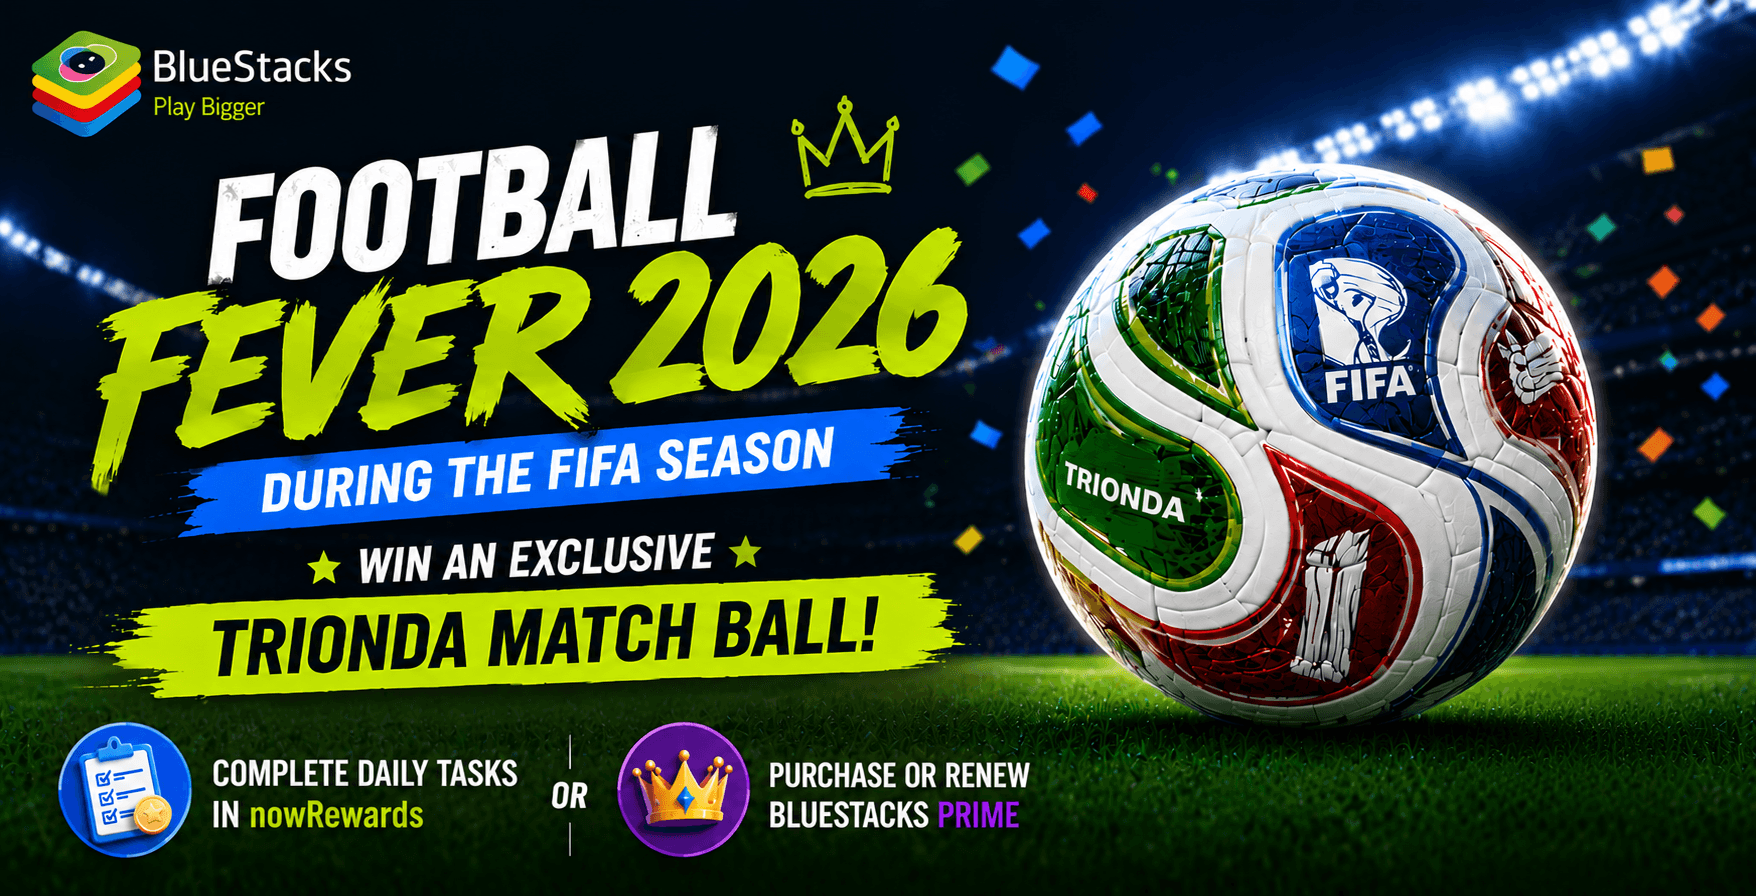
How BlueStacks AI Makes OpenClaw Easier and More Powerful

OpenClaw is one of those AI projects that keeps showing up everywhere. If you have spent any time around AI on X, GitHub, or YouTube lately, you have probably seen people talking about it, testing it, or showing what they built with it. Some are using it for planning and reminders. Others are using it for research, writing, summaries, or lightweight automation and even multi-agent orchestration.
For users who want to try OpenClaw without getting stuck in setup friction, BlueStacks AI offers a faster and simpler way to run it on PC or Mac, and we’ll get into that later in the article.
What Makes OpenClaw Different?
At a basic level, OpenClaw is a personal AI agent that runs on your machine and can help with repeatable tasks through a connected interface. That can include things like:
- planning your day
- summarizing notes or articles
- helping with research
- drafting content
- handling reminders
- connecting through tools like Telegram
This is what makes OpenClaw stand out from a standard AI assistant. The goal is not just to answer a question. The goal is to stay useful, accessible, and closer to the way real work actually happens. There are more deeper use cases but for the scope of the article, we will stick to the basic level automation and AI Agent workflows.
Why the OpenClaw Setup Still Feels Hard
OpenClaw may be easy to understand, but getting from “this looks useful” to “I’m actually using it” often takes more effort than expected. Real-world setup can quickly turn into a mix of provider keys, model choices, security settings, channel connections, and trial-and-error configuration. In some cases, users even start looking at a Mac Mini that costs around $600 just to get started, which adds even more friction before they have properly used the product.
A few common challenges show up again and again:
- hardware confusion
- provider and API key setup
- cost uncertainty across models
- safety and security concerns
- no clear idea of what to do first after installation
Even after setup is complete, many users still ask the same question: now what? If the answer is not obvious, people drop off early.
How BlueStacks AI Makes Running OpenClaw on PC or Mac Easy
BlueStacks has spent years building virtualization technology and making powerful software easier to access. BlueStacks AI Runtime brings that same thinking to personal AI. Instead of asking users to piece OpenClaw together from scratch, it gives them a more guided path to running it on PC or Mac. The setup takes no time, runs smoothly and you get on building your agent in no time.

Most importantly, it runs OpenClaw inside a sandboxed environment. Your personal files are secluded from the Agent while you’re building or experimenting. BlueStacks AI Runtime gives builders and creators a more controlled environment to get started without adding extra hardware costs (buying that mac mini or VPS costs) or turning the setup into a project of its own.
BlueStacks AI Runtime helps close that gap between idea and execution. It gives builders a simpler way to run OpenClaw, choose between BlueStacks Prime (5000 Free API credits) or their own key, launch the dashboard, and start exploring what the agent can actually do. For users who want the idea of personal AI without the usual setup drag, that is a meaningful improvement.
If you want to see how that flow works in practice, BlueStacks AI Runtime already has a full getting started guide that walks through the setup step by step. Let’s build your first AI agent together.
For updates, suggestions and feedback come join us on our Discord and be part of a great community.


